Practical ideas from FARM SHOW MagazineSubscribe · Free issue · Send us your shop tip
Subscribe to FARM SHOW
Issues / Vol. 29, No. 3 (2005)

Vol. 29, No. 3 (2005)

Money-Saving Repairs & Maintenance Shortcuts · Printed section pp. 36–39

42 selected entries · Complete text of selected entries

This issue’s section includes reader tips and feature-length shop stories. Held items and editorial notices are not reproduced.

Archive text: prices, coupons, availability and contact details reflect the original publication, not current offers. Reader methods are not universal instructions; follow manufacturer guidance and proper safety practices.

Reader shop tips

From the archive · Full text
Reader shop tip 1 of 2

David Kent

Individual tip 1 of 2 from this reader’s published contribution.
David Kent, Bedford, Iowa

“I have heavy, wet clay soil on my farm that sticks to the rubber gauge and press wheels on my Krause no till drill. It also plugs up the wheels in front of the drill’s double disc openers.

“To solve the problem, I removed both sets of wheels. Then I bought an old Deere 400 rotary hoe, removed the hoe wheels, and bent the tines to a 90 degree angle. The original wheel bearings were frozen up so I replaced them with new ones. Then I bolted the wheels to the mounting arms on the drill. The bent spokes on the rotary hoe wheels penetrate the ground without picking up wet soil. Now my drill pulls easier, and beans emerge just as well as if I used rubber wheels, if not better. The rotary hoe wheels also do a better job of closing the trench and covering the seed. They crush the seed trench and ‘cave in’ enough soil to adequately cover the seed.

“These Deere 400 rotary hoes can be bought cheap at auctions or junk yards. The bearings on the rotary hoe wheels happen to be the same size as the bearings on the Krause drill’s wheels so they’re a perfect fit.

From the archive · Full text
Reader shop tip 2 of 2

David Kent

Individual tip 2 of 2 from this reader’s published contribution.
David Kent, Bedford, Iowa

“On a New Holland TR 85 combine, the way the cylinder bars are attached to the rotors creates a slap (backward and forward) in the rotors whenever they’re under load. This wears out the connecting drive sprockets and the double chain that’s used to connect the rotors to the gearboxes. It’s actually a rather crude system. St. John’s Welding in Kansas suggested the first bar be set at at 90 degrees and the second bar split the distance between the first bars. But the factory rock trap doesn’t always work so you can have trouble with those settings. Instead, I positioned both bars at 90 degrees to the rotor. It seems to even out the load and allows rocks to flow through. I used the mounting bar brackets off a junked New Holland TR 70. I use the cheaper second bar only. Now it seems to have more capacity.”

From the archive · Full text
Reader shop tip

Jimmy R. Batemon

Jimmy R. Batemon, Batemon & Sons, Hanceville, Ala.

“The wear plates on the bottom of New Holland and Vicon pull-type mowers often wear out prematurely. The problem is that dirt gets into a 5-in. wide cav-ity on the mowers’ skid plates, which causes the front part of the skid plate to wear down. It can be an especially big problem wherever there are fire ant mounds.

“To solve the problem, we weld two or three 1-in. wide strips of stainless steel along the front part of the skid plate, in order to partially cover the cavity and keep dirt out. It works surprisingly well. We’ve also used this idea on several neighbors’ mowers and their mowers show almost no wear.”

From the archive · Full text
Reader shop tip

Pena-Plas

Pena-Plas, 1249 Mid Valley Drive, Jessup, Pa. 18434 ph 800 348-7473 or 570 489-8554; website

www.penaplas.com: Using pvc piping for compressed air lines can be unsafe. This company offers a new ther-moplastic piping system specifically-designed for compressed air. Manufactured from a specially engineered formulation of ABS, the end result is a shatter-resistant piping system with outstanding strength, ductil-ity and impact resistance, says the company. It handles pressures of up to 185 psi at 100 degrees Fahrenheit.

From the archive · Full text
Reader shop tip 1 of 2

Martin J. Engelbrecht

Individual tip 1 of 2 from this reader’s published contribution.
Martin J. Engelbrecht, Jefferson City, Mo.

“We have 14 different tractors scattered around our farm in five or six different sheds. Instead of having to drive the tractors to a central shop all the time for maintenance, we keep a vise and workbench in each shed. As a result, wherever there’s a tractor, there’s a place to work on it.

From the archive · Full text
Reader shop tip 2 of 2

Martin J. Engelbrecht

Individual tip 2 of 2 from this reader’s published contribution.
Martin J. Engelbrecht, Jefferson City, Mo.

“The 3-pt. hydraulics on our small Massey Ferguson loader tractor tend to ‘bleed off’which causes the lower lift arms to drop down. Sometimes we use the tractor to feed hay to our cattle, and if there’s a plow on back we don’t want it accidentally falling onto the ground.

“So we ran chains from two clevises mounted on the tractor’s differential to two more clevises on the lower lift arms. Each lower clevis uses a pin that goes through a hole already in the lift arm. To remove the chains we just remove a pin from the clevis on each lift arm. It saves a lot of aggravation. It’s important to use chains that are strong enough to override the valve on hydraulics in case someone accidentally engages the hydraulics.”

From the archive · Full text
Reader shop tip

Edwin Ruff

Edwin Ruff, Moses Lake, Wash.

“Here’s a photo of an electric lift I made in my garage to put boxes up in the attic. I already had a winch so I mounted a pulley on the rafter for the rope and made a platform that’s about 32 in. square. I just load the platform and winch it up to unload the boxes. In the past I always had to climb up and down a ladder for each box. I use the lift mostly at Christmas time when storing decorations in the attic.

“The winch was originally equipped with a hand crank, but I converted it to electric operation by attaching a rod to the winch and using an electric drill to supply the power.”

From the archive · Full text
Reader shop tip

Ben O’ Neill

Ben O’ Neill, Broadview Hts., Ohio

“When you first open a can of paint, take a moment to tap a small hole in the lower ridge on top of the paint can’s rim. As you dip and wipe the brush between strokes, excess paint will flow or drip back into the can instead of running down the outside. A flat-tipped screwdriver can be used to make the hole.

“When resealing the can after you’re done painting, place a cloth or sheet of paper over the lid to keep paint from splattering around as you hammer or tap the lid shut.”

From the archive · Full text
Reader shop tip

Stanley Dirksen

Stanley Dirksen, Davis Junction, Ill.

“I had a tractor with a stuck engine. To solve the problem, I knocked the center out of an old spark plug and brazed in a valve stem. Then I put in some penetrating oil, screwed a plug into one of the cylinders on the engine, and clamped an air compressor hose onto the plug. I also removed the rocker arms. The air pressure forces the penetrating oil past the rings to free them up. It works great.”

From the archive · Full text
Reader shop tip

Neil Schumacher

Neil Schumacher, 42804 385 th Ave., Lind- say, Neb. 68644 ph 402 923-1037; email

[email protected]: “Our new four-wheeled torch/caddy is easier to maneuver and more stable than other models on the market so it’s not as likely to tip over. It’s also easy to load and allows you to place the cylinders in line rather than side by side. As a result it measures less than 24 in. wide. It’s designed to hold standard cylinders up to 9 1/4 in. diameter.

“The caddy is made from powder coated steel and rides on a pair of 15 1/2-in. high pneumatic wheels in front and two smaller 8-in. solid rubber tires on back. Conventional torch caddies have two smaller wheels on back, so when you tip the caddy back and wheel it around you have to do a balancing act. With our four-wheeled caddy there’s no problem with stability.

“We can make units for either propane or acetylene. The caddies sell for $160 to $180 plus S&H.”

From the archive · Full text
Reader shop tip 1 of 2

John Boogaart

Individual tip 1 of 2 from this reader’s published contribution.
John Boogaart, Blenheim, Ontario

“Our 6-furrow moldboard plow is quite long and we found it difficult to keep the rear of the plow at the desired depth. On this plow the in-furrow tail wheel was equipped with a hydraulic cylinder to raise and lower the plow. The land side wheel had a hand crank screw adjuster on it. We replaced this adjuster with a cylinder. It’s much easier now to keep the rear of the plow at the desired depth, in varying field conditions.

From the archive · Full text
Reader shop tip 2 of 2

John Boogaart

Individual tip 2 of 2 from this reader’s published contribution.
John Boogaart, Blenheim, Ontario

“To clean up an oil or anti-freeze spill on our shop’s cement floor we use a handheld squeegee and a dust pan. From the dust pan we pour out the liquid into a bucket. We spread an oil-absorbing product on the oil spill afterward to prevent slipping.”

From the archive · Full text
Reader shop tip 1 of 2

Dan Gray

Individual tip 1 of 2 from this reader’s published contribution.
Dan Gray, Dewberry, Alberta

“Dodge diesel pickups equipped with a manual transmission have a notoriously faulty fifth gear. It’s retained by a split nut that’s tensioned with a machine screw that can break. To solve the problem, I groove the nut with a die grinder, then weld it on.

From the archive · Full text
Reader shop tip 2 of 2

Dan Gray

Individual tip 2 of 2 from this reader’s published contribution.
Dan Gray, Dewberry, Alberta

“When I want to bleed brakes but don’t have any help, I use an air valve and a modified tire pump – the old cylinder style. I regu-late the air pressure to about 30 psi and brace the tire pump between the steering wheel and the brake pedal, then apply and release air pressure as required from under the vehicle to depress the brake pedal. It may sound like a corny idea, but it works.”

From the archive · Full text
Reader shop tip

Robert Ingram

Robert Ingram, McArthur, Calif.

“Having parts and repair manuals for each piece of equipment has saved me a lot of time and money. It’s so simple to call the equipment dealer with the part number and description in hand. If they don’t have the part it saves me a 20-mile round trip. I bought nearly all my books on ebay. If you are patient, you’ll find what you’re looking for and can buy it cheap.”

From the archive · Full text
Reader shop tip

Gordon E. Harris

Gordon E. Harris, Clintonville, Wis.

“My son and I put in a concrete floor using black plastic tubing to provide heat in the floor. It works beautiful and cost a lot less than expensive heat pipe. We did this two years ago and it has worked out great.”

From the archive · Full text
Reader shop tip

Harbor Products, Inc.

Harbor Products, Inc., Carson City, Nevada ph 877 847-2628 or 201 681-3648; www.rescuetape.com

This company re-cently introduced a new product called Rescue Tape. It’s made of a self-bonding silicone with no adhesive so when removed it never leaves any sticky residue like traditional adhesive tapes. When stretched and wrapped under tension, it instantly bonds to itself, creating an airtight, water-tight seal that’s resistant to oils, fuels, acids, solvents, salt water, road salt, fertilizers, and UV rays. It takes just minutes or even seconds to permanently fuse together. It never gets gummy or sticky like electrical tape or duct tape, and resists temperatures up to 500 ̊ F.

Rescue Tape also withstands pressure up to 700 psi, so it easily repairs lines and hoses on tractors, vehicles, and equipment such as heater hoses, fuel lines, exhaust hoses, air hoses, water lines, or just about anything that you can wrap it around. It even works over wet, dirty or oily surfaces.

The product is also recommended for electrical wiring. You can use it to wrap wiring harnesses, waterproof electrical connections, and protect battery cables and terminals.

Rescue Tape comes on rolls 1 in. wide and 12 ft. long and is available in red, black and white, or clear. Sells for $24.99 for a two-roll pack (one black and one white). Each additional roll sells for $6.99. One dozen rolls sell for $79.

From the archive · Full text
Reader shop tip

Kenny Breeding

Kenny Breeding, Davenport, Va.

“I’ve come up with a quick way to seat the bead on the wheel rim of big truck and tractor tires. A lot of these tires are tubeless and are so big it’s hard to get enough air pressure to develop a good seal. My idea is kind of dangerous and a lot of care has to be taken, but it’s easy to do. First I separate the bead from the rim and patch the tire. Then I chain the tire down to something solid like a post or tree so it can’t bounce around (very important). Then, using a can of aerosol starting fluid, I spray a bit of ether inside the tire. Often I remove the valve stem and spray inside there. Then I fasten a piece of cloth to the end of a 10-ft. long stick and use it to ignite the fumes inside the tire. The resulting explosion will pop the bead back on the wheel rim.

“How much ether I use depends on the size of the tire. For a big tire I use about one-fourth of a 12-oz. can.”

From the archive · Full text
Reader shop tip

Clyde Barnhart

Clyde Barnhart, Athens, Ohio

“At 88 years young, I can no longer reconnect the driveshaft on my mower to the pto on my Gravely tractor. You have to lie down, reach under, and push and pull at the same time. Being reluctant to lose my independence, I made a simple sheet metal clip which holds the springs compressed behind the ring on the driveshaft.

“I clamp a vice grips onto the pto, steer the ‘clipped’ driveshaft onto the end of the pto, and wiggle the wrench while pushing in only one direction and the thing slides into place. After pulling out the clip and removing the wrench, I’m ready to mow.”

From the archive · Full text
Reader shop tip 1 of 2

Roger Foster

Individual tip 1 of 2 from this reader’s published contribution.
Roger Foster, Tower Hill, Ill.

“For positive control of oil being drained from elevated vehicles, its hard to beat the rollabout caddy that I use in my shop. The catch pan above is directly connected to the catch container below, and the pipe lets me position the unit under the vehicle being serviced. It eliminates the need to line up the oil flow from above to hit a catchpan below, which can result in frequent oil spills and dangerously slick floors.

From the archive · Full text
Reader shop tip 2 of 2

Roger Foster

Individual tip 2 of 2 from this reader’s published contribution.
Roger Foster, Tower Hill, Ill.

“As any lathe operator knows, heavy lifts and a steady hand are frequently called for. I decided to do something about it. I put up a length of door track overhead which serves as a track for a lightweight winch. I put the hanging support on hinges so it can swing left to right. Then I hung a low cost, lightweight, electrically-powered winch from it. This combination allows me to pick up whatever I’m working on and then gently guide it into my lathe.”

From the archive · Full text
Reader shop tip

Andy Patterozzi

Andy Patterozzi, Nokomis, Ill.

“In looking for some way to power a hand-powered meat grinder, I came up with the idea of adapting it to the gear off an old garden tiller. I mounted it all on a table top. I installed the gear at a right angle instead of vertically as it would be mounted on the rototiller. I make sure there’s always enough oil in the gear-box to keep the gears lubricated.

“It works. The speed it turns at is just right.”

From the archive · Full text
Reader shop tip

Clark E. Martin

Clark E. Martin, Harrisonburg, Va.

“Our Grayco Fireball pneumatic powered greaser equipped with a 30-ft. hose is our best buy (ph 800 533-9655). We bought it used 10 years ago and it’s still going strong. We use it with our shop air compressor to deliver grease out of a 120-lb. drum of grease. It’s much cheaper to buy grease in bulk so we save a lot of money.

“We operate the air compressor at 115 psi and have a condensation remover in the line before it enters the greaser. A pressure regulator allows us to control the pressure as needed. It has a pressure amplification ratio of 45 to 1 so it doesn’t take a lot of extra pressure to increase the grease pressure. It comes with a small dolly on which you set the grease drum. The grease pump is located on a hood that goes over the drum. There’s an air hose on one side and a 3/8-in. dia. hydraulic grease pressure line on the other side.”

From the archive · Full text
Reader shop tip

Chuck Duffy

Chuck Duffy, Solon, Iowa

“We needed three creek crossings made but culverts were very expensive for the size we needed. I made my own culverts by welding used 34 and 38-in. wheel rims together – I kept adding rims until the culvert was long enough. It worked great and didn’t cost much to weld together.”

From the archive · Full text
Reader shop tip

Joe Konecny

Joe Konecny, Pemberville, Ohio

“This press was built entirely out of scrap with the exception of the springs and the bottle jack.

I used a band saw and Miller welder to build it. The table/base is not adjustable because I was in a hurry, but that would be a good improvement. I think I’ll build some legs for it next since it’s so heavy and I don’t have a table that will support it.”

From the archive · Full text
Reader shop tip 1 of 2

Mrs. Dory Kidder

Individual tip 1 of 2 from this reader’s published contribution.
Mrs. Dory Kidder, Shell Lake, Wis.

“When replacing our old dishwasher, we found that the silverware tray worked well, mounted on our garage wall, to hold paint brushes and scrapers. If the brushes are wet after cleaning, they dry well in the homemade rack.

From the archive · Full text
Reader shop tip 2 of 2

Mrs. Dory Kidder

Individual tip 2 of 2 from this reader’s published contribution.
Mrs. Dory Kidder, Shell Lake, Wis.

“We also found that the top and bottom racks for plates and cups work great for mounting on the garage wall for an ‘instant pegboard’ for hanging up tools and such.”

From the archive · Full text
Reader shop tip

Joe White

Joe White, Little Rock, Ark.

“Ticks and chiggers are tough to deal with in the South.

Finding those ‘intruders’ is often difficult, even when you can feel them. My solution is a 3-in. piece of duct tape. Dabbed on the area, it will pick up the parasite every time...and secure it for disposal. Try it...you’ll like it.”

From the archive · Full text
Reader shop tip

Terry Corman

Terry Corman, Fort Collins, Colo.

“I use Scotch Brite Pads and 3M Sanding Pads to scrub baking potatoes and also dirty pans. They’re sold at body shop supply stores and work better than anything you can get at Wal-Mart.”

From the archive · Full text
Reader shop tip

Larry Schoborg

Larry Schoborg, Union, Iowa

Larry can carry a shovel, broom, post, or other tools in this metal holster mounted on the side of his tractor. He made it from two short pieces of pipe welded to the side of the frame. The pieces angle down so gravity holds tools in place.

From the archive · Full text
Reader shop tip

Rachel Crowe

Rachel Crowe, Skull Valley, Ariz.

The electric motor in her washing machine was worn out so she replaced it with a 3/8-in. drill mounted in a custom bracket. She chucked a pulley into the drill to turn the machine’s V-belt. Forward runs the wash action. Re-verse does the spinning.

“It’s a little noisy and it’s not automatic, but it beats doing wash in a bucket until we can get a new machine.”

Shop feature stories

From the archive · Full text
Feature story

Quick-Detach Vise

Featured source: Harold Fratzke

Harold Fratzke recently called FARM SHOW to tell us about a nifty “quick-detach” vise mounting bracket that he came up with. It lets him mount a vise alongside his welding table - leaving a clear table top - or on back of a pickup in the receiver hitch.

“We came up with the idea when we put a new 6 by 4-ft., 1/2-in. thick welding table in our shop,” says Fratzke.

“We wanted a vise on the table, but we didn’t want it mounted on the table top because it would sometimes interfere with our welding projects. So we welded a piece of 8-in. sq., 3/8-in. thick metal plate to a 20-in. length of heavy duty sq. tubing. We drilled three holes in the plate so we could bolt the vise on, and also drilled a hole in the sq. tubing.

“We then welded a length of sq. tubing under the table, the same type of tubing that’s commonly used to make a standard pickup receiver hitch. We added two set screws to the sq. tubing to secure the vise platform. The vise can be rotated in any one of four different positions, by simply pulling out the sq. tubing and rotating it.

“The tubing can be installed in any pickup receiver hitch, an idea that really comes in handy during harvest.”

Contact: FARM SHOW Followup, Harold Fratzke, 234 Shoreview Dr., Cottonwood, Minn. 56229 (ph 507 423-6341; email: [email protected]).

From the archive · Full text
Feature story

Oil Collector Saves “Every Last Drop”

Featured source: Tom Trantham

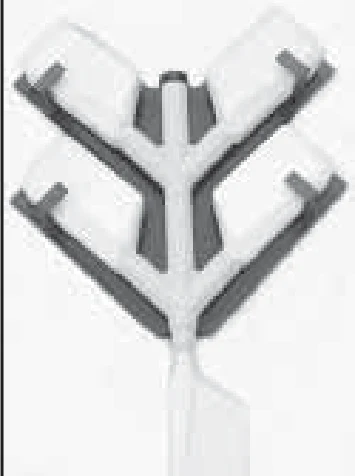
If you like to get “every last drop” out of oil containers, you’ll like the patent-pending Dust-Free Oil Saver.

The arrow-shaped double funnel mounts flat against a plastic panel that you can mount on the wall. Additional units can be nested above it to drain more than two oil bottles at once.

Inventor Tom Trantham says that although it was made to handle oil, it works for other liquids depending on bottle shape. Sells for $12.95 plus S&H.

Contact: FARM SHOW Followup, Double T Products, Inc., P.O. Box 117, Linwood, N.C. 27299 (ph 336 357-2892; email: [email protected]; website: www.doubletproducts.com).

From the archive · Full text
Feature story

How To Calibrate A Torque Wrench

Featured source: Joseph Cannon

Using a torque wrench to get just the right pressure on a bolt head is great if your torque wrench is calibrated correctly. What if it’s not? Joseph Cannon found that three out of five of his torque wrenches were 5 to 15 lbs. off. A friend’s new Craftsman clicker wrench was 20 lbs. off. When exchanged for a new wrench, they found it was off by 10 lbs. So the torque wrench tester Cannon had just built more than paid for itself.

“I made it from several pieces of scrap and an old slave cylinder,” explains Cannon.

“I needed a bolt that the wrench could exert pressure on and a link that would exert a force on the piston and fluid in the slave cylinder. I also needed a pressure gauge to interact with the fluid in the cylinder.”

An engineer by training and by trade, Cannon understood the math behind his device...Torque = Force X Distance. To turn a psi pressure gauge into a torque gauge, he needed to determine how much force would be applied over the length of the link he had chosen to achieve 60 lbs. of torque. Once he had that, he could revise the dial on a pressure gauge to correlate to torque instead of psi.

He used a hex bolt inserted through a square tube and linked to the slave cylinder by a piece of scrap metal. A shear pin connected the link to the bolt. The slave cylinder was secured in place and mounted to the steel tube with a second piece of scrap.

When the hex bolt is turned, it exerts pressure on the slave cylinder. To calculate the pressure-torque equivalent, he needed to first know the length of the link.

With his device, the length of the link is 0.3 ft. When placed in his equation of Torque = Force X Distance, with the torque being 60 ft. lbs, and distance being 0.3 ft., the only unknown was force. By dividing both sides by 0.3, force was shown to be 200 lbs.

He also needed the area of the cylinder. To determine that, he multiplied 3.14 times the radius of the cylinder (0.4 in.) and squared it. This gave him an area of 0.502 sq. in.

Once he had this information he could di-vide the force (200 lbs.) required for 60 ft. lbs. of torque by the area of the piston (0.502 in.) it was exerted against to get the pounds psi. In this case it was 298 psi.

It became a simple matter to install a 300 psi pressure gauge and put a home made face on it replacing the 300 psi mark with a 60 ft. lbs. mark and dividing the remainder of the dial accordingly.

“The important thing to remember is to use the same units of measurement throughout. If you start with feet, stay with feet. If you start with pounds, stay with pounds,” says Cannon.

“If you know the area of the cylinder you are using and the length of the link, you can figure out everything else.”

Contact: FARM SHOW Followup, Joseph Cannon, Fairfax, Va. (Please contact via email address only: [email protected]).

From the archive · Full text
Feature story

Heavy Duty Shop Hoist Made From Old Disk Gangs

Featured source: Robert Vickers

Changing the blades on his riding mower is an easy job for Robert Vickers, Clarence, Mo., who used the gangs off an old disk to build his own fold-up shop hoist.

“All I used was scrap metal, so it cost almost nothing to build,” says Vickers.

The hydraulic-operated hoist has an upper hinged “floor” that folds down flat. The floor moves forward and upward at the same time.

He started with an 18-ft. Deere tandem disk and cut off the wings, keeping only the 4 by 4-in. hinged frame members that allowed the wings to fold up. He pinned the frame members together so there are four hinges on each side. He also welded material in between the two sides. The floor measures 4 ft. wide by 5 ft. long and is raised or lowered by a 4-in. hydraulic cylinder attached to a pair of metal legs. The cylinder is operated by a pump that’s belt-driven by an electric motor.

The motor and pump, as well as a hydraulic reservoir, mount together on a metal “sled” next to the hoist. To raise or lower the hoist, Vickers simply operates a valve on the pump.

“It works great. It raises and lowers slowly but that’s what you want for safety,” says Vickers.

“The cylinder is off an old wagon and the pump off a combine. My only cost was for welding rod. I use it with my 20 hp riding mower. I just drive the mower onto the platform, raise it up, and go to work. Once the mower is up in place I remove a steel plate from the floor, which gives me full access to the underside of the mower.”

Contact: FARM SHOW Followup, Robert J. Vickers, 561 Shelby 400, Clarence, Mo. 63437 (ph 660 699-3522).

From the archive · Full text
Feature story

Free Up Floor Space With Handy Rack Organizer

Featured source: Perry Industries

If you can’t get the car in the garage or the truck in the shed, maybe the Handy Rack Organizer will help. The portable storage unit only takes up 44 by 58 in. of floor space, but would hold 30,000 lbs if you loaded it with solid steel. Each of the 15 shelves holds 2,000 lbs.

“The Handy Rack Organizer was designed as a storage unit for dimension lumber or steel,” says Darryl Perry, president, Perry Industries.

“People are using it for everything from cleaning up their garages so they can get their cars in, to organizing material at construction sites.”

Perry says one advantage to the portable unit over built-in storage is the ability to adjust it as storage needs change. Another advantage is being able to pick up an empty unit and move it or quickly disassemble it for storage in a compact 48 by 67 by 4-in. space.

Optional Sheet Mate extensions slip over the bottom shelf rungs. The 800-lb. capacity extensions allow storage of large flat materials such as wood sheeting, sheet metal or drywall. At the same time upper shelves can continue to store dimension lumber, metal or poly rods, piping or other components.

Outside weatherproof storage is made easier with the racks, suggests Perry.

“People put sheet material on both sides and it’s easy to tarp,” he explains.

“Tarps won’t flap and tear up in the wind as they will without that flat base.”

The unit consists of two A-frames with slanted arms extending out from each side, 3 cross braces and one diagonal brace for added strength. The unit is priced at $299.99 (Can.) with a pair of Sheet Mates costing $28.99 (Can.).

Contact: FARM SHOW Followup, Perry Industries, P.O. Box 130, Hawarden, Sask., Canada S0H 1Y0 (ph 306 855-2101; email: [email protected]; website: www.perryindustries.ca).

From the archive · Full text
Feature story

“Cord Lock” Keeps Connection Tight

Featured source: Richard Layden

“My homemade cord lock keeps extension cords and receptacles from disconnecting while they’re in use. It also keeps the plugs off the ground and out of moisture,” says Richard Layden, Hoopeston, Ill.

Other commercial cord lock mechanisms have a slip joint that can become loose and slip, making them useless.

His cord lock is a one-piece unit made from Lexan plastic and has no moving parts. The cord lock is then held tightly inside a spring-loaded metal bracket with slots in it. The slots keep the plugs from becoming separated when tension is applied to the cord. Afterward, it can also be used as an extension cord carrier.

The idea was a finalist in the national Farm Bureau invention contest.

Contact: FARM SHOW Followup, Richard Layden, 11443 E. 4200 North Road, Hoopeston, Ill. 60942 (ph 217 283-6864).

From the archive · Full text
Feature story

He Custom Machines Almost Anything

Featured source: Joseph Hine

FARM SHOW editors recently spotted the following ad in a tractor magazine: “Anything Custom. Custom machine solutions for your hard-to-find parts. Antique tractors, cars, trucks and heavy equipment. One-cylinder engines, custom bushings, rocker arms, rocker shafts and fuel pumps, pistons, guides, valve keepers and valves. Parts reproduced, repaired and designed.” We decided to check it out and talked to Joseph Hine, owner of “Anything Custom” based in Southbury, Ct.

“If you need to fix an old machine but can’t find the part you need for it, and your local welder or machine shop can’t help, I can probably make it. I can do everything from building custom radiators to making bull gears. If you can dream it up, I can make it for you,” says Hine.

“I have a small shop, and along with my uncle own a rare collection of about 150 antique tractors. We originally started our shop so we could make any parts we needed to restore the tractors. When other people found out what we were doing, they started asking us to make parts for them, too. I’ve done work for customers as far away as Alaska and Nevada.”

While Hine specializes mostly in antique farm equipment, he says he can make parts for almost anything.

“If I don’t have a mold for the part, I’ll make it by using the customer’s part to make a casting. Sometimes I use reverse engineering, in which I remanufacture the parts as close to OEM specs as possible.

“If you can’t find a part you need, you can send the worn part to me and I’ll look it over at no charge and tell you what it would cost to make. If you don’t want the work done, all you pay is the UPS charge to have the part mailed back to you.”

He got the idea for his business after working as a manufacturing engineer for a company that closed down and moved to China. So 1 1/2 years ago he started placing ads in farm magazines to see if he could do work for other people.

“Most of our tractors were built in the early 1900’s so I’ve learned how to make just about anything that goes into the cylinder head - valves, springs, keepers, and retainers, etc.

“I’ve done some pretty crazy types of machining,” says Hine.

“I’ve made a custom carburetor and fuel pump system for a 15 hp single cylinder Otto antique engine. The customer didn’t have a carburetor for it and didn’t know where to get one. We found a 5 hp model and scaled it up to make new castings. Then I remachined all the pieces. It’s working beautifully now.”

Contact: FARM SHOW Followup, Joseph Hine, 220 Main St. N., Southbury, Ct. 06488 (ph 203 264-5116; email: anythingcustom @hotmail.com; website: www.Anything Custom.net).

From the archive · Full text
Feature story

Affordable Transmission Flusher

Featured source: Dean R. Kolschefski

A Drake, N. Dak. man has invented a transmission flusher that he says is affordable for do-it-yourselfers.

Dean R. Kolschefski, says commercial transmission flushers sell for $3,500 or more and have a lot of extra bells and whistles. His unit, however, requires no electricity and therefore no pumps and motors.

“It’s very compact and simple. It weighs only about 40 lbs. and rides on a 3-wheeled cart. I think it could be marketed for $300 to $400,” says Kolschefski.

The unit has clear acrylic tubes that allow the operator to see the oil being exchanged.

“It’s kind of impressive. You can see the old black oil coming out and the new red oil going in,” he says.

“You fill the flusher with new oil manually, then when you’re ready to remove the old stuff from your vehicle, you hook up to the vehicle’s transmission and remove one line from the transmission. Once you’ve connected the two lines from the transmission flusher, you start the vehicle up and the vehicle does all the work. The flusher intercepts the old oil, which pushes a piston up, and forces new oil back in its place.”

Once the vehicle’s oil has been replaced, Kolschefski hooks his flusher up to an air hose to remove the used oil. This process takes only about five minutes and then it’s ready for the next job.

Kolschefski has used the transmission flusher on his own vehicles, as well as a few dozen times for other people, and says it has worked well.

“So far I’ve only used it myself, but I would be interested in producing and marketing my flusher, or even the idea,” he says.

Contact: FARM SHOW Followup, Dean R. Kolschefski, 2411 – 8th Ave. NE, Drake, N. Dak. 58736 (ph 701 626-7492).

From the archive · Full text
Feature story

Modification Solves Feeding Problem

Featured source: George Wissinger

George Wissinger of Huntington, Ind., fixed a common problem with his 1963 New Holland 268 small square baler.

“It’s not unusual in that line of balers for the belt to slip on the pickup when you’re in heavy hay or long stubble,” he explains.

“There’s a simple solution to the problem. It took me an hour and a half after I got the parts.”

Wissinger removed the belt drive (V-belt and the V-belt pulley) from the pickup and replaced it with a 10 ft. chain and sprockets. He installed the two sprockets he bought at a parts store with two “Weld-a-Hubs.”

“I welded a 1 by 2-in. piece of scrap iron to the hub, and drilled a hole through this tab, and also the sprocket. Then I put in a 1 by 2 by 1/4-in. thick shear bolt for protection. If something happens to the pickup, it will shear the bolt. In 20 years, I’ve only sheared two bolts. It’s a totally different performing machine once you make this change.”

Wissinger says the job was quick because he only had to weld one sprocket. The other sprocket is driven by the tab with the 1/4-in. bolt in it.

“I’ve done three of these balers – mine and two others in the neighborhood. It works great for everyone,” he says.

Contact: FARM SHOW Followup, George C. Wissinger, 3610 W. - 200 N., Huntington, Ind. 46750 (ph 260 356-8417).

From the archive · Full text
Feature story

Do-It-Yourself Powder Coating

Featured source: Gerald Bliss

Gerald Bliss, who farms near Dutton, Mon-tana, built his own “metal cooking” oven that lets him powder coat virtually any kind of metal, saving the cost of expensive commercially-coated steel.

Bliss also does custom powder coating of metal for area farmers. He uses an air gun to apply the powder coatings which are available in almost any color. He can also coat with baked-on ceramics.

The 4 by 4-ft. oven is 10 ft. long. It’s built out of sq. steel tubing and lined with sheet metal both inside and out, with insulation wrapped around the outside. Heat is provided by three heating elements out of 1,800-watt household kitchen ovens. The stove cooks at a temperature of 450 degrees.

“I built it because I didn’t want to pay the money for a commercial powder coating oven. I paid $600 to build the stove and an-other $4,000 for air guns. All together I spent about $5,000 whereas an OSHA-approved oven alone sells for $30,000 or more,” says Bliss.

“Powder coating helps steel stand up to chemicals better,” says Bliss.

“I do a lot of engine parts, including ceramic headers, manifolds and exhaust pipes. I do some ceramic coating work for race car drivers who want their engines coated with ceramic. The ceramic coating will drop header temperatures 300 to 400 degrees. For the same reason, I also do some engine work for big self-propelled sprayers. And I’ve done some work on motorcycle frames and metal fences. I powder coat a lot of wrought iron stuff, including hand railings for decks.

“The powder-coating material I buy consists of an epoxy mixed with other powders. When applied, it clings to the metal kind of like static electricity.”

Contact: FARM SHOW Followup, Gerald Bliss, 2317 N. Lane, Dutton, Montana 59433 (ph 406 463-2483).