Practical ideas from FARM SHOW MagazineSubscribe · Free issue · Send us your shop tip
Subscribe to FARM SHOW
Issues / Vol. 40, No. 6 (2016)

Vol. 40, No. 6 (2016)

Money-Saving Repairs & Maintenance Shortcuts · Printed section pp. 32–35

32 selected entries · Complete text of selected entries

This issue’s section includes reader tips and feature-length shop stories. Held items and editorial notices are not reproduced.

Archive text: prices, coupons, availability and contact details reflect the original publication, not current offers. Reader methods are not universal instructions; follow manufacturer guidance and proper safety practices.

Reader shop tips

From the archive · Full text
Reader shop tip

Jim Ruen

Jim Ruen, La Crescent, Minn.

“After a FARM SHOW reader sent in a tip for turning a flat tire into a flat-free tire by filling it with expandable foam (Great Stuff), I thought I would try it. I drilled holes like he said and emptied a regular size can of foam into it. I could tell that wasn’t nearly enough foam.

“So I picked up a larger can of the stuff and emptied it in. I could tell it was starting to fill, but there still seemed to be a long way to go.

“I thought about adding another can, but the first one cost about $6 and the second cost about $12, so I already had $18 in a tire that could be replaced for $22.

“Maybe it would be worth it to dump another $6 to $12 or more into it for a forever, flat-free tire, but I do have to wonder.”

From the archive · Full text
Reader shop tip 1 of 2

Carrol Jones

Individual tip 1 of 2 from this reader’s published contribution.
Carrol Jones, Loiuisa, Va.

“I write the hours of installation onto the outside of oil filters with a paint pen when I install them. This helps us keep on top of oil changes.

From the archive · Full text
Reader shop tip 2 of 2

Carrol Jones

Individual tip 2 of 2 from this reader’s published contribution.
Carrol Jones, Loiuisa, Va.

“Another thing I do is to attach a mailing label to the dashboards of tractors. The label says ‘Last Time Serviced’. I cover the label with clear plastic shipping tape and then used an erasable grease pencil to write hours on the tape. This particularly helps with 10-hr. servicing on machines that recommend it.”

From the archive · Full text
Reader shop tip

Cecil Reimer

Cecil Reimer, Tisdale, Sask.

“A reader in the last issue said the axle housing kept breaking on his 700 model Versatile. I wanted to say that solid steel axle tubes for Versatiles can be purchased at Gratton Coulee Agri Parts in Irma, Alberta, Canada (www.gcparts.com; ph 888 327-6767). Buy one and it’ll solve your problem.”

From the archive · Full text
Reader shop tip

Doug Clark

Doug Clark, Ilderton, Ont.

“In your last issue, you had an article on a fellow who sharpens his chainsaw with a cutoff blade. Wow! He must have hands and eyes as steady as a brain surgeon. As for me, I’m sure I’d end up cutting the chain. I have a professional electric saw chain sharpener that’s very accurate and simple to operate, but it takes forever to sharpen a chain and I need to take the chain off the saw and mount it in the sharpener. As a result, I rarely use that sharpener.

“Instead I use a stone in a cheap die grinder that works like a charm and is much faster. A kit from Oregon (available at TSC or Canadian Tire stores) contains 3 grinding stones for different-sized chains and sells for about $7. It takes me about 4 to 5 min. to sharpen a 16-in. saw chain using a compressed air die grinder without removing it from the saw. It’s extremely easy to do and leaves a better edge than a file. These stones will sharpen a chain 40 to 50 times before wearing down too far. I place the outer tip of the stone into the hook of the tool before starting the grinder so I can slide the stone up until the shaft end gets to the tooth, and then back down in just a couple of seconds to keep the tooth from overheating.”

From the archive · Full text
Reader shop tip

Stan McDonald

Stan McDonald, Foxboro, Ont.

As a metal working professional who sells DC speed controls (featured in FARM SHOW’s Vol. 26, No. 4), I’ve had readers ask if they can use a wood-cutting bandsaw to cut steel. My answer is that you can’t, unless you modify the saw so you can run it at different speeds. The reason is that to cut wood you need to be running much faster, at about 3,000 fpm (feet per minute), while for steel you should be running at just 150 fpm.

“I converted a 14-in. Ridgid bandsaw for a friend by making a box to hold two driveshafts so you can switch from one set of belts and pulleys to another, depending on whether you are cutting steel or wood. You also need to change the blade to match what you’re cutting.

“Another way to vary the speed is to install a 3-phase AC motor and install a Variable Frequency Drive that can be run on single phase. This gets a little more complicated but I have written an article on how to do it. You can email me if you’re interested in more details ([email protected]).”

From the archive · Full text
Reader shop tip

Lee Tolliver

Lee Tolliver, Tok, Alaska

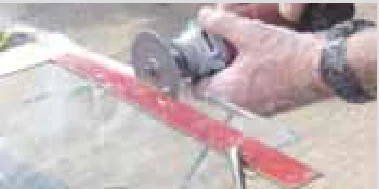
“Cutting plexiglass is always hard because the edges shatter and break. I recently came up with a method that works perfect. I just use a Dremel Multi-Tool with a small cutting disk. It cuts nice and clean, making about a 1/8-in. wide slot. I’ve even been able to cut letters out of plexi with this tool. I made a video of it that’s up at www.farmshow.com.”

From the archive · Full text
Reader shop tip

Gary Swensen

Gary Swensen, Yankton, S. Dak.

“One time at a gas station about 300 miles from home, another customer at the pump stomped on the electric brake cord to my trailer and I spent the next 2 hrs. looking to buy wire strippers, wire nuts, screw drivers, etc. It was dark so I couldn’t drive down the highway without lights.

“Ever since then I carry a freezer bag that contains everything needed to make minor repairs to lights and cord connections. It contains a wire cutter, stripper, screwdriver, tape, wire nuts and a cheap extension cord that I can cut up to make repairs.”

From the archive · Full text
Reader shop tip

Herb Rempel

Herb Rempel, Rosenort, Manitoba

“We needed to flush the oil in our Case IH Quadtrac tractor. To do that, you need to turn the rollers and idlers. We saved a lot of hours on the tractor – and lots of fuel – by bolting an electric motor off a table saw to a piece of plywood and fitting it with a large drive belt. I engage the belt-drive by putting a piece of wood under the plywood and stepping on the end to tighten the belt.”

From the archive · Full text
Reader shop tip

Paul Tierney

Paul Tierney, Bloomington, Minn.

“The spring broke on the gas tank cover on my Chevy pickup. Rather than pay for a replacement cap, I installed a bolt inside the cap on the flange surrounding the filler tube and then drilled a hole through the gas cap so the bolt sticks through when the cap is closed. I screwed a wing nut onto the bolt to hold the cap closed. Works great and I later painted the wing nut red to match the color of the truck.”

From the archive · Full text
Reader shop tip

Dom Montesano

Dom Montesano, Burlington Flats, N.Y.

“As I get older it becomes more difficult to pull-start the 12 hp. gas engine on my 35-ton log splitter, so I bought an electric start engine with the same shaft size and mounting holes. Then I made an angle iron bracket and bolted the control panel off an old Sears Craftsman garden tractor on behind the engine. I didn’t do any welding so if I ever want to I can convert it back to a pull start. The panel looks nice, and the engine works great and always starts right up with no effort.”

From the archive · Full text
Reader shop tip

Cecil J. Nix

Cecil J. Nix, North Bend, Ore.

“My friend’s New Holland 630 round baler wasn’t tieing bales properly, and I spent 3 days searching for the problem with no luck. I was about to give up when I finally discovered a bolt holding the brake spring was loose and causing the spring to slip, which kept the twine guide from working correctly. I gave the bolt a couple of turns, and all of a sudden the twine guide started working like new.”

From the archive · Full text
Reader shop tip

Bob Moty

Bob Moty, Crystal Lake, Ill.

“Filling up my air transfer tank with air was always a hassle. I have Milton air couplers on all my pneumatic equipment so I took two Milton air coupler ‘plugs’ - one with a female 1/4-in. N.P.T. and one with a male 1/4-in. N.P.T. - and screwed them together. Now to fill up the tank with air all I have to do is couple the hose on the tank to the hose on my air compressor.”

From the archive · Full text
Reader shop tip

Mike Barker

Mike Barker, Kent, Ohio

“I bought a new Ford F-350 pickup equipped with a flatbed, and when I picked it up the spare tire was stored on the bed. The installer said he didn’t want to drill a hole in the bed for the cable reel handle to go through in order to use the spare tire holder under the bed.

“I didn’t want the tire taking up space on the flatbed so I removed the reel assembly and looked at it for a while. I figured out that if I turned the assembly 90 degrees, the tube for the handle would stick out the right side. So I built a new mounting bracket out of flat steel and shimmed one side so the tube would extend above the flatbed’s frame rail. I welded a nut to a metal rod so I can use my impact wrench to raise and lower the cable.”

From the archive · Full text
Reader shop tip

Henry Priebe

Henry Priebe, Sodus, Mich.

“The Bosch fuel injection system on my late 1950’s IH B-275 diesel tractor started acting up so I took it to a local shop, but they said I should scrap the tractor because they couldn’t find parts to fix it. Instead, I took the injection pump off an Oldsmobile diesel engine and reworked it to fire on 4 cylinders. I made new mounting brackets and also altered the tractor’s diesel fuel lines to fit. I made this conversion about 15 years ago, and the tractor has ran great ever since.”

From the archive · Full text
Reader shop tip 1 of 2

Darrell Smith

Individual tip 1 of 2 from this reader’s published contribution.
Darrell Smith, Port Washington, Ohio

“Tall grass wrapped around the driveshaft on my zero turn riding mower, causing a seal on the deck’s gearbox to leak oil. After cleaning away the grass, I built a skid shield to fit across the deck’s stabilizer arms, below the driveshaft. Problem solved.

From the archive · Full text
Reader shop tip 2 of 2

Darrell Smith

Individual tip 2 of 2 from this reader’s published contribution.
Darrell Smith, Port Washington, Ohio

“Years of wear on the bottom of my Stihl 010 AV chainsaw caused the oil reservoir to wear through. To solve the problem, I thoroughly cleaned the case, using brake cleaner fluid to get rid of all the grease on the metal. Then I applied a layer of J-B Weld epoxy. It has held up for five years with no problems.”

From the archive · Full text
Reader shop tip

Robert Biancuzzo

Robert Biancuzzo, Southampton, Mass.

“To save space in my shop, I installed my 5 hp 60-gal. vertical air compressor in the basement of our home and piped it outside to the shop. The only surprise is when the compressor turns on in the middle of the night and wakes us up.”

From the archive · Full text
Reader shop tip

Duane Hansen

Duane Hansen, Sheridan, Mich.

“I have a small acreage with several different buildings including our home, a rental house, a lake place, and different areas where we mow grass. As a result, I own about 10 different machines with small engines including riding mowers, ATV’s and rototillers. Air filters for the engines on these machines sell for $8 to $10 apiece, which gets expensive.

“To save money, I got the idea to cut up new car air filters to fit all my small engines. I just measure the small engine filter, then use a metal shears to cut out a piece to fit and flatten it out. One car air filter is usually big enough to make 3 or 4 small engine filters. Sometimes the filter might be little short on each side, but as long as the air hole is covered that’s okay.

“I’ve used this idea for 2 years.”

From the archive · Full text
Reader shop tip

Michael Thomas

Michael Thomas, Salmon, Idaho

“Because turbochargers rely on exhaust pressure, leaks between the turbo unit and the exhaust manifold can reduce the performance of a turbocharged engine. It’s not uncommon for the heat generated by the high demands of a farm truck or machine to crack the cast iron exhaust manifold. In the past, welding cast iron was a job for experts but today, with the advent of rods such as Muggy Weld 72, electrode average-skill welders can tackle the job. Here’s how I recently repaired a manifold crack.

“Remove the manifold and clean off all oil and dirt. Prep the weld by grinding out the crack 1/2 to 3/4 of the way through the material and drill the ends of the crack in order to prevent the crack from continuing to run after welding. Preheat the cast iron with a torch or forge to a dull red. Weld 1 in. at a time using short arcs with low heat to avoid overheating the cast iron.

“If your bead is blobbing, you need more heat. If the weld is undercutting the cast, you’re using too much heat. Maintain preheat between beads. This is easier with a helper holding the torch. If cracking occurs during cooldown, weld over the first bead with Muggy Weld 77 or similar rod. After the weld is complete it’s important to allow the cast iron to cool slowly. One method is to bury the manifold in sand or cat litter overnight.”

From the archive · Full text
Reader shop tip

Robert McMahon

Robert McMahon, Knoxville, Tenn.

“I needed a large hold-down clamp on my welding bench for fabrication work, so I made one by modifying a ‘Stronghand’ F-style clamp.

“Start with a 1 by 2-in. piece of channel iron or flat bar and drill a hole for your hold-down bolt. Then weld the channel iron or flat bar to the bottom of the clamp. It’ll result in a super strong hold-down clamp that you can still use as a C-clamp or spreader. Other brands of clamps could be modified as well, but I find that Stronghand F-style clamps work the best.”

Shop feature stories

From the archive · Full text
Feature story

Add-On Grease Gun Extension

Featured source: Terry Nichols

“Whether you’re greasing a lawn mower or a combine, the job will be easier with this extension on your grease gun,” says Terry Nichols, Murdock, Kan.

“I designed the first one out of desperation because of problems I was having reaching some grease zerks, such as those in U-joints on big equipment. It worked so well, I made more and sold them to local farmers and a construction business.

“Now I use it on all grease zerks whether they are easy to get to or not as it allows you to apply down pressure on a zerk that would otherwise let grease squirt out the side. It reduces time spent greasing big trucks and equipment, and keeps mess to a minimum.

“I made 2 designs. One snaps on over the existing nozzle. To use the other one, you remove the nozzle on the grease gun and screw on the extension.

“I made this attachment to work on a battery-operated grease gun but I have used it on a hand pump gun and it works great there, too. I sell it for $29 plus S&H.”

Contact: FARM SHOW Followup, Terry Nichols, 9064 SE 25 St., Murdock, Kan. 67111 (ph 620 297-3927; cell 918 429-3883; [email protected]).

From the archive · Full text
Feature story

Shop Vac Sucks Dust Out Of “Glass Blaster”

Featured source: Andrew Sewell

“I do a lot of blasting with glass beads for my business of making solid brass models of farm equipment. It’s like sand blasting but with glass,” says Andrew Sewell, North Yorkshire, England.

“The beads shatter and make a lot of dust, which ends up airborne and goes everywhere. When the cabinet is pressurized, they blow out from every possible hole and you end up working in a cloud.

“So I hooked up a shop vac to the side of the cabinet to turn it from positive to negative pressure and stop the leaks. I made a bleed valve so I can easily regulate the amount of vacuum in the chamber. If there’s too much, I can’t open the lid and it will pull the gloves off their mountings. I adjust the valve as I work because the filter in the vac gradually clogs up.

“I made the valve from pieces of tubing with large holes cut in them. By turning the outer pipe I can open or close the holes to control the amount of vacuum.

“This setup works well in my shop – but you do want to have the most quiet shop vac possible because you’re standing right next to it.” Contact: FARM SHOW Followup, Andrew Sewell, North Yorkshire, England (www.classic-combines.com).

From the archive · Full text
Feature story

They Specialize In Auto-Lube Systems

Featured source: B&B Engineered Lube Systems

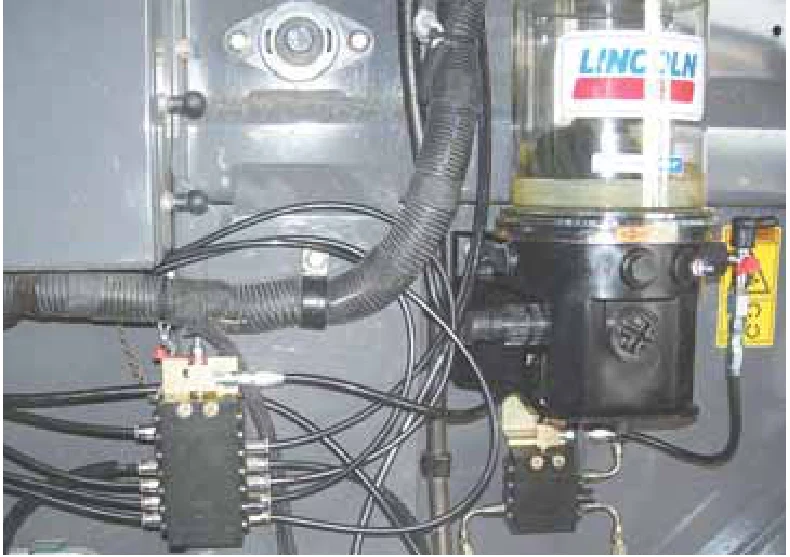
B&B Engineered Lube Systems is a Kansas company that sells and installs automated lubrication systems from Lincoln Industrial for any kind of farm equipment. One system can lube up to 300 points on a piece of equipment.

“We deal with customers who spend a lot of time greasing machines...and many who don’t spend enough time greasing them,” says Braden Hawk, B&B Engineered Lube Systems. Hawk says most systems are installed on site in about a day. The compact design is easy to install, even when space is limited. Cost of installation depends on difficulty and the number of lubrication points to be connected.

“A combine is usually harder than a sprayer, but has fewer points,” notes Hawk.

“A Gleaner combine usually runs about $4,000, but that includes parts, labor, travel to the site, and customer training.” He adds that the system is easy to work with, and if any problems occur, it is easy to adjust. Hawk argues that automated lubrication actually improves machine operation over manual greasing, no matter how thorough.

“The automated system lubricates while the machine is working,” he says.

“Because the bearings are moving, grease gets distributed more evenly. You don’t over lubricate.” B&B has shops in Hutchinson and Overland Park, Kan., and services all of Kansas, Nebraska, the western half of Missouri, and the southwestern corner of Iowa. Hawk says they would be glad to refer customers outside that area to other dealers, or potential customers can contact Lincoln Industrial (www.lincolnindustrial.com; ph 314 679-4200).

“We offer a 1-year parts and labor warranty, and our field technicians can be in an area in a day or two at the most,” he says.

“Most of our competitors’ systems are made overseas and can take weeks for parts to arrive.” Contact: FARM SHOW Followup, B&B Engineered Lube Systems, 2400 Line Rd., Hutchinson, Kan. 67501 (bbhydraulics.com; ph 620 662-2552 or 620 728-8454).

From the archive · Full text
Feature story

Space-Saving Shop Storage System

Featured source: Ryan Stauffer

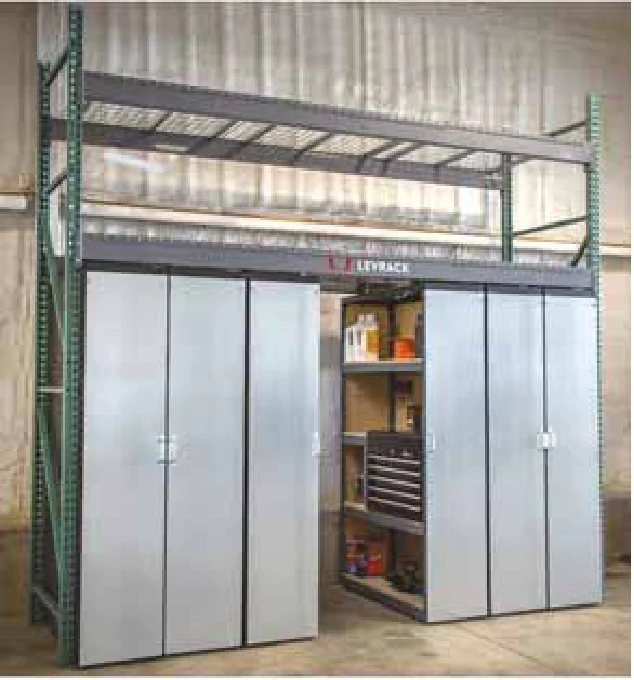
When Ryan Stauffer built a new shop he wanted a storage system that would keep things neat and organized, without taking up a lot of wall space. So he and friends Austin Stauffer and Dolen Schweitzer got together and built a vertical, space-saving “mobile-aisle” shelving system. They introduced it at the recent Husker Harvest Days farm show near Grand Island, Neb. The Levrack system is designed to work with existing pallet rack storage systems, or be installed as a self-contained system. Six rolling shelving units are contained inside a 12-ft. square steel frame that bolts to the floor. The 7-ft. tall, 4-ft. deep shelving units ride on rollers in an overhead rail, allowing them to be easily pushed from side to side. A pallet rack above them can be used to store larger items such as pumps and gearboxes. The 18-in. deep shelves in each shelving unit face inward toward each other. There’s a 29-in. wide opening, or “mobile aisle”, between any pair of shelving units that creates access to the shelves on either side of the aisle.

“It keeps your shop looking nice and tidy and provides a lot of capacity without taking up much space. The shelving units roll easily, even when loaded, and require no motors or complex parts,” says Ryan.

“We call it the Levrack because when you roll the shelving units from side to side it almost looks like they’re floating off the ground, or levitating. The shelves are rated at 1,200 lbs. and the pallet racking is rated at 3 1/2 tons so it has a lot of capacity.” According to Ryan, “The system always looks clean because the shelves are turned inward so that no one sees your mess. We use boltless shelving that can be easily adjusted up or down. If you want, you can pop the shelves out and use the space to store rakes and shovels and so forth. A pegboard on the front and back side of each shelving unit works great to organize small tools.” Ryan says that after he built the shop, at first he was going to build a parts room.

“However, we always had this idea in the back of our head about using a mobile aisle shelving system. Unfortunately all the ones we found were quite expensive and required a track in the floor, which wouldn’t work well in a farm shop because of gravel and dirt. Then one day we were standing under a pallet rack shelving system inside another shop and looked up. We thought we might be able to design hanging shelving units that roll from above.” According to Ryan the system is completely customizable, as the shelves and framework are sold separately.

“For example, for one customer we replaced the shelves in one shelving unit with a toolbox and workbench and installed a bolt bin in the adjacent shelving unit, with LED lights added above the aisle,” says Ryan.

“Eventually we plan to introduce systems for garages, but for now we’re focusing on the farm and industrial side. The front side of the shelving units is available in either galvanized sheet metal or diamond plate steel. A standard 12-ft. sq. Levrack storage system sells for about $5,300 plus S&H. Contact: FARM SHOW Followup, Ryan Stauffer, 2840 O Street Road, Seward, Neb. 68434 (ph 402 875-9466; www.levrack.com; [email protected]).

From the archive · Full text
Feature story

Clamp-On Torch Striker

Featured source: Greg Morehead

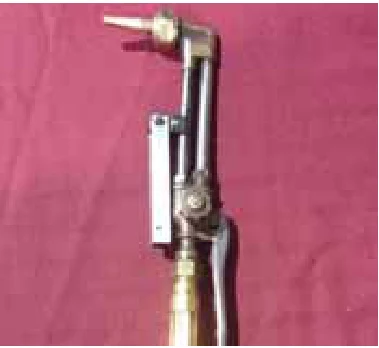
“It always stays on your welding torch, folding out of the way when you’re done using it. People can’t believe how handy it is,” says Greg Morehead about his new Flip N Striker. The 5-in. long, clamp-on aluminum unit is hinged at the bottom and fitted with an electric striker on top. There’s a pull-out trigger about half way down. To light a torch you just fold the unit all the way up and pull on the trigger. It causes a mechanism to strike an embedded pizeo crystal, which produces a small spark that ignites the torch. The unit is then folded back out of the way.

“It saves a lot of time spent looking for a striker and is safer than using a cigarette lighter,” says Morehead.

“It’ll strike about 30,000 times before it wears out, and water doesn’t affect it.” The Flip N Striker sells for $39.95 plus S&H. Contact: FARM SHOW Followup, Greg Morehead, 16348 River Road, Plattsmouth, Neb. 68048 (ph 402 510-3185; www.flipnstriker.com; [email protected]).

From the archive · Full text
Feature story

Add-On “Suppressor” Makes Hydraulics Run Smoother, Quieter

Featured source: Wilkes & McLean

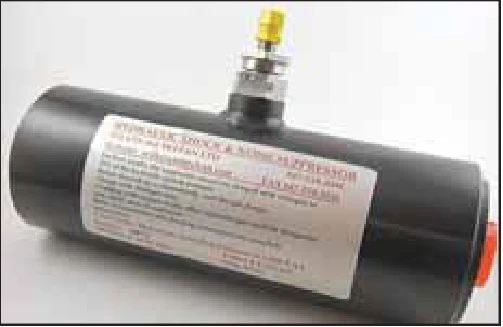
The Wilkes & McLean Suppressor can reduce the noises, vibrations and wear found with large hydraulic systems. The in-line device absorbs shocks and suppresses noise, reducing pulsations, wear and leakage.

“The Suppressor can be installed anywhere hydraulics are used,” says Ben Finfrock, Wilkes & McLean.

“It is used on a lot of large agricultural and construction equipment.” The suppressor is nitrogen charged and easily recharged as needed. According to Finfrock, how often it needs to be topped off depends on how often the hydraulics are used, as well as what they are used for and the type of fluid used.

The Suppressor is only 8 1/4 in. long, making installation easy.

“Suppressors are sized by system flow and pressure as well as the size of the hydraulic line,” says Finfrock. Finfrock says the company’s Suppressor ranges in price from $280 to $800. The company sells them direct as well as through distributors. He says several large equipment manufacturers are testing the suppressors for possible factory installation. Contact: FARM SHOW Followup, Wilkes & McLean, Ltd., 600 Estes Ave., Schaumburg, Ill. 60193 (ph 847 534-2000; toll free 877 534-6445; [email protected]; www.wilkesandmclean.com).

From the archive · Full text
Feature story

Sliding Tool Trays Can Be Doubled Up

Featured source: SlideZilla

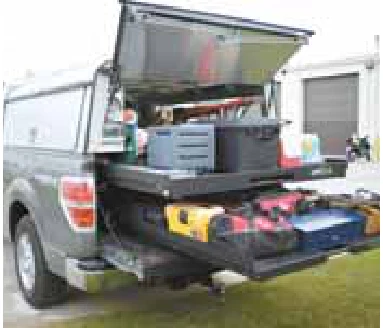
You can customize pickup bed storage with “SlideZilla” sliding tool trays that can be stacked 2-high, with one between the wheel wells and one above. Elevated trays are 58 in. wide and come in short (42-in.), medium (65-in.) and long (75-in.) lengths. The long tray comes with one of 2 rail kits to fit medium or long beds. The short and medium trays come with one of 3 kits for short, medium and long truck beds. The trays slide on 6 roller bearings on a powder-coated steel frame. Tray decks are made from marine-grade plywood with a rubberized skid-proof surface. The elevated trays fit just below the top edges of the truck bed sides. Long trays can extend up to 66 percent past the end of the truck bed, providing access to items stored beneath the elevated bed. The medium tray extends 60 percent, and the short tray extends 40 percent. Lower trays are 48 1/2 in. wide with 4-in. high sides, a 1,000-lb. capacity, and fit 6 1/2 and 8-ft. beds. They can be mounted separately or together with the Elevated Sliding Tray, leaving 15 in. of clearance for storage. All trays come with multiple lockouts and tie-downs for securing the trays and stored items. They are available from dealers online and off. Dealer 4wheelonline.com offers frames for the Elevated Sliding Trays from $339.95 to $354.95. Elevated Sliding Trays to fit the frames are priced from $419.95 to $649.95. Lower trays, which come completely assembled, are priced from $819.95 to $849.95. Contact: FARM SHOW Followup, SlideZilla, 1966 Sterling Ave., P.O. Box 579, Elkhart, Ind. 46516 (ph 574 293-1581; www.slide-zilla.com).

From the archive · Full text
Feature story

Hospital Equipment Finds New Life In Farm Shop

Featured source: David Eggers

David Eggers loves to find new uses for equipment that would otherwise be junked.

“If I see something that has potential, I buy it,” Eggers says. Casters were one of the reasons he purchased a hospital bed, anesthesia cart and gurney at a Brookings, S. Dak., auction. He uses casters to make shop equipment portable so tools and workbenches can be taken to any project or piece of equipment he is working on. The anesthesia cart was an obvious candidate for a tool cart.

“It’s pretty cool to have that many trays. It opens on both sides so I put less frequently used tools on the back side and the most-used tools on the front side,” he explains. The bed made an ideal adjustable workbench after he mounted a solid core door on the top. He can raise it up or down depending whether he is sitting or standing. The gurney turned into a “2-fer.” Eggers turned the bottom part of the gurney into a portable welding bench by adding a steel door for a top. He took off the bed portion and mounted castors on the bottom.

“I converted it to a large creeper, and it has a crank to elevate the head part. With a 3-in. cushion it’s comfortable and large and works well under combines and tractor,” says Eggers. He is a chiropractor which makes him mindful of ergonomic features that can reduce injuries. Contact: FARM SHOW Followup, David Eggers, 21609 469th Ave., Brookings, S. Dak. 57006 (ph 605 693-3020; [email protected]).

From the archive · Full text
Feature story

Cadet Parts Business Celebrates 20 Years

Featured source: Scott Urschel

“When I got laid off from my job 20 years ago it was a blessing in disguise because I started restoring Cub Cadet tractors and selling parts, and that’s what I’ve been doing ever since,” says Scott Urschel, owner of Urschel CCC in Indiana. Urschel had his first exposure to Cub Cadets when his father gave he and his brother two of the popular lawn tractors as Christmas presents. When Urschel started his business, his father helped him set up his inventory system, using the skills he’d acquired as a parts manager for a local equipment dealership. These days Urschel keeps a large inventory of parts in a new building on his farm.

“I try to keep a lot of parts on the shelf because when people call they appreciate getting the parts in a few days, rather than having me hunt them down,” says Urschel.

“I probably have 84 Cadets on the property now and parts from several hundred more on the shelf.” Urschel recently purchased 50 Cadet tractors from a fellow he’s known for several years. Many of them are restored, but some he’ll use for parts. Urschel says he prices his parts based on what he sees at swap meets and always tries to be fair.

“Rare parts bring a premium because there just aren’t that many of them out there.” He gauges the market at swap meets, online and by visiting with other collectors.

“Just like big tractors the market comes and goes,” says Urschel.

“Fifteen to 20 years ago they went from worth nothing to crazy high. For example, a set of round fenders that was maybe $10 went to $250, which was more than a complete tractor at one time. An M & W 9-speed gearbox has always brought a lot of money because it’s rare and hard to find.” Urschel says he gets most requests for parts that fit Cub Cadet originals, the 70 and 100 models, the 123, the 169, the 800 and the Spirit of 76. He says about half of his customers are retired people who are rebuilding a Cadet of their own. Another quarter are in their 50’s and 60’s and the rest are youngsters and young adults who are just starting to restore.

“A lot of people will pay $300 to $400 for a tractor, spend the same on parts and almost that much for tires, and have a really nice tractor when they’re done,” Urschel says. Urschel also sells complete tractors for restoration, and restores tractors if someone wants that done.

“Some restoration guys have a lot of overhead,” Urschel says.

“I charge by the hour to cover my costs and make some money, but I’m not in this to get rich overnight. I’ve learned that people who want a nice restored tractor don’t want to pay 3 to 4 times what it’s worth just to have it looking and running like new.” Contact: FARM SHOW Followup, Scott Urschel, Urschel CCC, 854 US Hwy 224, Uniondale, Ind. 46791 (ph 260 715-3440; [email protected]).

From the archive · Full text
Feature story

Forklift Mast Used To Build Shop Elevator

Featured source: Larry Wood

Larry Wood turned an old Clark forklift mast into a heavy-duty shop elevator by mounting it along one wall and building a platform onto the mast in place of the forks. He uses it to ride up to the upper level of his shop. The elevator is controlled by electrically-powered hydraulics so a simple electric switch is used to move it up or down. Makes it easy to retrieve parts or other equipment from the upper storage area.

“Now I can ride up to the balcony with whatever I want to store,” says Wood.

“The 2-stage mast will lift 2 tons about 12 ft. high, although the barn’s second floor is only 9 ft. above the floor. The platform is big enough that I can load lots of stuff on it.” He attached the mast to a 2 by 6 steel tube located between two of the posts on his shop wall. He welded a steel frame to the mast forks and bolted a 4 by 6-ft. long, 3/4-in. thick plywood floor onto the frame. He made an electric-hydraulic power pack for the elevator by combining a 12-volt hydraulic power unit and a 12-volt battery that’s attached to a trickle charger. Electric-operated elevator buttons are mounted on the forklift and on the wall.

“The elevator only uses power on the way up, so when I push the button it coasts down. I store the elevator at the second floor level just to keep it out of the way,” says Wood. He bought the hydraulic power unit used at a yard sale for $125. He paid $100 for the forklift mast and spent about $200 to rebuild it, adding new rollers and repacking the hydraulic cylinders. Contact: FARM SHOW Followup, Larry Wood,2081 newmans Cardington Rd. Waldo, Ohio 43356 (ph 740 726-2656; [email protected]).

From the archive · Full text
Feature story

Mini Press Brake Uses Bottle Jack

Featured source: Stan McDonald

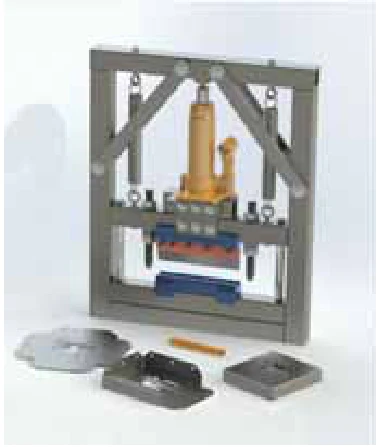
“Our new compact benchtop press brake is the perfect solution for anyone who needs to bend small sections of sheet metal or plate steel. It makes use of a common 20-ton bottle jack and requires no outside power source or specialized pumps,” says Stan McDonald, McDonald Enterprises, Foxboro, Ontario. He says the sheet metal-bending press works great for making suspension and body support brackets.

“With its relatively small footprint, this press is also a perfect fit for anyone with limited working space,” says McDonald. He came up with the idea when he needed to bend a bunch of brackets out of 3/8-in. thick plate steel.

“I didn’t want to cut and weld things together because we wanted a clean look without welding and the need for grinding and general cleanup. I looked for a commercial product that would bend like I wanted, but couldn’t find one so I made my own using the bottle jack as the bending force. It allows you to bend thicker material quickly and accurately and with a high degree of repeatability.” The bender has an adjustable stop to limit the amount of bend and can even be used with 2 settings if you’re making multiple parts, says McDonald.

“I also added a backstop that allows the material to be bent in the same location every time,” he notes. The press brake sells for $425 (U.S.) plus S&H.

Contact: FARM SHOW Followup, McDonald Enterprises, 402 Mudcat Road, Foxboro, Ontario Canada K0K 2B0 (ph 613 968-9516; [email protected]).