Practical ideas from FARM SHOW MagazineSubscribe · Free issue · Send us your shop tip
Subscribe to FARM SHOW
Issues / Vol. 38, No. 2 (2014)

Vol. 38, No. 2 (2014)

Money-Saving Repairs & Maintenance Shortcuts · Printed section pp. 36–39

41 selected entries · Complete text of selected entries

This issue’s section includes reader tips and feature-length shop stories. Held items and editorial notices are not reproduced.

Archive text: prices, coupons, availability and contact details reflect the original publication, not current offers. Reader methods are not universal instructions; follow manufacturer guidance and proper safety practices.

Reader shop tips

From the archive · Full text
Reader shop tip

Bill Mahle

Bill Mahle, Aitwahnee, Calif.

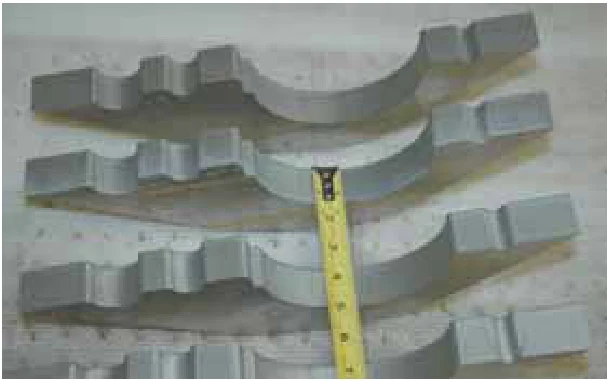
“I used J-B Weld Steel Stick to repair broken and missing trim tabs on a 1966 Ford Thunderbird’s headlight brackets. This epoxy putty dries steel-hard so you can drill and finish it with hand tools.”

From the archive · Full text
Reader shop tip

Dalbert D. Wright

Dalbert D. Wright, Ft. Walton Beach, Fla.

“Here’s an easy way to treat a rusty metal roof. Mix latex paint with enough water so it’s thin enough to pass through a hand-pump garden sprayer. It’ll penetrate the rust and preserve the roof. Works great.”

From the archive · Full text
Reader shop tip

Chris Wilske, Jonathan Steinbrink and Shea Wilton

Chris Wilske, Jonathan Steinbrink and Shea Wilton, South Kitsap FFA, Port Orchard, Wash.

Ageless Iron Almanac featured an idea from this group of FFA tractor restorers. The boys hit on the idea of using heavily diluted blackstrap molasses to loosen rusted parts. They put smaller parts in a tub and let them soak in the molasses for close to two weeks, then rinsed them off. Parts were loose, clean, and any paint on the parts was softened.

From the archive · Full text
Reader shop tip 2 of 2

Larry Place

Individual tip 2 of 2 from this reader’s published contribution.
Larry Place, Perry, Mich.

You can also use it to take grease off your hands. Just wash with soap and water after wiping hands with a rag.”

From the archive · Full text
Reader shop tip

Richard Knouse

Richard Knouse, Liverpool, Penn.

“I enjoyed the list of best rust-busting penetrating oils in one of your shop books. Another good one you could add to the list is Army gun bore cleaner, which comes in a small green can. Although made to clean gun bores, it eats through almost any type of corrosion. It will also take off paint and the blueing of a gun barrel if left in contact. Most military surplus stores stock it.”

From the archive · Full text
Reader shop tip

Bill Mitchell

Bill Mitchell, Tuscumbia, Ala.

“I have a Ford 642 tractor and when I’m pulling a 72-in. King Kutter mower, it runs fine for an hour or so. But when it becomes hot (but not overheated), it quits after a sputter or two. If I let it sit for a while it will start back up okay. But then the same thing happens again.

“I’ve changed the coil, put heat tape on the fuel line, and tuned it up but nothing seems to help. It doesn’t use excessive oil. Has anyone else had this problem?”

From the archive · Full text
Reader shop tip

Bob Lounsberry

Bob Lounsberry, Columbus, N.J.

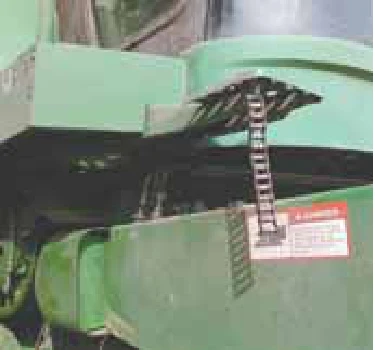
“I used to have to hunt all over whenever I needed the header drive coupler chain for my Deere combine. I solved the problem by attaching an S-hook to the bottom of one of the steps to the cab. Now I always know where the chain is hanging.”

From the archive · Full text
Reader shop tip

Joe Hummert

Joe Hummert, Jonesburg, Mo.

“I was having a lot of vibration in my 1972 New Holland square baler, but only under load. Another farmer told me the problem was U-joints that were too tight. I pulled back on the flywheel and felt some play in there so I put in a new bushing and it solved the problem.”

From the archive · Full text
Reader shop tip

Edward Fett

Edward Fett, Lennox, S. Dak.

There are a lot of different ways to start a tractor in extremely cold weather. Fett says he’s tried them all and nothing works as well as the method he came up with.

“I mounted a metal ring on three adjustable-height legs. The ring is just the right size to hold a large heat lamp. I adjust the legs so the lamp is about 1/2 in. from the oil pan on the tractor and then turn it on. What’s great about this idea is that it not only warms up the oil but also the entire engine compartment.

“It doesn’t cost much to run and you can adjust the height to any tractor. I’ve used it on Deere, Moline and White tractors. Works better than any plug-in heater I’ve ever tried, and it’s a lot safer than a pan of hot coals.”

From the archive · Full text
Reader shop tip

Larry Clausen

Larry Clausen, Wauseon, Ohio

“To break loose old manifold bolts, take a large punch and a big hammer. Hit the bolt right on the head with the punch several times and then try to turn it. Repeat if necessary. Almost always works.”

From the archive · Full text
Reader shop tip

Curtis Murray

Curtis Murray, Wheatfield, Ind.

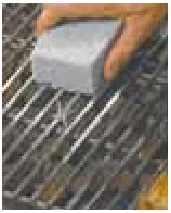
“After several moves over the past several years, my old cast iron table saw was very rusty. I tried wetstones, emery cloth, and even power buffing with polishing compound. Nothing would clean it up. I finally bought a product at Menards (also available at Amazon.com) for cleaning barbeque grills called Grillstone. It’s made from recycled glass bottles that are ground into ultra-fine silica foam. In 20 min. I had the table top looking good, slots and all. I followed that up with a coat of Teflon spray.”

From the archive · Full text
Reader shop tip

Albert Holt

Albert Holt, Butternut, Wis.

“I made a handy tool trailer from a 250-gal. fuel oil tank. I cut it in half and welded angle iron around the inside edge. The lower angle iron sticks up 3/4 in. and the upper angle iron is recessed 3/4 in. to provide a rainproof cover.

“It has parts and tool compartments built on the sides, leaving the center part open for larger parts and tools. A folding prop holds the top half of the cart open.

“It saves me a lot of loading and unloading of my pickup.”

From the archive · Full text
Reader shop tip

Franklin Zitta

Franklin Zitta, Petersburg, Va.

“Dried-up sealed bearings are often a pain to replace. Instead of replacing them, I drill a pin hole into the bearing and partially refill it with grease. By using this method I’ve been able to keep some bearings running for years.”

From the archive · Full text
Reader shop tip

Allen Kimball

Allen Kimball, Dover, Ark.

“I’ve had some trouble with the 12-volt system on my Allis Chalmers D19 tractor. I would buy a new regulator and it would work for a while but then quit. Finally I moved the regulator from its original location behind the radiator and ran a separate ground wire from the regulator to the battery.”

From the archive · Full text
Reader shop tip

Ron Nikolai

Ron Nikolai, Marshfield, Wis.

“To save money I use antifreeze instead of calcium chloride in the rear tires on my garden tractor. I get the antifreeze free in 50-gal. barrels from a local salvage yard. I take the tire off the rim, let the air out and break the bead. Then I use a 1-gal. jug and a funnel with a long spout to add the antifreeze until it almost reaches the top of the tire. Antifreeze isn’t quite as heavy as calcium chloride so the tires ride a little rougher than they would with calcium chloride, but it’s not a problem.”

From the archive · Full text
Reader shop tip

Daryl Holte

Daryl Holte, Pincher Creek, Alta.

“When a starter rope breaks on a push lawn mower or other equipment, most people take the machine to a small engine shop to have the rope rethreaded. It’s a tricky thing to do yourself.

“I came up with a simple, quick way to thread the rope. I turn the starter spring until it’s tight and reverse it one or two turns, securing the rope pulley to make sure I don’t overtighten the spring. Then I thread some mechanics wire through the starter housing where the rope comes out and through the hole in the pulley. I use a torch to heat the end of the wire until it gets red hot, then push the end of the nylon rope onto the wire and let it cool. That lets me pull the wire through the starter housing and the pulley, then cut the rope off the wire and tie a knot. I finally release the pulley so the starter spring will unwind and pull the rope onto the pulley.”

From the archive · Full text
Reader shop tip

James Gerdin

James Gerdin, Braham, Minn.

“I use my drill, some 3/8-in. redi rod, and a square piece of denim to clean out the wheel hubs on tractors and implements before installing new bearings. I cut out several square pieces of denim slightly larger than the hub, then sandwich the denim between 2 washers and nuts on the redi rod. It’s a simple, quick way to clean out hubs.”

From the archive · Full text
Reader shop tip 1 of 3

Neal McCleary

Individual tip 1 of 3 from this reader’s published contribution.
Neal McCleary, Elkton, Md.

“I came up with an easy way to get a tight bearing onto a shaft. I put the shaft into a freezer for a day and then heat the bearing to expand it. After I grease the bearing it goes right onto the shaft. I used this idea on a 2-ft. long shaft on my Woods 11-ft. rotary mower when I had to cut a worn bearing off and the new bearing wouldn’t go on.

From the archive · Full text
Reader shop tip 2 of 3

Neal McCleary

Individual tip 2 of 3 from this reader’s published contribution.
Neal McCleary, Elkton, Md.

“Installing the remote hydraulic couplers on my Deere tractors can be a difficult job. I’ve got to carefully hold the coupler with one hand so the O-rings don’t fall out, and put bolts in with my other hand. The remote couplers are big and heavy, and it’s an awkward place to get at. To solve the problem, I found a couple of bolts that were about 1 in. longer than the original ones and cut the heads off to make a stud bolt. I also made a little point on them. I used both hands to set the coupler on the 2 stud bolts, which are loosely screwed into place. Then I put the other 2 bolts in the bottom, took the 2 stud bolts out, and put the original bolts back in.

From the archive · Full text
Reader shop tip 3 of 3

Neal McCleary

Individual tip 3 of 3 from this reader’s published contribution.
Neal McCleary, Elkton, Md.

“Whenever I’m installing the front-end loader on my tractor, the bolts that hold the loader always seem to turn as I’m trying to tighten them. To solve the problem I tach weld one end of a 1/4-in. thick, 1 by 3-in. metal bar to the bolt head. As I turn the bolt, the bar runs into the loader’s frame, which stops it from turning.”

From the archive · Full text
Reader shop tip

Jack Mosher

Jack Mosher, Genola, Utah

“A lot of people use WD-40 to free up rusted nuts and bolts, but I think JB-80 spray lubricant works even better (ph 626 359-9174; www.justicebrothers.com). Here’s a tip. After applying JB-80, tap the nut or bolt with a hammer, then tighten the nut or bolt a little until it moves ever so slightly and remove it. The vibration caused by tapping makes a tremendous difference and advances the penetrating oil deep into the threads.”

From the archive · Full text
Reader shop tip

Myron Finch

Myron Finch, Baxter, Iowa

“To clean out the trap under a sink I use a large plastic zip tie that’s about 3 ft. long. It’ll go through the trap with ease and push out the clog.”

From the archive · Full text
Reader shop tip

Mary K. Seidling

Mary K. Seidling, Fall Creek, Wis.

“Sometimes cold weather will cause a loader tractor’s hydraulic hoses to freeze up so I can’t raise the loader. To keep that from happening I pour a bottle of gas line antifreeze and water remover, such as HEET, into the tractor’s hydraulic fluid tank. It’ll work through the hoses and keep the hydraulic fluid from freezing up.”

From the archive · Full text
Reader shop tip

John Wilde

John Wilde, Kirkwood, Mo.

“I used EZ-Pour universal replacement spout and vent kits to bring my old Blitz and Eagle gas cans back to life (www.ezpourspout.com). They’re much safer and easier to use than the spouts on newer gas cans.”

From the archive · Full text
Reader shop tip

Jim Kral

Jim Kral, New Ulm, Minn. (ph 507 354- 1945; www.kralautoparts.com)

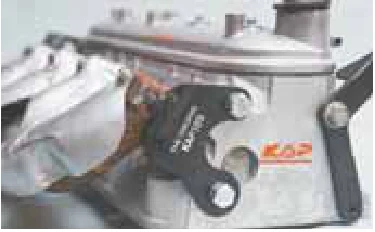
“My new exhaust manifold bolt repair kit is designed to stop exhaust leaks between the exhaust manifold and cylinder head on 1999 and newer model GM trucks and SUV’s equipped with 4.8, 5.3, 6.0 or 6.2-liter engines. The exhaust leak is caused when the end retaining bolts on the manifold break off inside the cylinder head. It’s a common problem on GM trucks. The traditional repair can easily cost $1,500 or more, and exposes the cylinder heads to additional damage.

“The kit includes 2 parts that are inexpensive, easy to install and reliable. I’ve been selling this kit to local customers for several years. You can install the parts yourself. Sells for $34 to $52 depending on the model.”

From the archive · Full text
Reader shop tip

Terry Morgel

Terry Morgel, Avon, Minn.

“If you have a tool with a wood handle such as a hammer, ax or maul and the head is loose, the problem might be that the wood has dried out. In that case, soak the tool for a week or so in a 50-50 mixture of diesel fuel and used oil. The mixture should cover the top of the head by at least 2 in. The wood will swell up and won’t dry out again.”

From the archive · Full text
Reader shop tip

Dennis Woerman

Dennis Woerman, Barnes, Kan.

“I do most of my own tire repair work and the beads on tubeless implement tires are tough to seat. I use a female coupler on the end of my air compressor hose to plug various air tools into. I found that if I remove the valve core from a tire stem and push the coupler onto the stem, it will air the tire up fast enough to seat the bead. Once the bead is seated, I remove the hose and replace the valve core, then finish inflating the tire.”

From the archive · Full text
Reader shop tip

Melvin Stoner

Melvin Stoner, Calumet, Okla.

“I built a handy hitch for my torch cart that lets me pull it with a garden tractor. It’s a lot easier than trying to load the cart into a pickup or loader bucket. I made the hitch out of pieces of angle iron that attach to the lower part of the cart. A piece of angle iron at the top of the cart is used to tilt the bottles at a 45 degree angle for transport. When I get to where I’m going, I can stand the bottles up without unhooking from the tractor by loosening the top piece of angle iron.”

From the archive · Full text
Reader shop tip

Dan Truax

Dan Truax, St. Cloud, Minn. (ph 320 248-3005; [email protected]; www.gaswaterheatertimer.com)

“I recently became marketing manager for American Pacific, and the only device we make is a gas water heater timer. This inexpensive device was designed and patented by Jeff Davis. The timer acts as a programmable setback controller. It allows you to program a gas water heater to automatically lower the water temperature whenever hot water demand is low, and raise the temperature when hot water demand is high. Electric timers have been around for a long time, but not for natural gas or propane. A detailed study can be found on our website. About 25 percent of all house energy dollars are spent on heating water.”

Shop feature stories

From the archive · Full text
Feature story

“Snuff-Style” Grease Cartridge Dispenser

Featured source: Art Hertz

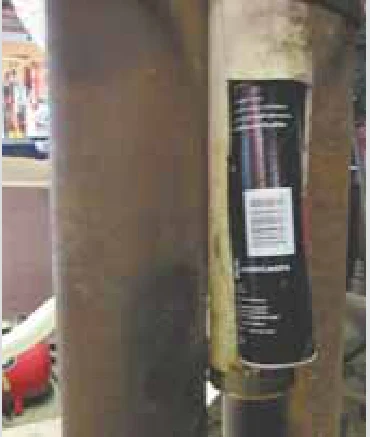
“It’s really handy to use and hardly takes up any space in my shop,” says Art Hertz, Fairfax, S. Dak., who recently sent FARM SHOW photos of the homemade grease cartridge dispenser he made out of a long piece of 2 1/2-in. dia. pvc pipe.

“It’s based on the same idea used in stores to hold cans of chewing tobacco. You pull a cartridge out of the holder and another one immediately comes down to take its place. The pipe is long enough to store almost an entire case of cartridges.” The pipe is strapped on between a pair of steel posts that support the ceiling in Hertz’s shop. He cut a 1-ft. long rectangular slot at the bottom of the pipe. Then he glued a plastic cap into the bottom end of the pipe and drilled a hole in the center of the cap, just big enough for his finger to fit into it.

“To remove a cartridge, I stick my finger up through the hole and lift the cartridge to pull it out of the slot, about 1/4 in. The next cartridge immediately drops down in its place,” says Hertz. Contact: FARM SHOW Followup, Art Hertz, 36717 Quarry Rd., Fairfax, S. Dak. 57335 (ph 605 654-2250; cell 605 830-1001).

From the archive · Full text
Feature story

Garden Tractor Repowered With Kubota 4-Cyl. Diesel

Featured source: Tim Bulthouse

“My Deere dealer told me a 4-cyl. Kubota diesel wouldn’t fit in my Deere tractor, but I proved him wrong,” says Tim Bulthouse, Grand Haven, Mich., who repowered his 1981 Deere 400 garden tractor with a Kubota 4-cyl., 1.2-liter, 24 1/2 hp industrial diesel engine.

“The Kubota engine is a lot more reliable than the original Kohler engine and also has more torque,” says Bulthouse.

“I use the tractor with a 60-in. deck to mow grass on my 2-acre property. I did have to make a lot of modifications to make the new engine work, but it looks original.

“Most people notice right away that I added a big 2 1/4-in. stainless steel exhaust pipe, and that a couple of air duct screens are missing. The exhaust pipe isn’t quite as loud as you’d think, but it sounds nice. I had to cut 2 in. from the top of the frame so the engine would fit. I also had to cut into the front end of the tractor so the engine’s front end would fit, and lengthen the tractor’s side panels by 5 in.” The tractor was originally equipped with a 20 hp Kohler gas engine, which had worn out and been replaced with an 18 hp Kohler. However, it had trouble handling the tractor’s 60-in. mower deck. The Kubota diesel came out of an old parking lot sweeper and was used to operate the sweeper’s vacuum and brushes.

“It didn’t have a flywheel when I got it and it took me a year to find one,” says Bulthouse.

“The crankshaft had a spun rod bearing so I had someone straighten the crankshaft and weld it back together.” He had to build a new driveshaft and machine adapters to hook it up to the engine. He also fabricated new motor mounts. The tractor didn’t have a radiator so he had to find one.

“I discovered that with some modifications, the radiator from a Deere 430 diesel tractor would fit,” says Bulthouse.

“The radiator’s water outlets went in and out the same way, but there was no surge tank so I had to build one.” He also had to make a new battery box, remanufacture one of the tractor’s steering arms so that it wouldn’t interfere with the driveshaft, and modify the tractor’s steering system.

“I cut the drag link and moved it over 1/2 in., then welded it back together,” notes Bulthouse. Contact: FARM SHOW Followup, Tim Bulthouse, 12662 120th St., Grand Haven, Mich. 49417 (ph 616 844-7393; [email protected]).

From the archive · Full text
Feature story

Portable Pto Unit Helps Test Equipment In Shop

Featured source: Brendan Leep

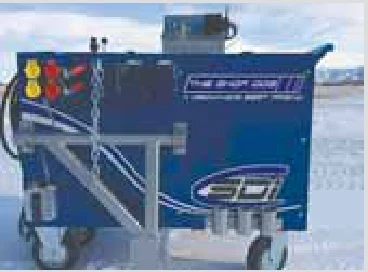
“We call it the Shop Dog and there’s no other machine like it that we know of,” says Brendan Leep, Manhattan, Mont., about the new shop machine he developed with partner Brad Moss. It’s designed to replace the need for a tractor during implement set-up or maintenance. The machine is fitted with a pto, 2 hydraulic remotes, and a 12-volt power system. The pto turns anywhere from 0 to 110 rpm’s and can be remote-controlled. The rig also has a 7-pin plug for operating field lights, tail lights, and flashing lights and a 3-prong plug for activating an implement monitor so sensor problems can be diagnosed. There’s also an amp meter and a hydraulic pressure gauge.

“We accomplish all of this while using 220-volt power that can be found in almost any shop,” says Leep. The hydraulic remotes can be used to raise and lower cylinders and to do everything from lifting and lowering a baler’s pickup to unfolding and folding tillage equipment. The hydrostatically-controlled pto system lets you precisely operate the implement at whatever speed you need to watch what’s going on. By running the pto slow and using the remote control you can find the masters link in a chain, locate grease zerks, fine tune bale knotters, check bearings and belts, and so forth. The Shop Dog even has a canister for excess oil that accumulates from connecting and disconnecting hoses, and a convenient carrier for pto adapters or hitch pins. The Shop Dog has a MSRP of $12,500. Videos and more information can be found at the company’s website. Contact: FARM SHOW Followup, Brendan Leep, 12247 Prairie Rd., Manhattan, Mont. 59741 (ph 406 209-1430 or 406 539-9498; [email protected]; www.shopdogindustries.com).

From the archive · Full text
Feature story

“Look Alike” Alternators Replace Old Generators

Featured source: Powermaster

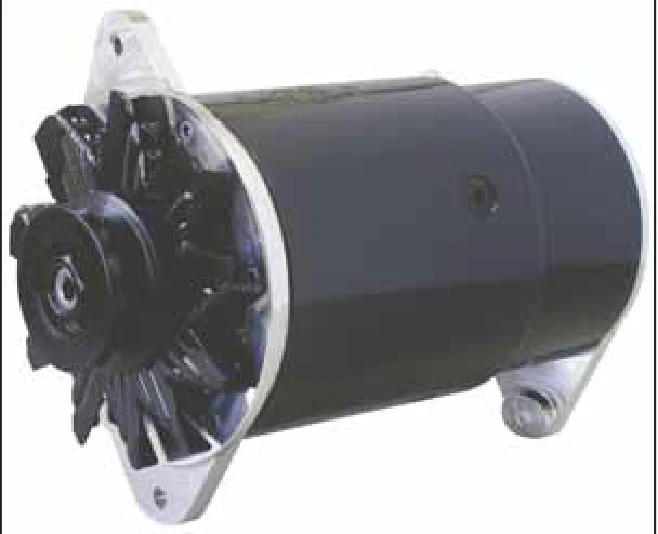
The PowerGEN from Powermaster offers the output and reliability of an alternator with the looks of a generator. It’s a great way to update older tractors, cars and trucks.

“Flathead Ford guys really like the PowerGEN,” says Brady Basner, Powermaster.

“It’s really popular for Ford tractor restorations. It has that old Delco style and can work with just about anything.” While the PowerGEN has the look of an original stock generator, it has new tech touches. Machined grooves inside the case encourage better air flow across the stator band to the rotor, keeping the PowerGEN cooler under heavy loads and extended rpm runs. A functional light drive lets operators keep a functioning charge indicator light on their dash. The original PowerGEN was designed for Ford flatheads from 1939 to 1948. It produces up to 75 amps, 60 amps at idle. Based on its success, Powermaster has introduced PowerGEN alternators for GM long and short generators, as well as Ford swingmount and flatheads from 1949 to 1953. Powermaster also offers a T-Bird specific PowerGEN with factory dimensions and a factory style 1/2-in. wide pulley. It’s available in 6V positive ground and 12V negative ground models for 1955 to 1957 Ford Thunderbirds. Basner admits a PowerGEN unit is more expensive than an off-the-shelf part from a standard auto parts retailer. However, he notes each one is made with all new components from high tech materials and made in the U.S. The company also does custom rebuilding of starters and alternators. The PowerGEN, which is as likely to go on an old tractor as a hot rod, is sold through specialty retailers like Summit Racing and online performance parts retailer JEGS. You can call the company direct to determine which unit is right for your application. Contact: FARM SHOW Followup, Powermaster, 1833 Downs Dr., West Chicago, Ill. 60185 (ph 630 957-4019; [email protected]; www.powermasterperformance.com).

From the archive · Full text
Feature story

Extend Belt Life, Improve Control With Mechanical Disc Clutches

Featured source: David Ash

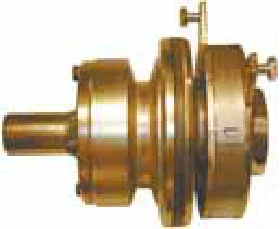
Mechanical disc clutches are easy add-ons to a multitude of uses from belt tightening to engaging and disengaging equipment. The long-proven, simple design eliminates wear caused by belt tighteners. Georgetown Hydraulics makes 8 models of mechanical disc clutches for use with 5 to 40 hp engines.

“They can be used to replace belt tighteners for longer lasting belts, used on line shafts or on engines,” says David Ash, Georgetown Hydraulics.

“All pulleys are A/B combination for use with either A or B type belts. Some models are available with stub shafts or direct drive hook ups.” Ash says clutches need to be sized properly for the application. Customers should call to review how they plan to use the clutch to ensure they get the right size.

“Prices range from $198 to $896,” says Ash.

“The higher the horsepower, the heavier duty and the more expensive the disc clutch needed.” Georgetown zinc-plates the clutches for rust resistance. Ash says they can be controlled either by cable or air cylinders. He says they are popular with wood shop operators with tools operating off line shafts. They are also popular with farm equipment and powered implements. Contact: FARM SHOW Followup, Georgetown Hydraulics, 343 Christiana Pike, Christiana, Penn. 17509 (ph 610 593-2753).

From the archive · Full text
Feature story

Old Engine Block Makes Sturdy Workbench Base

Featured source: Scott Bruce

When Scott Bruce of Ozark, Mo., found an old straight-six engine block at a dump, he decided to use it to build a heavy-duty workbench.

“The bench is made entirely from recycled material. My only expense was the welding rod,” says Scott. He says the heavy-duty workbench works great for just about any project.

“It can hold an anvil and tolerate any amount of hammering, welding, cutting or grinding, and there’s a metal rib running down the middle that’s useful for clamping projects of any shape in place. Also, the solid weight of the engine block base ensures the workbench isn’t going anywhere,” says Scott. He inserted lengths of sewer pipe into cylinder holes at each end of the engine as legs. The pipes fit into the holes with very little play. To further secure the legs to the block he made a locking collar out of horseshoes. He heated the horseshoes with a torch and then beat them to the engine block around the circumference of each pipe. Then he welded the horseshoes to the pipe and the block. A similar collar was created at the bottom of the block. The next step was to create a tabletop using sections of a junked trailer ramp. He welded two ramp sections together to create a rib that runs down the middle of the tabletop. Then he welded the tabletop to the pipe legs, first notching the pipes where they meet the tabletop. The final step was to bolt a vice to the tabletop. Contact: FARM SHOW Followup, Scott Bruce, 4K Farms, 2108 Logan Ridge Rd., Ozark, Mo. 65721 ([email protected]).

From the archive · Full text
Feature story

Upgrade Seat Kit For Deere Tractors

Featured source: Kendall Roetman

“I recently came up with an upgrade spacer kit for the Active Seat in Deere 20 and 30 series tractors. It makes the seat a lot more comfortable,” says Kendall Roetman, Hospers, Iowa. Roetman got the idea after he experienced problems with the factory seat on his Deere 8330 tractor.

“I’ve always struggled with the ride height on this tractor. I wanted to sit higher, so I was always trying to set the seat as high as possible. But every time I changed the setting, the computer that controls the seat would automatically lower it because I was trying to operate the seat too close to its upper height limit. I even had a Deere technician change the operating parameters for the seat, but it didn’t help.

“My Deere service manager suggested I install a spacer, which he said I could purchase from the company for $312. I thought that was too much, and their kit didn’t add enough height to help.” He used square tubing to fabricate the 2-in. high spacer that fits between the base and seat and installs with long bolts (supplied).

“You just remove the original bolts and replace them with mine. You don’t have to disconnect anything,” says Roetman. The spacer kit sells for $185 including S&H. Roetman says he’d be willing to make a kit for other Deere series tractors if there’s enough interest. Contact: FARM SHOW Followup, Kendall Roetman, 4131 Log Ave., Hospers, Iowa 51238 (ph 712 230-1831; [email protected]).

From the archive · Full text
Feature story

Don’t Toss That Defective Digital Display; He’ll Fix It!

Featured source: Dwayne Ditz

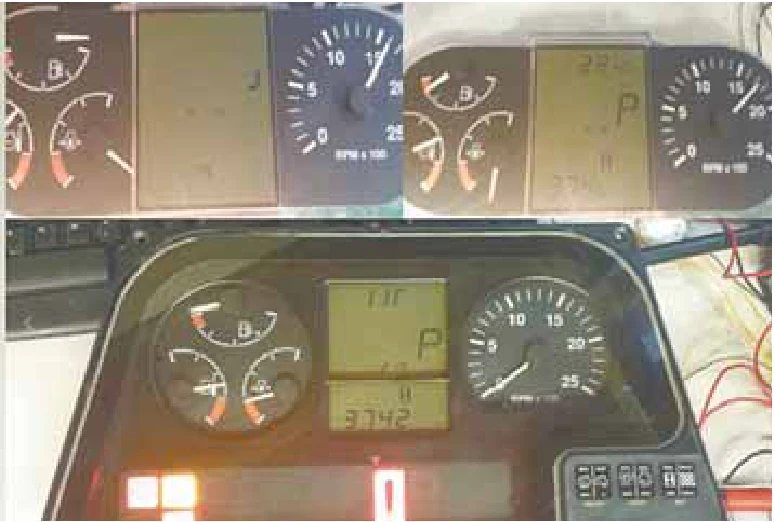
If you’ve got a digital display that goes bad, it can cost you thousands of dollars. Instead, you can call Dwayne Ditz, who will repair and reprogram defective instrument clusters that dealers would normally replace. The difference can mean thousands of dollars out of pocket.

“I’ve had clients who’ve spent more than $50,000 on a new vehicle and the instrument cluster fails in the first year,” says Ditz, whose company is called Prospeedo.

“The warranty may cover replacement, but the dealer can only put a new one in with zero time/miles. Sell it, and it will be red-flagged and legally must be sold as TMU (true mileage unknown) and THU (true hours unknown). This isn’t about ‘rollback’; it’s about the owner having a right to the information that is stored there.” Instruments repaired by Prospeedo have their mileage and other information restored. Ditz notes that most dealers don’t have the tools or knowledge to retrieve true hours and restore them in new or repaired instrument clusters. A growing number of dealers now send new clusters to Prospeedo for restoration of data before they install them. Even without considering resale value, Ditz says most instruments or instrument clusters can be repaired for far less than the replacement cost. He offers a complete warranty on the repaired part for the life of the vehicle. With 24 years of experience fixing digital speedometers and other equipment, Ditz has seen it all. He works on everything from cars and trucks to snowmobiles, quads, motorcycles, tractors and heavy equipment.

“I got started in 1998 offering digital speedometer and hour meter repair,” says Ditz.

“Farmer customers told me they were having serious issues with gauges not working, displays not lighting up and the tractor not moving.” Ditz was able to fix about 98 percent of the problems. He found a common problem was a corrupted EPROM or flash file caused by a battery boost to a dead battery. Other problems include failure of cold solder joints and ribbons to bad chips, microprocessors failing, or defective plastic stepper motors that drive the gauges.

“There are a multitude of reasons why a digital hour meter or speedometer instrument cluster can fail,” says Ditz.

“Although I can’t fix all the problems, I can repair most problems found in the industry.

“Before you have a display or a cluster replaced, give me a call and tell me what the problems are,” says Ditz.

“I don’t charge for anything I can’t fix, beyond shipping.” If he can’t find a replacement part or rebuild it himself, he may have the parts manufactured. That’s the case with a $3 relay needed for the control board in 2005 to 2007 F-250 Ford trucks.

“The defective relay system is built into the board, but the company that made them is no longer in business,” says Ditz.

“I am now in the process of having relays made that will fit the same socket.” Difficulty with finding parts for older vehicles is the reason Ditz doesn’t work with vehicles made prior to 1992. He says that even parts for 1992 to 1996 are becoming hard to find.

“I keep 500 to 600 instrument boards on hand at all times,” says Ditz.

“There are thousands of circuit boards with digital displays built into them. Every week I see something new.” Contact: FARM SHOW Followup, Prospeedo, 3829 12 St. N.E., Calgary, Alta., Canada T2E 6M5 (ph 403 809-3903; toll free 800 277-9269; [email protected]; www.prospeedo.com).

From the archive · Full text
Feature story

Waterjet Cutting System Designed For Farm Shops

Featured source: Jude Lague

If you’re looking for the ultimate metal cutting tool for your farm shop, a Minnesota company just might have what you need.

“The FARM-JET® is the first waterjet cutting system designed and priced for farmers,” says Jude Lague, president of Jet Edge, the manufacturer. It cuts parts from virtually any type of metal, without heat, flames or noxious fumes. The secret is a 55,000 psi waterjet that can cut with needlepoint accuracy and efficiency through 5-in. thick steel or titanium. It’s just as good at cutting through carpet, food and even foam rubber.

“The FARM-JET is designed especially for rural environments with limited electrical service,” says Lague.

“We built this because we think there’s a demand for a sophisticated cutting tool by farm operations that repair and build their own equipment.” Lague goes on to say that before his company introduced this model, a waterjet cutting tool required a 6-figure investment and access to 460-volt electrical power. Electricity for this machine can be supplied from a 115v 60Hz or 230v 50Hz source. Lague says the FARM-JET is an economical and portable alternative to high-priced stationary machines. A 50-hp tractor carries the 1,800-lb. machine on a Cat. I or II 3-pt. hitch. A 540 or 1,000 rpm pto drives an Eco-Jet pump that produces 1 gpm water flow and 55,000 psi pressure at the tip of the abrasivejet cutting head. Material lays on a 40-in. square cutting table and is cut as the head follows a computer-generated cutting path. The head is mounted on a motorized Z axis with 5 in. of up and down travel. Side-to-side and front-to-back movement is controlled by the X and Y axis. Cutting instructions for the FARM-JET are programmed into a Windows PC computer that uses a FlashCut Pro-Series Stepper Controller and FlashCut CNC software. The system also includes IGEMS path generation software and a hand-held pendant to operate the machine. Lague says a FARM-JET has several advantages over other cutting systems.

“If you need a part fast, you can create and cut one in just minutes without having to get it from a dealer or having someone make it for you. The waterjet cuts just about any thickness metal without creating heat, case hardening, recast or molecular change to the material. The waterjet system also cuts without creating any noxious fumes.” Abrasive silica is added to the cutting stream when cutting metal while water alone is used to cut other materials. Contact: FARM SHOW Followup, Jet Edge, 12070 43rd St. N.E., St. Michael, Minn. 55376 (ph 800 538-3343; www.jetedge.com).

From the archive · Full text
Feature story

Cab Mounted On Kubota Tractor

Featured source: Todd Carlson

Gary Carlson wanted to put a cab on his 1999 Kubota F2560 garden tractor to make blowing snow more comfortable. The Eau Claire, Wis., resident went looking on Craigslist and found an old Kubota cab from a compact utility tractor in good condition. He purchased it for $75 and, with help from son Todd, modified it to fit. They used the mower with a 52-in., 2-stage snowblower and a 6-ft. mower deck equipped with a hydraulic dump grass collection system.

“The conversion took about a month, but it looks and functions like a factory unit,” says Todd.

“It has a 12-volt heater, power windshield wiper, and lights facing the front and rear. There are doors on both sides so we can enter or exit from either side. Dad spends a fair amount of time removing snow, and at his age he shouldn’t have to tolerate a face full of snow any more. That was our inspiration.

“People who see it for the first time are surprised to learn that it’s not factory-made. Kubota does make a cab for this mower, but it costs thousands of dollars. The conversion took about a month to do, but we only spent about $200 and that was mostly for sheet metal and a 12-volt heater.” The cab bolts onto the mower’s rollover protective structure (ROPS) without the need to remove the ROPS from the vehicle. There are doors on both sides and large glass windows on all 4 sides. The cab was taller than necessary for the mower so they cut 10 in. off the bottom. In order to accommodate the steering column they also lengthened the cab by 6 in., welding new sheet metal onto the back side. A diamond plate box was added on front of the cab to accommodate the mower’s foot controls, including the hydrostatic foot pedal, brake pedal, and differential lock which extended in front of the steering wheel.

“We fabricated some aluminum parts and attached them over a steel frame that attaches to brackets, which we mounted on the mower’s chassis,” explains Todd. The box has a small glass window located just in front of the mower’s headlight, and it shines through the window. A flashing yellow security light mounts on top of the cab. They used rubber-backed carpet runner to seal the cab’s floor, bolting it to the frame to provide a flexible seal against snow and wind. A 12-volt ceramic heater and fan keep the windows defrosted. Contact: FARM SHOW Followup, Todd Carlson, 1217 Oak Street, Bloomer, Wis. 54724 (ph 715 225-0222; [email protected]).