Practical ideas from FARM SHOW MagazineSubscribe · Free issue · Send us your shop tip
Subscribe to FARM SHOW
Issues / Vol. 48, No. 4 (2024)

Vol. 48, No. 4 (2024)

Money-Saving Repairs & Maintenance Shortcuts · Printed section pp. 32–35

32 selected entries · Complete text of selected entries

This issue’s section includes reader tips and feature-length shop stories. Held items and editorial notices are not reproduced.

Archive text: prices, coupons, availability and contact details reflect the original publication, not current offers. Reader methods are not universal instructions; follow manufacturer guidance and proper safety practices.

Reader shop tips

From the archive · Full text
Reader shop tip 1 of 2

Gary Meeks

Individual tip 1 of 2 from this reader’s published contribution.
Gary Meeks, Verona, Va.

“I’ve had a lot of trouble with fractional horsepower electric motors seizing and sticking, especially window fans. Oiling them isn’t enough as they quickly stick again. It’s as if the grease turns to glue. I found the cure— spray the bearings out with ether, then oil them. It works well.

From the archive · Full text
Reader shop tip 2 of 2

Gary Meeks

Individual tip 2 of 2 from this reader’s published contribution.
Gary Meeks, Verona, Va.

“Do you have a key to the house or shop that’s hard to find on your ring of keys? You can get colored plastic key top covers, but they make the key bulky, and mine wore out quickly. Try putting it on a small ring that extends it out a bit from the main ring, or use a paint pen to cover the top of the key in color. Another option is to take one of those colored pieces of tape that Subway uses when wrapping the sub and wrap it around the top of the key. When it wears off, eat another sub.”

From the archive · Full text
Reader shop tip 2 of 4

John Rochester

Individual tip 2 of 4 from this reader’s published contribution.
John Rochester, Charlotte, N.C.

“If you need to clean paint or caulk off a screwdriver, put a heavy razor blade in a vise.

From the archive · Full text
Reader shop tip 4 of 4

John Rochester

Individual tip 4 of 4 from this reader’s published contribution.
John Rochester, Charlotte, N.C.

“I use a paint can lid as a low-sided parts/tool tray when working under my car. It’s easy to reach into, slides easily, and is easy to clean.”

From the archive · Full text
Reader shop tip

Robert Lee Greenwood

Robert Lee Greenwood, Bellwood, Neb.

“When pouring my concrete floor, I dug out and poured in two 6-in HW steel tubes with cross bars on the bottom and 5/8-in. chain anchored inside with a steel bar across the tube and welded in. Both were fitted with lids at the floor surface. Now, I have an anchor point in the floor to chain a bent machine and pull it back in shape anchored to the second point. They also serve as floor mount points for shop tools like metal benders.”

From the archive · Full text
Reader shop tip

Anthony Tanzi

Anthony Tanzi, Mastic Beach, N.Y.

“I’ve had luck drilling hardened steel plates using a carbide tip drill bit at high speed.”

From the archive · Full text
Reader shop tip

Paul Schmittauer

Paul Schmittauer, Albany, Ohio

“I use my leaf blower to clear snow from my sidewalks and garage ramp. If you get to it while it’s still dry and powdery, the blower will clean it down to the bare concrete. I also use it to clean out my off-road vehicles. Simply open the doors and blow all the dirt and debris out. It also works great for cleaning the garage floor, even better than a vacuum cleaner. I also go up on the roof and blow debris out of the gutters with it.”

From the archive · Full text
Reader shop tip

Steve Ragan

Steve Ragan, Eustace, Texas

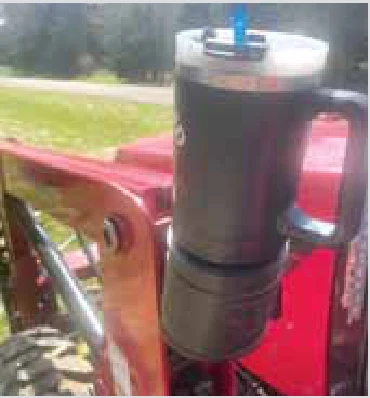
“This is the easiest but most useful modification I’ve ever put on a tractor. I always drink something when working with my tractor and never have a place to put my cup. A 3-in. flexible PVC coupler solves the problem. One screw holds it to my loader frame. It holds just about any size cup and absorbs some of the vibration. You also end up with two good hose clamps left over.”

From the archive · Full text
Reader shop tip

Warren Hartl

Warren Hartl, Yoakum, Texas

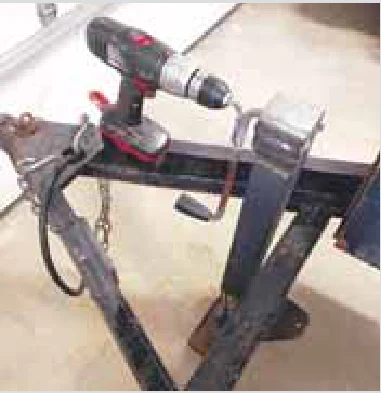
“It was hard to change the blades on my zero-turn mower or clean under the deck. I welded a trailer jack to the front. Now I can jack it up to 30 in. off the ground to clean or work. It pins sideways when not in use.”

From the archive · Full text
Reader shop tip

Mike Connors

Mike Connors, N.H.

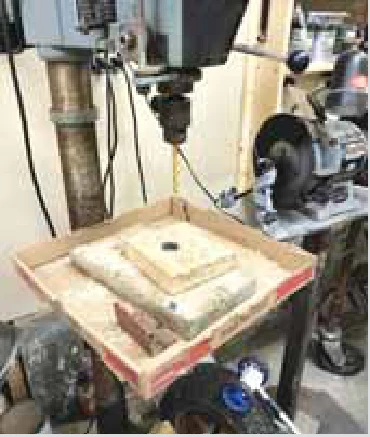
“Put a large pizza box on your drill press table. It’ll contain almost all the swarf, so there’s less mess to clean up. If you have a vise, just bolt through the box. A new box comes with every pizza!”

From the archive · Full text
Reader shop tip 1 of 2

Fritz Groszkruger

Individual tip 1 of 2 from this reader’s published contribution.
Fritz Groszkruger, Dumont, Iowa

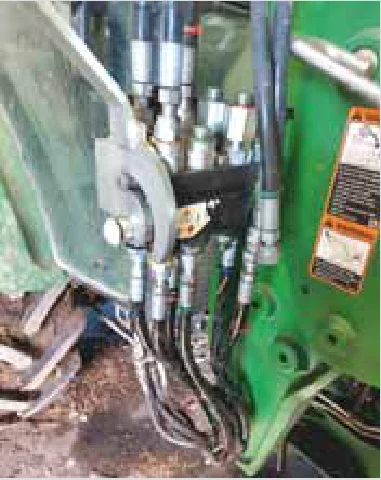
“The hydraulic coupler leaked on a Deere 5105M. The two cams and lever that pulled it tight had worn and cost $500 to replace. I welded to build them up, and it was tight. After another $250 for cartridges, I bought $16 worth of fittings. It’s not quick, but it doesn’t leak.

From the archive · Full text
Reader shop tip 2 of 2

Fritz Groszkruger

Individual tip 2 of 2 from this reader’s published contribution.
Fritz Groszkruger, Dumont, Iowa

“The two halves of the loader control handle on 5105M cost $876 to replace. I’m trying to repair it with JB Weld. I imagine these parts prices are to subsidize their electric tractors. The world has gone nuts.”

From the archive · Full text
Reader shop tip

Bill Ridgway

Bill Ridgway, Salem, Ind.

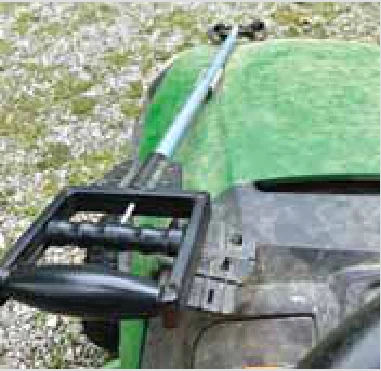
“We have a lot of trees, which leads to many limbs to pick up. To make it easier for an 80-year-old, I pull a small 2-wheeled trailer and just set the limbs on it. A few pop rivets and some PVC pipe were all it took to make this handy pick-up tool.”

From the archive · Full text
Reader shop tip

Danny Morres

Danny Morres, Springfield, Ill.

“I had a 1977 F-150 with a topper that collected snow, snow melt, and ice. Sunlight rarely melted it, and ice dams formed. It broke the aluminum base of the topper.

“My 2013 F-150 4x4 full-size pickup has a small gap between the truck’s cab and the front of the topper. To avoid ice dams, I wedge a 2-in. pool noodle (cut in half and trimmed to fit) between the cab and the fiberglass topper. I remove it before driving— slips right out.”

Shop feature stories

From the archive · Full text
Feature story

Urinal Made From Chevrolet Turbo 400 Transmission

Featured source: Doug Peccianti, Sacramento, Calif.

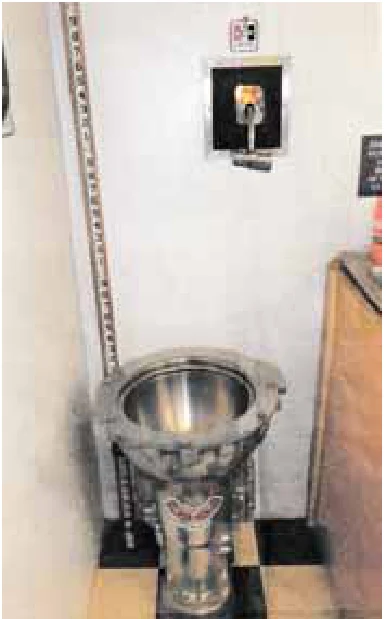
Doug Peccianti of Sacramento, Calif., has a custom urinal in his welding shop that always attracts attention, as it’s made from a Chevrolet Turbo 400.

“I built the shop 10 years ago and knew I wanted to add a bathroom,” says Peccianti.

“But as I scanned the room, I saw the Turbo 400 in the corner. Inspiration struck, so I decided to put it to use.”

Peccianti removed the transmission’s internal components and placed a stainless-steel salad bowl into the recess.

“My wife got a new one for the kitchen, I promise,” he laughs. One of his favorite features is the flush valve, made from a Hurst shifter that he also had on hand.

Peccianti estimates he invested $100 into this project by purchasing most materials at swap meets. The project took about 10 hrs., mainly because the design took some tinkering to conceptualize fully.

“I could build it again in 4 hrs.,” he says.

“Cutting out the internal components took a bit of thinking.”

The custom urinal never fails to earn a response from those who see it.

“It can be a real talking point in the shop,” says Peccianti.

“It always puts a smile on people’s faces.”

Contact: FARM SHOW Followup, Doug Peccianti, 4064 Las Pasas Way, Sacramento, Calif. 95864 (ph 916-482-4272).

From the archive · Full text
Feature story

Add-On Keeps Brakes From Freezing Up

Featured source: Wyatt Van Damme, Belmont, Manitoba, Canada

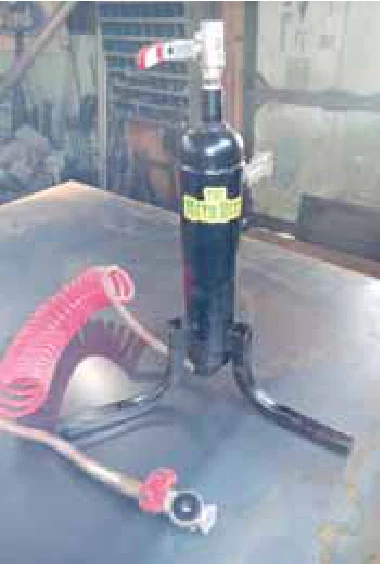
Wyatt Van Damme has a simple solution for frozen brakes with The Meth Head canister. Van Damme recalls fighting with frozen brakes while growing up on the family farm. While injecting methyl hydrate into a brake system does the job, it’s difficult and tends to spill.

“The Meth Head canister is really just a chunk of pipe with three legs and two airline connections,” says Van Damme.

“It provides a closed system that won’t spill. Just hook it up once a month in the winter or every few months, depending on how many miles you go. In between, disconnect it and store it in your shop.”

Simple instructions on use match the simple design. Instead of trying to pour methyl hydrate into the glad hand on the trailer air line, set up The Meth Head behind the cab or sleeper and connect it to the coupler from the truck and the glad hand on the trailer air line.

“Once it’s connected, close the valve and hit the air brake button,” says Van Damme.

“Disconnect it, and away you go. It’s an easy preventative.”

Van Damme used the skills he developed as the owner of Triple Pass Welding to design and fabricate The Meth Head. He entered it in the Manitoba Ag Days Innovation Showcase and won the top prize in the Farm Built Solutions category.

The Meth Head is priced at $300 CAD and is available directly from Van Damme.

Contact: FARM SHOW Followup, Triple Pass Welding, P.O. Box 221, Belmont, Manitoba, Canada R0K 0C0 (ph 204-523-0446; [email protected]).

From the archive · Full text
Feature story

Homemade Implement Mover Works In Tight Spaces

Featured source: Brent Uffelman, Waco, Neb.

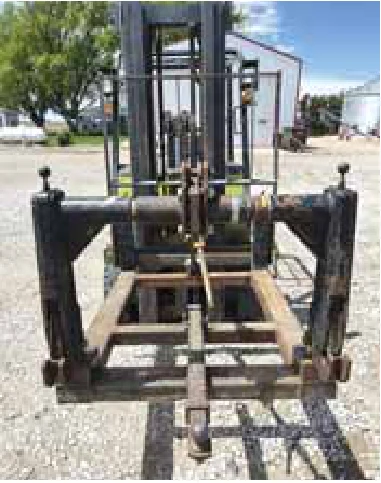
When Brent Uffelman needed to move his small farm equipment and trailers in and out of his sheds, he created a small device he could use with his propane-powered forklift to simplify the task.

As his forklift started more easily in the cold Nebraska winters than his diesel tractor, it seemed the obvious choice for the job.

With his son, Conner, he used scrap metal from his yard to build 3 by 5-in, 1/4-in. thick rectangular tubing frames to slide over his forklift’s tines. To secure the frame, he welded short, hooked chains onto the rear to latch into D-rings welded to the forklift mast.

Each end features an upright hooked support to engage the outer pins on 3-pt. hitch tools and equipment. He installed a quick hitch and turnbuckle on the front to reach the necessary height to move small implements like shredders and blades. He installed a square tubing sleeve at the center front for a reversible 2-in. receiver hitch, which can be used with a 2 or 2 5/16-in. ball or spade hitch.

“I just pull a pin and slide in the hitch I want to hook up to,” Uffelman says.

“With the good visibility, I can drive right up to something, hook up, lock the implement on the quick hitch, and drive away. The forklift does all the heavy lifting without requiring any dollies.”

He says his mover can also be used on tractor-mounted front-end loaders or skid steers, if necessary, but he likes the convenience of his forklift as he can quickly get on or off for adjustments.

“It’s more user-friendly and maneuverable for fitting my equipment into tight spaces in my storage sheds,” he says.

Uffelman paid about $200 for the quick hitch and around $115 for the steel.

Contact: FARM SHOW Followup, Brent Uffelman, 1217 Road V, Waco, Neb. 68460 (ph 402-366-4893; [email protected]).

From the archive · Full text
Feature story

Shop-Built Rolling Anvil Rail Table

Featured source: Jerome Behm, Burlington, N.D.

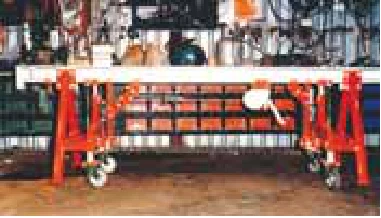
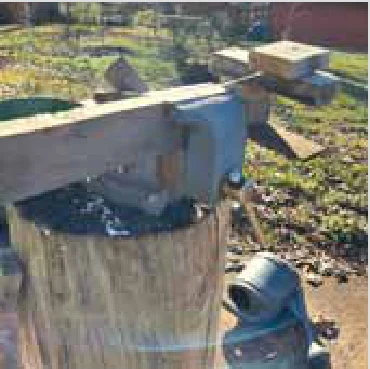
Jerome Behm had the perfect anvil for popping rivets in and out of a sickle bar. To make the long anvil, he mounted a 10 ft. length of railroad rail topside down on stationary legs. A second set of legs with caster wheels is lowered to raise the anvil/rail table for moving about the shop.

“I made it back when sickle bars still used rivets to fasten the blades to the bar,” says Behm.

“Sickle bolts replaced rivets, so I don’t use the table for that anymore, but it’s still handy as a mobile anvil. I can easily roll it around on the shop’s concrete floor.”

The stationary legs are 3-in. steel round stock cut at 30-degree angles welded to 6-in. sq. plates for bases. Matching plates welded to the tops of the legs are bolted together below and through the rail, sandwiching it between them.

Making the unit mobile required mounting a second set of legs with casters between the stationary legs and connected to them and the rail.

A winch and cables running through a system of pulleys force the legs on casters down while lifting the rail table up. The winch is mounted just inside the pairs of legs at one end of the rail. Its cable connects through a ferrule and eyelet to a pair of lift cables at the far set of legs.

At each end of the rail, short (about 10-in.) lengths of round stock connect both sets of stationary legs to square frames that house the castor wheel legs. The frames stabilize the caster wheel legs while allowing them to move up and down. Square tubing mounted to the top of each set of caster wheel legs forms an upside-down T over the legs.

The Ts vertical leg connects to the rail with a piston that accommodates the leg’s movement. A tab to one side of the vertical leg anchors an eyelet for the cable system. A spring mounted between the stabilizing frame and a tab on the other side raises the legs when the winch is not in use. A second vertical post extends from the stationary leg frame to the underside of the rail. A brace extends at a 45-degree angle from it to the rail.

One lift cable at the far set of legs travels through a pulley in the vertical post brace to a second pulley above it. From there, it travels back under the rail to a pulley at the matching vertical post brace on the near set of legs. It then travels down to the stabilizing frame on those legs.

The second cable also travels through a pulley on the post brace and down to a pulley on the stabilizing frame of the far set of legs.

In both cases, the cables travel up to the eyelets near the top of the upside-down T connected to the caster wheel legs.

When Behm turns the winch handle and the cable tightens, the caster legs lower, and the rail framework rises.

Once the anvil/rail table has been moved to the desired spot, Behm reverses the process.

Getting the spacing and placement of cables and pulleys correct took Behm several years.

“I’ve always liked fabrication and metalwork,” he says.

“While no longer needed for sickle bar work, it’s solid and heavy, still useful for shop work.”

Contact: FARM SHOW Followup, Jerome Behm, 13500 19th Ave. NW, Burlington, N.D. 58722 (ph 701-833-2220).

From the archive · Full text
Feature story

Eliminate Spills When Servicing Equipment

Featured source: Eva Wiesmüller, Sulzberg, Germany

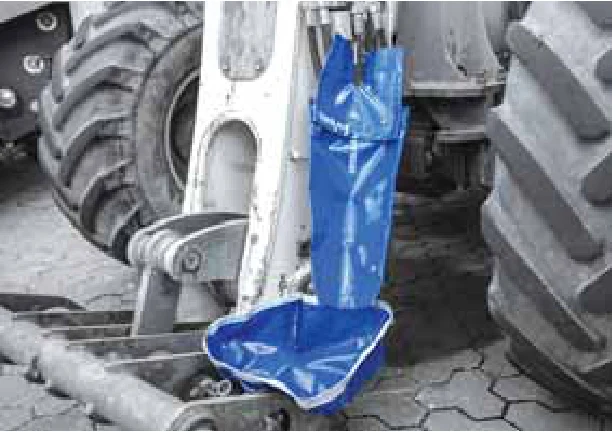
Flexible liquid collection systems from Aqua Evolution Systems are cleaning up water, oil, hydraulic, and transmission fluid servicing. Marketed as DerBlaue, the materials incorporate plastic-covered bendable metal, a sealing lip around the edges, and magnets. These components allow the collection systems to be shaped for each situation and fastened securely in place.

“So far, we don’t have dealers in the U.S. or Canada,” says Eva Wiesmüller, Aqua Evolution Systems.

“However, we hope to add dealers in both, as our website statistics indicate the second highest hits come from North America.”

Products in the DerBlaue line include splash guards, a slide, a tub, funnels, and pumps. All are resistant to contaminated heating water and glycol-containing liquids, as well as hydraulic, oil, and other liquids. The splash guards or rosettes are designed to wrap around pipes or tubes and catch dripping liquids. They’re available as either single or double-pipe rosettes.

The slide is a flexible sheet 19 1/2 in. long, 11 3/4 in. wide at the top, and 7 3/4 in. wide at the bottom. It can be shaped to direct fluids into the tub or other retention containers. It can also be placed directly under an outlet or a splash guard. Hanging tabs incorporate neodymium magnets for attaching it to a metal surface or other metal-lined DerBlaue products. The slide also has eyelets to hang it in place.

The tub has a 10 1/2 qt. capacity and can be placed under a splash guard and/or a slide.

It’s 13 by 13 in. square and 5 in. deep. With its magnetic and bendable design, it can be shaped to conform to any surface while retaining liquids. The soft, tapered lip fits against a surface. The tub has two carrying handles and a tab for using a pump.

The funnel hoppers can be hung in place with height-adjustable suspension systems with a maximum carrying capacity of 176 lbs. Lips are lined with fiberglass rods for stability. They can be used by themselves or with splash guards and a slide. The small funnel mouth is about 15 3/4 by 15 3/4 in., and the hopper holds about 6 1/2 gal. The large funnel mouth is 31 1/2 by 31 1/2 in., and the hopper holds about 13 gal. Both have 3/4-in. connections at their bottoms for drain tubes or hoses to transfer pumps. Each also can be fitted with filter sleeves.

The 12-volt pump delivers 10 1/2 qt. per min. and is resistant to 140 F and most liquids.

Items are priced individually and in sets. A set with a tub, pump, battery, two rosettes, and a slide costs about $450. Funnels are priced at $157 and $242.

Wiesmüller notes that only the tub ($98.25) and the slide ($53.18) are currently available to be shipped to customers in the U.S. or Canada. They can be ordered directly from the website.

Contact: FARM SHOW Followup, DERBLAUE, Aqua Evolution Systems GmbH, Lindenstraße 14, 87477 Sulzberg Germany (ph 4983763269963; [email protected]; https://shop.derblaue.com/en).

From the archive · Full text
Feature story

‘Swiss Army Knife’ Saw Kit

Featured source: Lee Valley

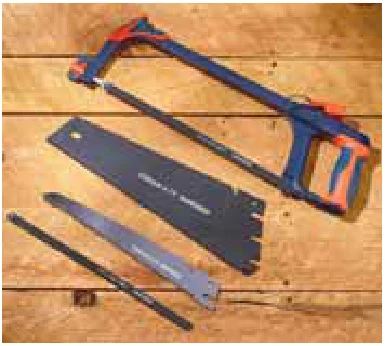
When Lee Valley announced the “Swiss Army knife” for yard and garden tools, FARM SHOW checked it out.

The multi-blade with a single-handle kit looked interesting. Made by Inwell Manufacturing, it includes a 13-in. handsaw blade with a 7-tooth per inch crosscut edge and a 10-in. pruning blade/drywall blade with a 7-tooth per inch edge. The blades are high carbon/manganese steel.

The kit also includes two hacksaw blades with a common frame. The bimetal blade has 24 teeth per inch for fine cuts, while the carbon steel blade has 18 teeth per inch for faster and more aggressive cutting.

The handle is described as a sturdy, lightweight aluminum alloy with a polymer coating grip. When not in use, the blades and handle fit in a plastic carrier with a hang tab for storage.

The blades lock securely into place with a cam action clamp. The locking system is simple for quick change-outs. Just insert the blade and lock it down.

Lee Valley had the kit priced at $16.90 with limited availability but quickly ran out of stock. While Inwell doesn’t list it on their website, it’s available from the Inwell store on Amazon for $20.99.

Contact: FARM SHOW Followup, Amazon (search for multi-blade saw).

From the archive · Full text
Feature story

Shop-Built Adjustable-Height Creeper

Featured source: Robert Greenwood, Bellwood, Neb.

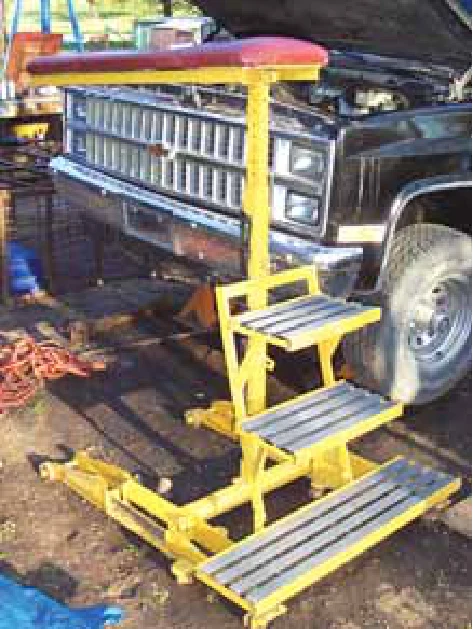
Robert Greenwood of Bellwood, Neb., has engineered a solution to inaccessible vehicles.

“Pickups are so tall now that I can’t service them from the ground,” he explains.

“So, I took two bad floor jacks, some steel, a fiberglass step tread, and a folding tall creeper that allows me to adjust the height for any of the trucks and walk right up to work or get to a dipstick.”

The project only took a few days after Greenwood worked out the design.

“I welded everything in my shop; most of the design was based on the material I already had. My costs were just my time and welding materials; everything else I pulled from my iron pile.”

He made the base from two worn-out floor jacks while the structure was tubing, which he salvaged from packing crates and old machinery. The grating on the steps came from leftovers from a shop stand in another building, and the front-end shield is a repurposed pickup bed liner.

“About the only things I purchased were the plywood, rubber foam pad, and Naugahyde vinyl I used to form the cushion. Maybe $50 in total.”

The project has proven to be a quick way to improve his ability to access vehicle undersides.

“It worked out so well that I don’t think I’d do anything different. Maybe I’d add a tool tray to one side, or maybe the end,” he says.

“Shop space is always at a premium, so I recommend making it fold like I did so it can become smaller. I store this one under a workbench most days.”

Contact: FARM SHOW Followup, Robert Greenwood, 3961 E Rd., Bellwood, Neb. 68624 (ph 402-367-9774; [email protected]).

From the archive · Full text
Feature story

Torque Reducer Improves Auger Drilling

Featured source: Andy Burish, Cumberland, Wis.

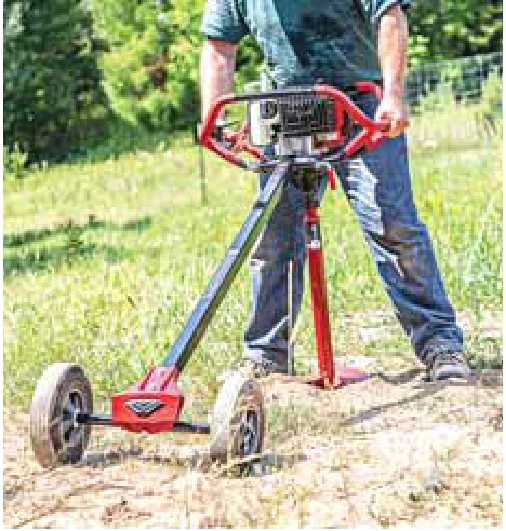
The Earthquake® OutriggerTM Auger Torque Reducer works to turn two-man auger jobs into one-man jobs.

“It acts as a lever taking away the jarring force felt when hitting roots and rocks while drilling holes, reducing user impact by up to 75 percent,” says Andy Burish, Earthquake Brand Manager.

“We started making earth augers in 1960, and since the beginning, we’ve faced the challenge of managing the torsional force to the operator that occurs when an earth auger hits a rock or root while drilling,” Burish says.

“One of our engineers saw an opportunity for a more effective product. His idea was simple yet innovative: weld a bracket to an Earthquake powerhead to hold a 5-ft. long 2 by 4 board. This lever significantly reduced the twisting force during drilling.” Once the Earthquake engineering team began using this custom lever, they didn’t want to dig a hole without it. Earthquake refined the concept, adding a heavy-duty cast-iron knuckle for stability and large, airless wheels for easier transport. The torque reducer is built with a durable cast iron knuckle and is designed for tool-less connection to the Earthquake Dually Powerhead Model 43101—no bolts or wrenches are required. Just flip the Outrigger over into transport mode to help move the auger to a new location.

“Any other auger torque-reducing device on the market is much larger and more cumbersome to use,” says Burish.

“These tools are essential for landscapers, enabling efficient hole drilling in tight spaces where larger equipment can’t reach. Yet can also be used by farmers and ranchers looking to put in fence posts, or by homeowners needing to drill holes for decks or mailboxes.” The Outrigger is $229 with free shipping. It’s made in the USA and comes with a 5-year warranty. Says Burish, “All Earthquake products are backed by a U.S.-based customer service team to ensure satisfaction for all of our customers.” Contact: FARM SHOW Followup, Earthquake, 1730 Industrial Ave., Cumberland, Wis. 54829 (ph 800-345-6007; [email protected]; www.getearthquake.com).

From the archive · Full text
Feature story

Repair Tool Works From Undamaged Threads

Featured source: Stephen Tuck, Somerdale, N.J.

Israel’s NES Tools dominates the bolt and nut thread repair sector with their NES 1, 2, and 3 external thread repair tools. Their main North American distributor, Anglo American Tools, has been handling the machining tools for over a decade.

Each tool is universal, infinitely adjustable, and doesn’t depend on pitch or object diameter.

“You don’t need a caliper or pitch gauge,” says Stephen Tuck, Anglo American President.

“Just open it, size it on the tool, and tighten it firmly enough to spin with your fingers.”

During use, two matching and parallel cutters float lightly, finding the thread Vs whether fine or coarse, hard or soft, or left or right-handed. The cutters are made from high-speed steel with 58 Rockwell hardness built to last for hundreds of uses.

“As you turn the tool, you’re gently but firmly pushing the cutter through the damaged threads,” Tuck says.

“Unlike other thread repair tools, ours starts anywhere on the undamaged thread and works back rather than starting it at the tip or end where the damage usually occurs.”

The external thread repair tools come in three basic sizes: the smaller 5/32 to 11/16-in. NES 1A, the 11/16 to 1 1/2-in. NES 2, and the larger 1 3/8 to 6-in. NES 3.

Prices range from $55 to $449 plus S&H. Contact: FARM SHOW Followup, Anglo American Tools, 401 Kennedy Blvd., Somerdale, N.J. 08083 (ph 800-223-8600; [email protected]; www.angloamericantools.com).

From the archive · Full text
Feature story

Easy-To-Use Tow Ball Converter

Featured source: Braxton Lierd, Lindon, Utah

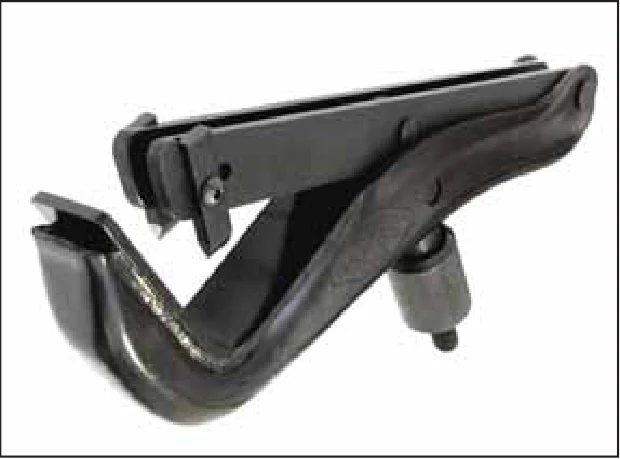
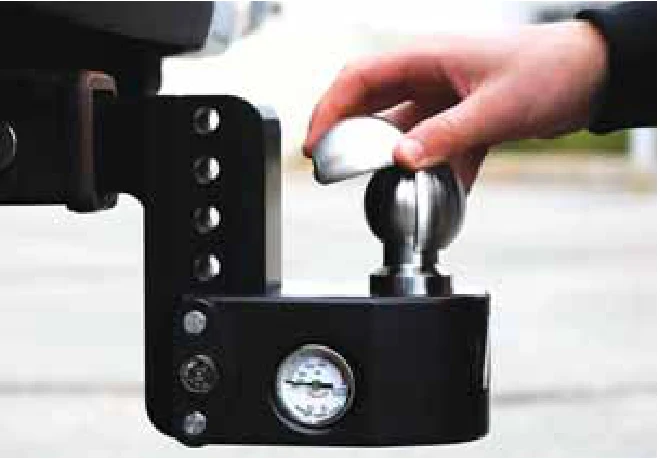
The Weigh-Safe Clamshell Tow Ball gives you versatility for towing that otherwise requires expensive modifications.

“It was developed by Kevin McAllister to change from a 2-in. tow ball to a 2-5/16-in. tow ball quickly and easily,” says Braxton Lierd, Weigh Safe community manager.

“He was tired of unbolting and bolting on new tow balls every time he had to change trailers.”

Weigh Safe entered the towing market in 2013 with a patented trailer hitch ball mount with a built-in scale to measure tongue weight. Since then, the company has built a name for itself with revolutionary products that improve peace of mind.

The converter is compatible with most 2-in. tow balls. The newest clamshell model, released last year, fits the Weigh Safe 2-in. Tow Ball and the 180 2-in. Combo Tow Ball.

“It works much like a two-part spherical washer that increased the size of the tow ball to be larger,” Lierd says.

“Once the trailer coupler is covering and attached to the ball, the clamshell fills the gap with tough stainless steel, and there’s no way it can work its way off.”

Despite the size increase, the capacity rating is for the 2-in. tow ball within the shell. It’s also best to remove the converter from the tow ball unless towing, as an unweighted converter could detach while driving and cause problems to people and property.

The Converter retails for $30 on the company website.

“I think the converter is more convenient, cost-effective, and exciting to use than anything else on the market,” says Lierd.

Contact: FARM SHOW Followup, Weigh Safe, 420 N. Geneva Rd., Lindon, Utah 84042 (ph 801-820-7020; [email protected]; www.weigh-safe.com).

From the archive · Full text
Feature story

Chain Hoist Makes Zero-Turn Clean-Out Easy

Featured source: Gary Meeks, Verona, Va.

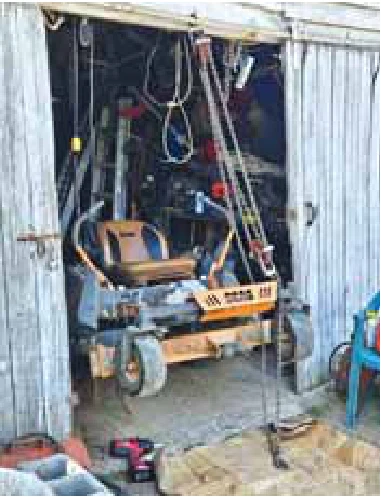
Gary Meeks suffered the granddaddy of mower blade messes while mowing behind his barn with his zero-turn mower.

“I got all three blades wrapped up with electric fence wire, plastic shrink wrap, pallet strap, and baler twine,” says Meeks.

“I knew I needed to get the mower high enough to get at it from below with room for my impact wrench.”

Meeks put an old chain hoist to work, hooking it to the sliding door track on an old garage. He knew the track was screwed in solid to the header over the doorway.

“I lifted the mower so the rear frame just touched the ground behind it,” says Meeks.

“I didn’t tie off the pull chain on the hoist, but I would’ve if I weren’t sure about its brake.”

Meeks went to work removing the blades. However, the blades wouldn’t slide off even with the nuts off.

“I had to cut wire and twine just to get them loose and off,” he says.

“Removing the blades, sharpening, and replacing them took about an hour. I took advantage of having the under-deck exposed to clean out the grass pack and the corners. The grass always flows better when the deck is clean.”

Contact: FARM SHOW Followup, Gary Meeks, 238 W. Amber Rd., Verona, Va. 24482 (ph 540-487-0423).

From the archive · Full text
Feature story

Brackets Fine-Tune Closing Wheels

Featured source: E.J. Swihart

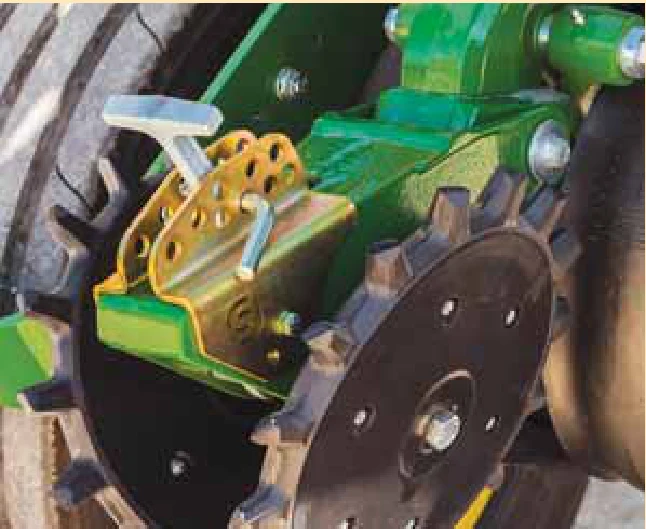
When a local farmer came to E.J. Swihart with a problem, the two devised a solution. The problem was being unable to fine-tune the closing wheel downforce on a Deere planter.

“He had an idea of what he wanted, which was a bracket with more adjustability,” says Swihart, Swihart Solutions.

“I started welding stuff up for a prototype. Several tries later, and I had what he was looking for.” Swihart had a set of brackets that mount to the original tailpiece on the closing wheel. Installation takes less than a minute. With nine holes versus Deere’s four holes, the farmer can choose any of nine downforce settings between 10 and 60 lbs. Each setting is spaced 5.5 lbs. from the previous one, with two settings lower than Deere’s allowed.

“In addition to increased accuracy and adjustability, the brackets keep the T-handle centered to prevent the spring from contributing to side drift,” says Swihart. Swihart made a full set of the brackets, which the farmer used for his 2023 planting. The farmer was tickled, and Swihart realized others might like the brackets, too. He showed the brackets to Brian Sieker at New Ag Supply, who really liked them and is now distributing them.

“I do a little of everything in custom fabrication, but what I’m really passionate about is developing new products that increase efficiency and productivity,” says Swihart.

“I like to work with farmers because they know exactly what they need to make their systems work better.” Swihart enjoys developing a solution as he did with the Set Exact downforce brackets.

“I like to look for a product that can help not just one farmer but thousands and then get it up to scale,” he says.

“One out of a hundred projects are things that more than that one client can benefit from. I have a lot of projects in the works and try to prioritize the ones with the most potential.” New Ag Supply offers the brackets for use on XP and ME Series Deere planters. They cost $66 each and include all needed hardware. Contact: FARM SHOW Followup, New Ag Supply, P.O. Box 347, Chase, Kan. 67524 (ph 620-938-7009; [email protected]; www.newagsupply.com) or Swihart Solutions, 602 E. 5th St., Enterprise, Kan. 67441 (ph 785-477-9854; [email protected]; www.swihartsolutions.com).