Practical ideas from FARM SHOW MagazineSubscribe · Free issue · Send us your shop tip
Subscribe to FARM SHOW
Issues / Vol. 41, No. 6 (2017)

Vol. 41, No. 6 (2017)

Money-Saving Repairs & Maintenance Shortcuts · Printed section pp. 32–36

37 selected entries · Complete text of selected entries

This issue’s section includes reader tips and feature-length shop stories. Held items and editorial notices are not reproduced.

Archive text: prices, coupons, availability and contact details reflect the original publication, not current offers. Reader methods are not universal instructions; follow manufacturer guidance and proper safety practices.

Reader shop tips

From the archive · Full text
Reader shop tip 1 of 2

Harold Quint

Individual tip 1 of 2 from this reader’s published contribution.
Harold Quint, Kirksville, Mo.

“One of the best additions to my shop was a Challenger 10,000-lb. capacity car hoist that I had shipped in for a total cost of $2,632 (www.challengerlifts.com). I’ve tested it with up to 15,000 lbs. with no problems. Sure beats crawling around underneath cars and pickups like a worm.

From the archive · Full text
Reader shop tip 2 of 2

Harold Quint

Individual tip 2 of 2 from this reader’s published contribution.
Harold Quint, Kirksville, Mo.

“One of the best repairs I ever made on the road was on a 1975 Ford 5-150 while traveling from Missouri to New York. The rear axle started smoking due to a bad bearing. We were able to locate a new bearing but not the axle, so the mechanics were not sure what to do. I said I knew a few tricks and asked for a torch, center punch, and hammer. I punched some offset dimples in the axle where the bearing would be seated and started building it up. I then ‘miked’ both the bearing and axle. When I got the axle to the exact diameter, I lightly heated the bearing inner race and slid it onto the axle and tapped it into place. The pickup ran for 6 years after that without ever getting a new axle.”

From the archive · Full text
Reader shop tip 1 of 2

Paul Moore

Individual tip 1 of 2 from this reader’s published contribution.
Paul Moore, Batavia, Ohio

“A hydraulic gear came off an Allis Chalmers 3500 engine on my place. My dealer said we have to pull the engine, but a neighbor boy with long skinny arms was able to reach through a 4-in. hole and retrieve the gear, which was stuck behind the starter. Those skinny arms saved us a lot of money.

From the archive · Full text
Reader shop tip 2 of 2

Paul Moore

Individual tip 2 of 2 from this reader’s published contribution.
Paul Moore, Batavia, Ohio

“Some county workers gave me an old steel bridge deck. I set it up over a drainage ditch and now use it to steam-clean equipment.”

From the archive · Full text
Reader shop tip

AARC

AARC, www.aarc-us.com; ph 715 639- 2042

AARC has a new bearing cleaner that flushes out wheel bearings fast. The company also makes a bearing packer that lubricates the bearing just as fast.

The bearing cleaner consists of a plunger inside a cylinder-shaped chamber; a screw-on, cone-shaped plastic base; and a small black cone. The operator fills chamber at least 3 in. deep with cleaning solvent. He then places the cone over the bearing and pushes down on the plunger to flush all the grease out of the bearing. At the same time, the cleaning solvent will be forced up through the bearing’s rollers. The bearing packer uses a similar principle to pressurize grease into the bearing. It can be used with any size standard grease tube.

From the archive · Full text
Reader shop tip

Allen Pederson

Allen Pederson, Nashua, Iowa

“I was having trouble with flat tires on my gravel driveway because of all the nails scattered around. I tried some fancy nail grabbers, but could only pick up a few. Then I tried using a round microwave magnet tied to a 3-ft. chain. It churns through gravel and grabs lots of nails. Amazing how many I picked up.”

From the archive · Full text
Reader shop tip

Allen Davenport

Allen Davenport, Godfrey, Ill.

“I use an infrared temperature gun to check for bad bearings on our combine. I wait until I’ve been going for about an hour and then check them. Infrared temperature guns are relatively inexpensive now on the internet.”

From the archive · Full text
Reader shop tip

Stephen Hewes

Stephen Hewes, Lyme, N.H.

“The splines on the power steering sector shaft on my Massey Ferguson 175 tractor stripped. Instead of replacing the entire assembly, I drilled through and used a tapered grade 8 bolt to secure it. I also welded to build up splines and then ground them down.”

From the archive · Full text
Reader shop tip 1 of 2

Carl Hopkins

Individual tip 1 of 2 from this reader’s published contribution.
Carl Hopkins, King George, Va.

“The pto shaft seal was leaking on my 3910 Ford tractor. The repair manual said to break the rear apart to fix. Instead, I screwed two sheet metal screws into the seal and used a slide hammer to pull the seal out. Then I used a long piece of pipe to push the new one into place. Worked great.

From the archive · Full text
Reader shop tip 2 of 2

Carl Hopkins

Individual tip 2 of 2 from this reader’s published contribution.
Carl Hopkins, King George, Va.

“When I was pouring the floor in my shop, I anchored pieces of chain in the concrete to use for straightening bent equipment, anchoring vehicles, and other uses.”

From the archive · Full text
Reader shop tip

Dieselcraft Engineering

Dieselcraft Engineering, www.dieselcraft.com; ph 530 613-2150

The company recently came up with a new test kit that shows you if there’s water in your diesel fuel. The kit consists of a capsule filled with yellow powder, a test tube, and a transfer pipette that’s used to take fuel samples right out of your vehicle’s fuel pump. As the powder settles in the test tube, you can see that it’s indicating water by a change in color to pink. If there’s no water in the fuel the powder at the bottom of the tube will remain yellow. Any pink spots in the water means there are 500 to 1,000 ppm of water in the fuel. If there’s more than 1,000 ppm of water in the fuel it will turn all the powder hot pink. Test kit sells for $44.95. The company says adding its Technol 403 diesel fuel conditioner to your fuel can solve the water problem. Technol 403 is designed to raise Cetane, improve fuel lubricity, increase fuel combustibility, and clean the fuel system. It’s sold in 8-oz. and 1-gal. containers. An 8-oz. bottle is enough for 62 gal. of diesel fuel. It’s sold in case quantities only. A case of twelve 8-oz. bottles sells for $160 plus $10 S&H. It’s also available in 1-gal. size bottles that each treat 1,000 gal.

From the archive · Full text
Reader shop tip

George Hillman, Jr.

George Hillman, Jr., Batesville, Ind.

“I attached a bungie cord to the steering column on my Farmall H tractor in order to pull the slack out of the transmission gears, which keeps them from shimmying. I used the same idea on my Farmall M. Works great.”

From the archive · Full text
Reader shop tip

Briggs & Stratton

Briggs & Stratton

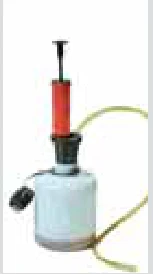
Changing the oil on lawn mowers and other outdoor power equipment can lead to messy spills. But with this new oil extractor pump, you don’t even have to remove the drain plug. You drop the tube into the oil reservoir and then pump the air out of the container. The resulting vacuum sucks the oil up through the tube and into the container. The oil extractor pump is sold on Amazon and at www.briggsandstratton.com in 1.6 and 4-liter models that sell for $24 and $40, respectively.

From the archive · Full text
Reader shop tip

Ron Melchert

Ron Melchert, Seymour, Wis.

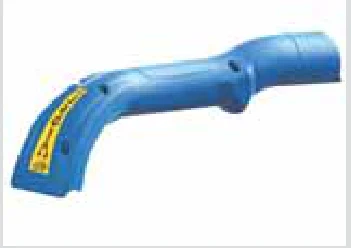
“I recently purchased a wrench extender from my local Matco Tools distributor (ph 866 289-8665; www.matcotools.com). It works great by providing extra torque and can also be used in hard-to-reach areas.

“You install your wrench – open end or box – into the jaw. There’s a 1/2-in. square drive slot at the bottom of the tool where you can also insert a 1/2-in. drive breaker bar.

“Sells for $79.95 on the company website.”

From the archive · Full text
Reader shop tip 1 of 2

David Simpler

Individual tip 1 of 2 from this reader’s published contribution.
David Simpler, Elkton, Md.

“I wanted to grease the pins and bushings on my backhoe. However, I couldn’t pump grease into the bushings on some of the grease fittings. I changed the fittings but it didn’t help. Then someone suggested that I adapt a zerk fitting to the hose on a Porta-Power, so I attached the Porta-Power’s 3,000-lb. psi flexible hose to a grease zerk connector. It worked.

From the archive · Full text
Reader shop tip 2 of 2

David Simpler

Individual tip 2 of 2 from this reader’s published contribution.
David Simpler, Elkton, Md.

“I didn’t want water getting into the vertical slant-cut exhaust stacks on my tractors, but I couldn’t find an exhaust cover for them. Some farmers use a tin can as an exhaust cover, but the cans always blow off.

“To solve the problem, I came up with what I call my ‘spring-loaded asparagus can cover.’ I’ve used this idea on all 3 of my tractors equipped with vertical exhaust stacks, and it works great. However, whenever I need to use the tractor for an extended period of time I remove the can to keep fumes out of my face.”

From the archive · Full text
Reader shop tip

Lawrence Goodman

Lawrence Goodman, Ionia, Mich.

“After I installed new brake adjusters on my tandem axle dump truck I needed a way to grease them, so I bought a 90-degree angle coupler that was designed for my grease gun. I borrowed the pipe from an old grease gun and attached a small pipe coupling onto one end, then installed a grease zerk in the coupling. I also welded a T-handle on the coupling so that it can be easily removed. Works great.”

From the archive · Full text
Reader shop tip

Jack B. Freeland

Jack B. Freeland, Mobile, Ala.

“The carburetor on my Deere 19 hp riding mower got gummed up after I used gas with ethanol. My local repair shop wanted $200 to clean the carburetor, and they had a 2-week service backlog.

“Instead, I went on eBay and ordered a new carburetor for the Briggs & Stratton engine for just $20. It was delivered in just 3 days with free shipping. It bolted right up in 20 min., and my mower now runs fine.”

From the archive · Full text
Reader shop tip

Bob Moty

Bob Moty, Crystal Lake, Ill.

“In your last issue, you wrote about someone who uses a shop vac with a 1 1/4-in. dia. hose to clear out clogged drains in sinks and bathtubs. My idea is to just use a garden hose. I stick the end of the hose down the drain and use a screwdriver to pack wet rags around the hose. Then while someone else holds the hose and rags down to keep them from blowing out, I turn on the water. I figured that since there’s already 50 lbs. of pressure in my water line, I might as well use it. That pressure will blow anything out.”

From the archive · Full text
Reader shop tip

Ken Ladd

Ken Ladd, Minneapolis, Minn.

“My cousin and I were trying to figure out how to store and apply our home brew mix of 50-50 automatic transmission fluid and acetone that we use as a penetrating oil to loosen up rusted nuts. I went on eBay and found some inexpensive vintage oil cans with spouts. The can shown at left in the photo has no gasket that could leak fluid. The other can does have a gasket, but hopefully it will stand up to use.”

Shop feature stories

From the archive · Full text
Feature story

“Mechanic Lift Seat” Great For Getting Around Shop

Featured source: Ned Stoller

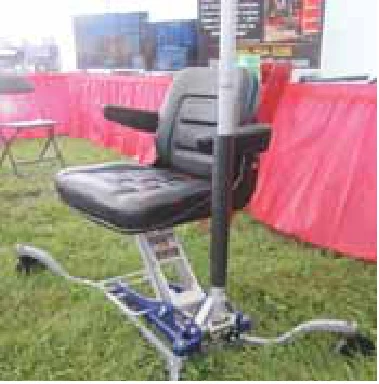
“This new mechanic lift seat raises, lowers and rolls for less stress on the body. We designed it to help farmers with leg impairments work on projects close to the floor and then rise to sitting or standing without trouble,” says Ned Stoller with Disability Work Tools, Lowell, Mich. The lift seat consists of a mechanic’s creeper equipped with a seat and a hydraulic floor jack. Pumping on the jack handle lifts the operator from kneeling level up to a sitting position, without using leg muscles. The seat can be lowered to within 8 1/2 in. of the ground and raised to a height of 24 in.

“The operator uses his arm strength to push and pull the unit into position, without having to crawl from one place to another,” says Stoller.

“The floor jack brings him into a sitting position, and from there it’s easy to stand up by holding onto the armrests.” A wide wheelbase and a 1-in. steel tubing frame make the lift seat stable and strong enough to support 280 lbs. Stoller designs and manufactures the mechanic lift seat along with other adaptive tools. He also works with the AgrAbility Project, and his DisabilityWorkTools.com website lists a raft of tools to help people continue to work. The mechanic lift seat sells for $649 plus S&H and is available on the website. An electric-operated model is also available for an additional $600. Contact: FARM SHOW Followup, Disability Work Tools, 12152 Cascade Rd., Lowell, Mich. 49331 (ph 888 354-3289; [email protected]; www.disabilityworktools.com).

From the archive · Full text
Feature story

“Pipe Spacers” Boost Floor Jack’s Lift Height

Featured source: Terry Benoit

Terry Benoit’s standard floor jack didn’t reach high enough to lift some of his farm equipment for service work. So the Orange, Texas, man made stackable “pipe spacers” that let him boost the jack’s reach 6 in. at a time.

“It works great on a lot of my farm equipment,” says Benoit.

“For example, I have a pickup with large tires. The jack can lift only about 19 in. high, but by adding 3 spacers I can increase the total lift height to 3 ft.,” says Benoit. He made the scrapers using scrap 4-in. dia. pipe, 1/2-in. thick round steel plate, and some 1-in. dia. steel rod. He used a metal bandsaw to cut the pipes 6 in. long and then welded a plate onto each end.

“The plates already had holes in them that were just the right size,” says Benoit.

“I welded a 1-in. long rod into the hole on half of the plates. Then I welded a plate with a rod on it to one end of the pipe and an unmodified plate to the other end.” Floor jacks are equipped with a removable, shallow round metal “dish” with a stub rod on the bottom that fits into a hole in the jack’s base. To add spacers Benoit removes the plate and inserts the spacers as needed, then puts the dish back on top.

“The spacers work something like lego blocks. I just place as many spacers as needed on top of each other to get the height that I need,” says Benoit.

“I recently used the spacers to raise the back end of my posi track skid loader so that I could work on the tracks. The floor jack was 2 ft. too short, so I added 3 spacers.”

Contact: FARM SHOW Followup, Terry Benoit, 1077 Bobcat Circle, Orange, Texas 77632 (ph 409 363-2569; [email protected]).

From the archive · Full text
Feature story

Ceramic-Coated Mufflers “Last Forever”

Featured source: Ed Vieth

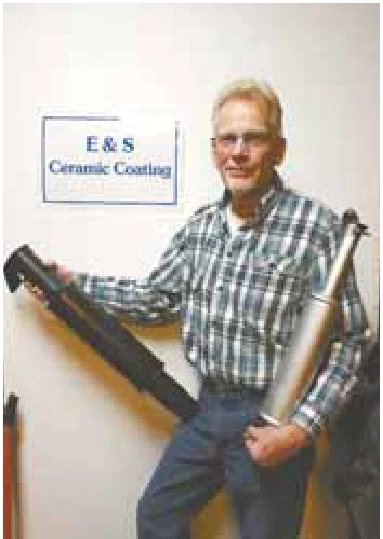
You can eliminate peeling paint on mufflers and manifolds by having them coated in ceramic. E & S Ceramic Coating can dress them up in either a black or silver coating.

“Ceramics will scratch like paint or porcelain, but it lasts better than even high temperature paint,” says E & S owner Ed Vieth.

“There is nothing worse to have a pristine restoration and then have paint peel off the muffler.” Vieth offers 2 coating processes. One is the traditional baked coating. However, it is limited by the size of his oven to items 31 in. or less. A second process cures with the heat of the tractor.

“Both processes are good up to 1,800 degrees,” says Vieth.

“However, I think baking might make a more durable coating.” Vieth sandblasts items immediately before coating. In the case of stainless steel, he blasts it with a black oxide.

“I have to use gloves on prepared pieces to ensure that no impurities interfere with the coating process,” says Vieth.

“I prefer to sandblast and coat in low humidity.” Vieth emphasizes that ceramic coating is not rustproofing. The coating is made from clay, and it’s porous. If the tractor sits outside any length of time, a muffler or exhaust pipe can rust through.

“If the ceramic-coated component is cared for, it can last forever,” says Vieth.

“If it is out in the rain, the best thing you can do is to fire it up and heat it up.” Vieth has a flat charge of $50 for mufflers under 30 in. Slightly longer mufflers are priced at $70. Single manifolds are priced at $75 and a double at $85. Exhaust pipes are priced at $50.

“If you have an extra large muffler, I need measurements before I can quote the job,” says Vieth.

“The actual coating material is the most expensive part of the entire process.” Currently, Vieth has a turn-around time of about 2 weeks on most mufflers. However, that may change after the first of the year. When he retires from his full-time job, he’ll have more time for E & S. He also does ceramic coating for HAPCO parts when requested by a customer. Contact: FARM SHOW Followup, E & S Ceramic Coating, 3436 Sturdevant St., Davenport, Iowa 52806 (ph 563 424-2672 or 563 271-3551; [email protected]).

From the archive · Full text
Feature story

2-Post Car Lift Can Handle Little Tractors

Featured source: William Brauer

William Brauer gets double duty out of his hydraulic, 2-post car lift, thanks to the garden tractor adapter he made. Twin sets of rails attached between the lift arms make it easy to work on his collection of 7 Deere 140 lawn and garden tractors.

“I looked at commercial lift adapters, but they were too expensive,” says Brauer.

“The open center between the lift arms makes it easy to change oil and work on the tractors.” Brauer fabricated the attachment using lengths of 2-in. square tubing for 2 sets of wheel support rails. They extend between the arms of the full-size lift. Short lengths of 2-in. channel iron are bolted to the ends of the rails to form parallelograms. A 2-in. steel pipe is bolted to the underside and at the center of the channel iron. It is sized to match holes in the arm ends that normally house vehicle frame rest pads. To attach the rails, Brauer removes the pads from the arms and slips the pipe into their place.

“The front set of rails (first to be driven over) are telescoping to accommodate wider wheel bases,” explains Brauer. The rails are 2-piece with lengths of 1 1/2-in. steel bar inside them. Brauer can slide them apart as needed. He regrets not making the rear set of rails telescoping as well.

“I have a Deere 318 garden tractor that has wheels that are a little large for the rails,” says Brauer.

“However, I have had a zero-turn mower on it. Even the way it is, it’s very versatile.” Brauer fabricated removable ramps for the rails. They consist of 4 sets of 8 by 10-in. steel pads, each with a 2-in. bend in one end to fit over the front rails and “lock” on. Each set of ramps is connected by light chains to a block of wood that sets between the rails. A single set of ramps fits the rear or far rails with chains that wrap around the rear most rail.

“The ramps make it much easier to drive over the rails when mounting a tractor on them,” says Brauer.

“When I raise the lift, the wood blocks drop down so the wheels rest on the rails.” Contact: FARM SHOW Followup, William A. Brauer, 28W574 Garys Mill Rd., Winfield, Ill. 60190 (ph 630 231-2250; [email protected]).

From the archive · Full text
Feature story

He Specializes In Rare IH Parts

Featured source: Glen Mlnarik

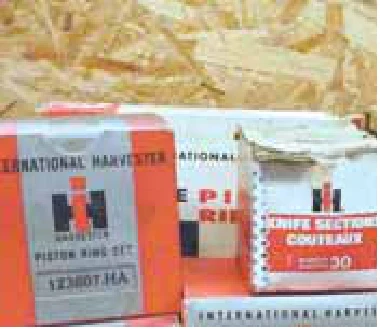
When International Harvester went out of business in the mid-1980’s, Glen Mlnarik got into the business of buying and selling IH parts. His dad and uncle were IH dealers for 26 years in Dodge, Neb., and Mlnarik bought as much as he could at liquidation auctions.

“I saw that people were restoring tractors and that business really started taking off in the early 1990’s,” explains the Howells, Neb., owner of Little Red Tractor Company, LLC. His inventory of parts covers models from the late 30’s (F12 and F20 IH) to the 60’s (460 and 560 IH). He carries everything he can get hold of from good used parts to overseas-built aftermarket parts for IH and Cub Cadet. Besides tractor parts and manuals, he carries parts for implements and has IH Chromed tools. Some of the parts in biggest demand are original gauges, tachometers and emblems –“the bling,” Mlnarik says. They are getting more difficult to find, and restorers seek them out. With more competition on the Internet, Mlnarik says it’s more difficult to find them. But he’s always on the lookout and tries to be a good source of information to customers. The retired Master Chief Petty Officer and his wife, Joan, have kept their business small intentionally and run it as a part-time retirement business (Monday-Thursday). While they have a shop and a website, most customers contact him by phone. It’s important to get the right model number, year and sometimes the serial number, Mlnarik says. His experience restoring tractors and selling parts and an extensive library of IH parts books help get customers what they need.

“It’s so much easier to do it on the telephone,” he explains.

“I treat every person with the same amount of time and effort to get it right.” He keeps information about customers’ tractors on file so that he can quickly fill followup orders.

Contact: FARM SHOW Followup, Glen Mlnarik, 124 Marion St., Howells, Neb. 68641 (ph 402 986-1352; 402 380-4202; www.littleredtractorco.com; [email protected]).

From the archive · Full text
Feature story

Ford “N” Shop Tips

Featured source: Mark F. Burris

Mark Burris describes his Ford 8N as a best buy, but he has done a fair amount of tinkering on it. That includes dealing with a lack of oil pressure and learning how to partially split a tractor.

“The tractor was a basket case when I got it with bad tires, a pulled starter, and worn out valves,” says Burris.

“By the time I finished the overhaul, I had learned quite a bit about N tractors. Since then I’ve overhauled 3 more.” The oil pressure problem is a common one with the N’s, he suggests, due to the placement of the pump. On the N’s, it sits alongside the block, not in the oil pan like later tractors.

“If a Ford 2, 9 or 8N sits for a long time, it can appear to have no oil pressure, even though it did when you last used it,” says Burris.

“What happens is the motor loses its ‘prime’. You can tear the motor apart and find nothing wrong with it.” To regain the prime, Burris suggests over filling the crankcase almost to the top. Start it at idle and watch the oil gauge.

“Once you have pressure, turn off the motor and drain out the excess oil,” says Burris. If that doesn’t take care of the problem, he invites readers to give him a call. He will help identify other possible problems and solutions. Another shop tip Burris passes along is how to almost split a tractor, something he first tried when he needed to replace a ring gear on the flywheel. All it takes is a couple of pieces of perforated angle iron and 2 pieces of all-thread rod.

“I use the perforated angle iron to lock the front wheels together,” says Burris.

“I disconnect the tie rods and slip them backwards on the axle. If there is room, I slip the angle iron through in front of the fan and connect the steering arm to it with 3/8-in. bolts. If not, I’ll use a brace to go underneath.” He suggests tightening the tie rods up so they don’t twist at the steering arm. Once the front wheels are stabilized, he jacks up the front of the tractor enough to get a car stand or wood block supports under the transmission. This locks the rear axle in place. As the goal is to partially split the tractor, he pulls the hood off and disconnects oil lines and electrical wiring running between the engine and the transmission halves of the tractor.

“I pull 2 bolts on the bell housing running forward to the engine block just ahead of the oil pan and 2 just below it,” says Burris.

“These are 7/16-in. bolts, and I slide 18-in. lengths of 7/16-in. all-thread rod through the holes into the engine block.” With the all-thread rod in place, Burris removes the other bolts from the bell housing. He says he can then wiggle and push the engine end of the tractor forward while watching to be sure the all-thread stays seated in the engine block and in the holes of the bell housing.

“The engine balances on the all-thread and the front axle,” explains Burris.

“I’ve never had any problem, but for safety sake, you could block the front end as you do on the rear.” Burris has used the technique to work on the clutch, the flywheel and the starter.

“You can buy a clutch kit and replace the whole thing or pull the flywheel off to replace the ring gear,” he says.

“If you have it split, it’s a good time to replace the pirate bearing on the flywheel or the throwout bearing on the back of the clutch. I replaced the Bendix on the starter without pulling the starter.” Simply reverse the process to put the engine and transmission back together, adds Burris. He says it is a quick process that speeds many repairs.

“I can do a clutch replacement in about 4 hrs. this way,” he says. Burris is eager to help other N owners solve their repair problems. He suggests calling after 8 p.m. during the week or any time on weekends. Contact: FARM SHOW Followup, Mark F. Burris, 20301 Burr Oak Dr., Coupland, Texas 78615 (ph 512 639-8363).


From the archive · Full text
Feature story

Corn Crib Converted Into Farm Shop

Featured source: Sue Edwards

“I needed a workshop and considered tearing down my old corn crib and putting up a new building, but I didn’t want to spend the money. Instead, my boyfriend and I covered the old crib with some used steel siding, built a pair of large sliding doors, and painted the building red with white trim. I’m happy with the result,” says Sue Edwards, Dodgeville, Wis.

“Structurally, the corn cribs were very strong,” says Edwards, who made the conversion last spring.

“The oak and pine lumber in it was in excellent shape.” The 22 by 40-ft. corn crib had two 7-ft. wide bins with a 7-ft. wide drive-through alley running down the center where a corn sheller’s dragline could be laid down. Workers would then rake ear corn into the dragline. The bins had raised wooden floors on concrete foundations, while the alley was made of dirt and located one foot below the bin floors.

“I show horses and ponies and use the building to store my carts and a buggy. I also refurbish the equipment and needed a nice, dry place where I could work on them over the winter,” says Edwards.

“I was going to tear the building down and start over because of the uneven floor, but then decided to fill the alley with enough gravel to make everything level. I installed lights above the center alley and below the crib’s loft. I also removed some cross braces that supported a loft in order to open up the alley.” She bought used sheet metal from a local Amish salvage yard and used self-tapping screws to attach it to the crib. She plugged the screw holes with metal epoxy, and then applied two coats of exterior latex paint to the metal. She also installed a small dusk-to-dawn floodlight at each end of the building. Her boyfriend used 2 by 4’s and 2 by 6’s to build the sliding doors.

“The crib’s metal roof was too steep for us to safely paint it, so it’ll have to wait until we reroof it some day,” says Edwards.

“We spent a little more than $1,000 for the steel, lumber to frame in the door, door tracks, and paint.” Contact: FARM SHOW Followup, Sue Edwards, 2796 Spring Valley Rd., Dodgeville, Wis. 53533 (ph 608 935-7079; [email protected]).

From the archive · Full text
Feature story

“Built-To-Last” Power Steering Kit

Featured source: Randy Raschein

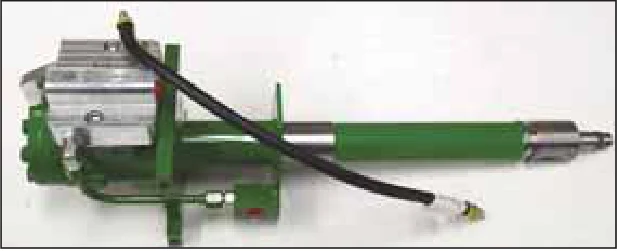
“The factory steering valves on older tractors eventually break down internally. Our new power steering kit is built strong to last and will eliminate troublesome rebuilds. It works like factory steering, yet doesn’t destroy the tractor’s antique value by requiring you to drill holes or weld anything in place,” says Randy Raschein, Farmland Tractor Supply, Tangent, Oregon. The kit is designed to replace the factory steering boxes on Deere 10 and 20 series tractors including the 2510, 3010, 3020, 4010, 4020, 4320, 4520, and 4620 models. Kits for Deere 30 series tractors should be available by the end of the year. Kits are also available for Ford New Holland tractors including the 4110, 4610, 4630, 4380, and 5030 series; and the 5000, 5600, 5610, 5900, 6600, 6610, 7600, and 7610 models. All kits come with a modern hydrostatic steering valve. According to Raschein, the kits are made with 100 percent American-made components and come with a 2-year warranty.

“These kits include self-lubricating bronze bushings and stainless steel hardware. No modifications are needed, as the kits use all the original steel lines, fittings, throttle control, and steering wheel. All kits come with everything needed to install and instructions are included,” he says. The kits sell for $950 plus S&H. The price does not include steering pump or steering arm. Contact: FARM SHOW Followup, Randy Raschein, Farmland Tractor Supply, Inc., 32427 Old Hwy. 34, Tangent, Oregon 97389 (ph 877 928-1646; [email protected]; www.farmlandtractor.com).

From the archive · Full text
Feature story

Coolant Filter Protects Powerstroke Diesel Engines

Featured source: Riffraff Diesel Performance, Inc.

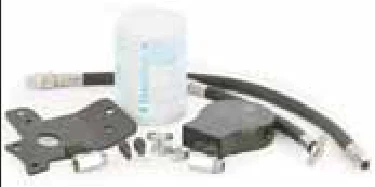
Contributors to online diesel forums say that adding a filter to your Ford Powerstroke diesel engine coolant system is an economical way to ease maintenance requirements and provide operator peace-of-mind. This $120 accessory, available from aftermarket companies such as Riffraff Diesel, is easily installed even if you have limited mechanical experience. The payoff is a product that keeps coolant clean by filtering out sand, metal and dirt particles that cause abrasive wear and plugging of small cooling system passages. Riffraff’s coolant filtering system for the Ford 7.3L Powerstroke filters a small amount of coolant with each pass. It uses a Donaldson spin-on filter that’s easy to change as needed, usually 3 times in the first nine months and once yearly thereafter. The filter removes casting sand and metal shavings in a new engine to keep those abrasive nuggets from aggravating the water pump, ERG cooler and engine oil cooler. The device comes with a special bracket that mounts to factory holes on the Super Duty and includes all fittings needed for installation. Sand and metal particles get in a coolant system during manufacturing because Powerstroke blocks are molded in casting sand and holes are drilled for cooling ports.

Chris Carter is a knowledgeable diesel mechanic who says you cut open the first filter from an aftermarket installation and see almost a teaspoon of abrasives removed from the coolant. He says people who don’t want to add the aftermarket kit should change the coolant in a new engine at least twice in the first 6 months and flush the system before refilling it each time. Contact: FARM SHOW Followup, Riffraff Diesel Performance, Inc., P.O. Box 416, Eagle Point, Ore. 97524 (ph 866 446-3360; www.riffraffdiesel.com).

From the archive · Full text
Feature story

Thermostat And Timer Operate Block Heater

Featured source: Ron Post

“I’ve got a 45 year old Allis Chalmers 185 diesel that’s really hard to start when it’s below 50 degrees. I used to have it plugged in continuously about 6 months of the year and I know for a fact that the heater was using a lot of electricity,” says Ohio farmer Ron Post.

“I figured out a clever way to use the heater intermittently rather than continually and save myself money in the process.” Post built a simple junction box that connects a thermostat and a timer, so when the block is maintained at a certain temperature, usually 50 degrees, the heater won’t engage. When the block drops to around 40 degrees, the thermostat triggers the block heater switch so that device warms up the block.

“I took a regular electric source and ran a line into a 4-way junction box,” says Post.

“I plugged in the hot line first, then plugged the other line into the thermostat. Then I used power from the hot side and ran that into the thermostat, then into the junction plug. I have it set up from the hot side to a timer, which I bought at the local hardware store. When I’m not using the thermostat, I just go into the timer and flip out the indicators so it starts and stops intermittently a couple times in the night.” Post says the device worked so well on his tractor that he made another one that turns a heater on in his pump house. He uses a third one to warm up his snowplow truck in the winter.

“I’ve also used it to run a small heater in an old freezer where I keep my tools in the wintertime. It keeps them nice and warm, and I don’t have to bring them into the house. The device is so simple I think it would work on anything where a person needs to control a heat source and not have it run continually. On the tractor I think it kicks in maybe once an hour for 15 min. when it’s really cold, and probably once every 2 or 3 hrs. when it’s around freezing.” Post says he’s probably got about $60 invested in each device, about $40 of which goes for a good thermostat and 10 ft. of cord with a junction box. The indoor/outdoor timer he says is only about $6. Contact: FARM SHOW Followup, Ron Post, 726 Skeels Rd., Celina, Ohio 45822 (ph 419 942-1897).

From the archive · Full text
Feature story

Power Tool Repair Parts

Featured source: Toolpartsdirect.com; ereplacementparts.com; MikesTools.com; Partstree.com

www.Toolpartsdirect.com; ph 888 358-0332: If you need a part to fix one of your power tools, chances are you’ll find it here because the company has about 850,000 different parts for some 30,000 different models of tools. All you do is type the model number in the website’s search bar. If you don’t have the model number, click on the link underneath and it’ll tell you how to find it. www.ereplacementparts.com; ph 877 346-4816: This company stocks parts for just about every major power tool manufacturer, and ships them quickly. They also explain in detail how to quickly find tool model numbers for many different brands. Extensive “how to repair” guides and videos are provided.

www.MikesTools.com; ph 714 558-8360: They offer a wide variety of parts as well as woodworking and metalworking tools which are listed by manufacturer. The company occasionally will take used tools in on trade, or make a special purchase of factory reconditioned tools, and then list them on the website. www.Partstree.com; ph 512 288-4355: This company is an authorized servicing dealer for every brand they sell, and they sell only new genuine OEM original parts. As a result, they say you can be certain the parts you order will fit your equipment exactly as intended by the original manufacturer. More than 60,000 parts numbers are in stock, from more than 30 major outdoor power brands.

From the archive · Full text
Feature story

Garage Door Panels Used To Finish Farm Shop

Featured source: William Brauer

William Brauer made a good looking insulated ceiling for his farm shop using garage door panels that he got as seconds from a nearby factory. Installation was easy.

“I installed 2 by 2’s at the bottom of the trusses in my 30 by 60-ft. shop and laid in the panels like a drop ceiling,” says Brauer.

“I used the whole door, up to 10-ft. widths. They have 2 in. of insulation sandwiched by metal panels. The sandwiching makes a rigid panel so there is no sagging.” Once they were in place, he laid another 3 1/2 in. of insulation on top and covered it with Tyvek. It helps keep his shop warm. When he started the project, he was buying seconds from a nearby factory. That ended when garage door retailers began buying the seconds. They were using them to replace rusted doors that were still under warranty.

“The factory stopped selling seconds altogether,” says Brauer.

“However, the retailers couldn’t get rid of the bad doors they replaced, so I started picking them up.” Brauer traveled to dealers between Chicago and the Quad Cities to pick up doors.

“I didn’t care what color they were on the outside because they were always white on the inside,” says Brauer.

“With their seals, they fit together real well.” Contact: FARM SHOW Followup, William A. Brauer, 28W574 Garys Mill Rd., Winfield, Ill. 60190 (ph 630 231-2250).

From the archive · Full text
Feature story

Giant Lazy Susan Makes Tools Easy To Find

Featured source: Stephen Bashista

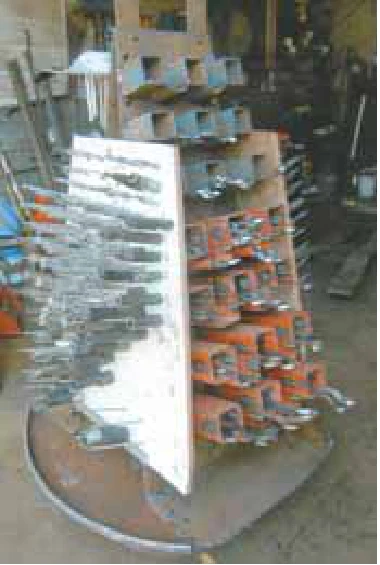
Stephen Bashista has an organizer idea for the “not so perfect farm shop.” His four-sided Lazy Susan makes it easier to find the assorted wrenches and sockets he has collected over the years. It spins for easy access because of the tandem axle manure spreader wheel and hub he set up as the base. Beefed up with plates welded to the shaft and metal sides to create a 48-in. tall A-frame, it’s durable and heavy. With a handle on the top, Bashista can move it anywhere using a loader with a chain or forks.

“I usually stick it in a corner of the shop. It turns so the tools come to me,” explains the Southampton, Mass., farmer. The two 3/16-in steel plate sides have wrench cups - 2 1/2 to 3-in. thin wall square tubing cut 3 1/2 to 10-in long to hold various size 1/8-in. wrenches - with troughs between to hold 1/16-in. wrenches. Slotted shelves hold socket wrenches.

“I left an open space at the bottom of each cup about 3/8 in. wide to let out the dirt and welded the top and part of the sides,” Bashista notes. The other two sides are made of 32-in. tall by 20-in. pieces of 3/4-in. plywood on 1-in. angle iron bases. One side is for metric sockets and the other is for SAE sockets.

“I pre-drilled it at 15 degrees for 16D finish nails for small sockets. The pegs for larger sockets are Timberloc screws with cutoff heads at 7 in., with a small flat area ground onto the shank side for the drill chuck to grab,” Bashista says. To make it easier to find the right size tool, he organized them by size from small to large.

“I built this in 2016 because I didn’t have a good toolbox setup,” Bashista says.

“I had odd stuff around, and it was a mess to find them and sockets were all over the place.” When he needs to, he can move it outside to work on equipment in the yard, he says. Contact: FARM SHOW Followup, Stephen Bashista, 61 Pleasant St., Southampton, Mass. 01073 (ph 413 527-4104).

From the archive · Full text
Feature story

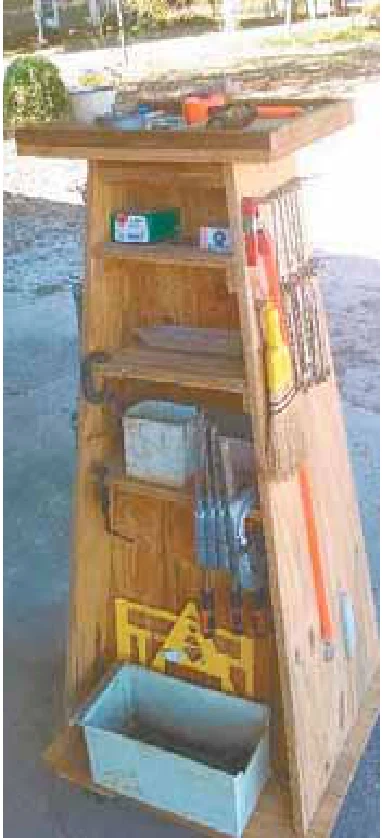
“Tip-Proof” Tapered Tool Caddy

Featured source: Carvel Cheves

Carvel Cheves’ tool caddy keeps his wrenches, sockets and other tools organized and close to the job. The cabinet sides taper from 22-in. edges at the bottom to 10-in. edges at the top.

“The taper makes it hard to tip and helps keep sockets and wrenches hanging in place,” says Cheves. Hangers for the tools are 3 1/2-in. torx screws that were screwed through from the back side. Cheves used 5/8-in. plywood for the sides. The caddy has 3 sides, with one side open for shelves. He hangs clamps, spare tools, and supplies in that space, including a magnet tray.

“It’s handy for holding nuts and bolts when I’m taking apart a piece of equipment,” says Cheves. The caddy sits on a 26-in. square base with wheels at the corners. Cheves used 2 casters and 2 straight-line wheels so he can steer it into place at a work station.

“I didn’t have a plan when I started,” says Cheves.

“As I finished it, I looked at the top and thought, why waste the space.” He then added a 22-in. square top with raised sides to make a tray. Cheves had an appliance service business for 39 years. When he retired, he had plenty of tools. He credits his caddy with helping keep some of them in order and close at hand. Contact: FARM SHOW Followup, Carvel Cheves, P.O. Box 219, Bunn, N. C. 27508 (ph 919 496-2575).

From the archive · Full text
Feature story

His Online Videos Teach Transmission Repair

Featured source: Jim Williams

Jim Williams teaches automatic transmission repair to anyone who wants to learn at no charge. Courses include the most popular GM, Ford and Chrysler transmissions. The 8-hr. training programs can be found on YouTube as well as on Williams’ website where he also sells the parts and accessories needed to repair or rebuild transmissions. The videos are professionally presented with the actual transmission front and center. Williams shoots them in a studio with no distracting background noise. He is trying to do for others with video what he said was done for him decades ago. When he was 17, his transmission broke down. Unable to afford the $500 repair costs, he bought Peterson’s Big Book of Auto Repair with a section on transmissions. Black and white photos and step-by-step instructions helped him make the needed repairs. That led to a 30+ year career in transmission repair, including running his own transmission repair shop for 25 years.

“I want to show people how they can do it themselves,” says Williams.

“If they run into a problem or have a question, they are welcome to give me a call to discuss it.” Each video starts with an introduction that encourages the viewer that they can indeed repair their transmission. Each transmission or transmission group has its own 8-hr.

presentation. They are broken down by Part 1 Assembly and Part 2 Disassembly. Each part is divided into lessons, making it easy to watch in natural segments, drop back and review, or pick up where you left off. While Williams likes teaching people about transmissions and empowering them to do their own repairs, the videos also serve a commercial purpose.

“If they find the videos on YouTube, hopefully, they will link to my website for any parts they need,” says Williams.

“If they find them on my website, I hope they will stay and order parts there.” Parts in his online store range from a $1 E-clip for a parking rod to a $399 deluxe super kit for rebuilding a transmission.

“People who don’t have a good internet connection can order the course on a thumb drive,” says Williams. Thumb drive collections of individual or multiple collections can be ordered by phone or from the online store. Prices generally run around $39 for individual courses. To find his videos, just search at YouTube.com for “Transmission Bench Videos.” Contact: FARM SHOW Followup, Transmission Bench, 157 Greensprings Ct., Martinez, Ga. 30907 (ph 706 414-9945; [email protected]; www.transmissionbench.com).