Jerry Brandt
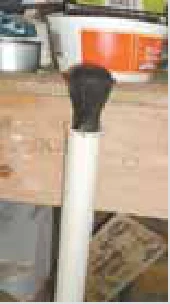
“I was always laying my battery tester and anti-freeze tester down somewhere and then accidentally breaking them. I solved the problem by attaching a couple pieces of pvc pipe to the side of my work bench to hold them.”
Money-Saving Repairs & Maintenance Shortcuts · Printed section pp. 36–39
33 selected entries · Complete text of selected entries
This issue’s section includes reader tips and feature-length shop stories. Held items and editorial notices are not reproduced.
“I was always laying my battery tester and anti-freeze tester down somewhere and then accidentally breaking them. I solved the problem by attaching a couple pieces of pvc pipe to the side of my work bench to hold them.”
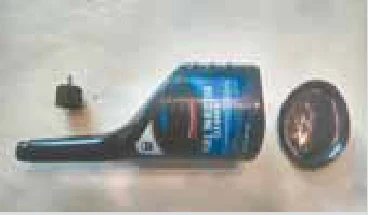
“I find that an empty fuel injector cleaner bottle makes a good funnel. To store the bottle I screw the cap to the bottom of a shelf and hang it there. That way whenever I’m not using the funnel it stays clean and handy.”
“The slide gate on my grain bin sump was hard to open and close, so I designed and built this chain/crank system that works like a garage door opener. I attached bearing brackets to support a sprocket and crank that I mounted on the bin unloading auger, and I also attached a bracket and pulley to the bin. The chain that runs around the sprocket is attached to a rod on the slide gate. To open and close the slide gate, I just turn the crank.”
“Here’s how I salvaged my 12-volt cordless drill after the original battery packs failed. I bought a small 12-volt gel cell battery from a surplus store. Then I cut the top off an old battery case, extended the wires from the drill, and strapped the new battery onto the bottom.
“The drill is now a bit heavier than before, but it has more torque than it did with the original batteries and will run forever. When the battery needs a charge I just hook it up to a 12-volt charger for a few hours, without even having to disconnect the battery from the drill.
“I salvaged an 18-volt flashlight from a drill kit by replacing the 18-volt bulb with a 6-volt bulb from a 4-cell flashlight. Then I hot glued the bulb to a 4-cell ‘D’ battery holder from Radio Shack. These aren’t rechargeable so I just use it as a 4-cell flashlight. It works great. It stays where I put it, and I can rotate the lamp head for the best angle.”
“The on-off solenoid switch on my 1994 Dodge pickup equipped with a Cummins diesel engine went bad. I saved money by substituting the push-pull cable off a tractor.”
“We fill 22-oz. squirt bottles with Luboil multi-purpose lubricant and squirt some onto each sealed bearing every day that I’m using a particular implement (www.conklin.com).
Luboil keeps the seal soft so that it grips the shaft and keeps dirt and dust from getting into the bearing. We haven’t had a sealed bearing fail for several years, as long as it’s located where we can put Luboil on it.”
“I made a simple nail driver to get into hard-to-reach areas using a piece of 1/4-in. round tubing and a 1/4-in. dia. steel pencil rod. I slide the rod into one end of the tube and weld a solid piece of steel to the other end. I cut off the pencil rod so it’s inset inside the tube a bit. I just pound on the piece of steel on top of the tube to drive the nail.”
“I have an old golf cart that is battery-powered. It runs on 36 volts and has six 6-volt batteries. The 36-volt charger it came with stopped working. Ebay wanted lots of money for one. I bought 3 cheap 12-volt chargers at a yard sale and charge 2 batteries at a time with each one. I plug them all in at once and put them on a timer. Works great.”
“To loosen a stuck allen head screw in a locking collar on a bearing, just hit the collar with a big punch on each side of the screw. Be careful not to hit it so hard you pinch the threaded hole. This method is much easier than trying to heat the screw and works just as well.”
“Regular maintenance of my New Holland 855 round baler is very important because of the poor design of some of the components on this chain-driven baler. For example, the bale rollers ride on ball bearings that need regular oiling or they will quickly go bad. They each cost $50.
“Also, there are 10 rollers on this baler and it’s not only very expensive to replace them, it’s also a major job.
“The baler came with a 2-gal. plastic container that holds oil. It lubricates the chain-drive with a 1/8-in. plastic tube when the door is open. However, the door is open only long enough to oil part of the chain. So I mounted hooks on each side of the baler to hold a 5-gal. pail of oil with a 1/4-in. tube feeding out the bottom. Before I start baling, I hang up the pails and engage the pto drive, running the machine until the chain is well-oiled. Then I take the pails off the baler and I’m ready to bale.”
“Here is a time-saving idea I came up with. I was building a new hay rack and had to drive in a bunch of 6-in. long 60D nails. Driving all those nails with a maul got tiring real quick. So I came up with the idea of using an air chisel that came with a planishing hammer. The shaft happened to fit through a 3/4-in. drive by 1 1/2-in. socket. All I had to do was hold the socket on the nail and drive it in. Worked great.”
“I used two 5 by 6-in. treated poles 11 ft. high in my shop to support a 12-in. steel I-beam running from one side to the other. Then I fitted an overhead trolley to lift heavy equipment, such as rear wheels off a tractor. The chain hoist I use will lift 2,000 lbs. Very simple and handy.”
“I read with amusement in your last issue how Steve Cunningham of New Hampshire took a sledge hammer to a Tecumseh engine after years of hard-start problems. I have also been tempted to make the same ‘adjustment’ to one of these engines. However, I may have a solution for other sufferers. I discovered by accident that if I leave the fuel cap loose after filling and then pump the primer bulb on the carburetor, the engine will start more easily, usually on the first or second pull.
“I was telling a co-worker about this problem and he told me about a guy he knows who fixes Tecumseh engines by cutting a small notch on one side of the choke plate with a round file. He says the choke on these engines is too restrictive so cutting the notch opens it up some.”
“I needed a cheater bar to put more leverage on my big wrenches. So I cut and welded two small pieces of angle onto a length of square tubing so I can easily slip a large wrench into it. Easy to use and I get a lot more leverage.”
“Since reading in FARM SHOW about using a 50-50 mix of acetone and automatic transmission fluid as a penetrating oil, I’ve used it for all kinds of jobs. It’s amazing. I mixed some up and gave it to a friend who runs a small engine repair business. He had sworn by PB Blaster for years but quickly became a believer in this low-cost mixture. The only trouble I’ve had is finding a good oil can to hold it. I tried a regular pump oil can but the acetone quickly evaporated, leaving just the ATF. So I put some in a small shampoo bottle with a small flip top. It worked great for about 5 hrs. until the acetone turned the plastic bottle into goo. Plastic pop bottles work longer but just pouring the liquid out of it can be messy and wasteful. Has anyone found a better solution?”
“Instead of jamming a nail or screw into the tip of a caulking or silicone tube for storage, which really doesn’t work that well, screw an electrical wire nut onto the tip. It keeps the contents much fresher.
“To clear spider webs out of the eaves in your shop or elsewhere, chuck a straight wooden dowel into your electric drill. Just pull the trigger and wave it through the webs. Works so well you’ll go looking for more spider webs.”
“Preparing tractor batteries for winter is a problem in the north country. I used to bring my equipment inside for winter but it didn’t seem to extend battery life. A friend finally gave me this advice: Make sure the batteries are fully charged in the fall on equipment that you’re not going to use during the winter. Then disconnect the ground wire. Leave the battery in place all winter. First thing in the spring, charge the battery before starting it up. It’ll be ready to go and the battery will get maximum life. This method really works.”
“I built a very heavy-duty workbench using the frame of an industrial air conditioner that’s made with 4-in. sq. tubing with 1/4-in. sidewall. The top is a piece of 3/4-in. thick 60 by 120-in. plate steel. It’s fitted with 2 caster wheels and two standard wheels and has two stabilizer legs, a tongue for moving, and 4 steel drawers made from scrap sheet metal. It weighs a little over a ton and is practically indestructible.”
“Sometimes the simplest things make your life easier. That’s what makes FARM SHOW interesting to me.
“Here’s an idea that really helped me out in the shop and it didn’t cost a thing except for a couple 2 by 4’s. I bought a Ryobi table saw that came with a flimsy stand that ended up bending soon after I began to use it. I put up with it for a few years until I spotted a used grill at the dump and decided it would make a great saw stand replacement. I just took off the grill parts, added two 2 by 4’s, and screwed the base of the table saw onto the 2 by 4’s after removing the old table saw legs. Now the saw is truly portable and a lot sturdier.”
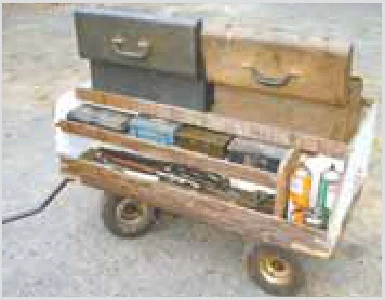
His tool wagon makes maintenance and repair easy. Instead of running back and forth for tools, he pulls his tools with him.
“I built a box with tool bins and shelf space for multiple tool kits, as well as lubricants and a first aid kit. It is designed to sit on the running gear of a small 4-wheel wagon. I can pull it around to whatever piece of equipment I’m working on. The running gear is the size of a child’s wagon, but heavier built with wider wheels. I picked it up at Northern Tool (www.northerntool.com). There are 10 bins on the lower level and shelves on 2 higher levels. The entire box can be lifted off the running gear. It can also be slid into the back of a pickup for use in the field.”
Sharpening mower blades and doing other work on lawn mowers got easier after Mike Moore built a hoist out of an old air bumper jack.
“I bought it from an old filling station and modified it for my shop,” he says. He credits James Bowie in Tipton, Iowa, for welding up the extension on the front that securely holds the mower’s front wheels in place when the front end is lifted up. Square tubing slides in and out for different width machines. A safety lock locks the lift in place. The $200 he spent to buy and modify the jack was well worth it, Moore says, compared to ratcheting up a manual jack.
“It is fast, heavy-duty and portable. You can easily roll it where you want it,” he says. Contact: FARM SHOW Followup, Mike Moore, 604 Meridian St., Tipton, Iowa 52772 (ph 563 889-0703).
Why settle for cheap, poor quality drill bits that don’t last when you can get professional metalworking bits that you won’t find in any big box store? Silas Zimmerman, Zimmerman Drill Bit Sales, has been supplying machine shops, fabricators and other metalworking professionals with drill bits for the past 4 years.
“We try to sell only high-quality, preferably U.S.-made, products that we know will meet or exceed customers’ expectations,” says Zimmerman.
“We have thousands of drill bits out there in the years we’ve been in business and have had no negative feedback.” As a wholesale distributor, Zimmerman can’t sell retail, but his commercial customers often do. If FARM SHOW readers call or write him, he will provide the name of his nearest customer prepared to do resale of his premium bits. Zimmerman says one reason he puts quality first is that he is an end user.
“I like to sell things that I can feel good about selling,” he says. He says that 99.9 percent of the drill bits he sells are from one manufacturer, Norseman/CTD (Consolidated Toledo Drill).
“I wouldn’t use any other,” says Zimmerman.
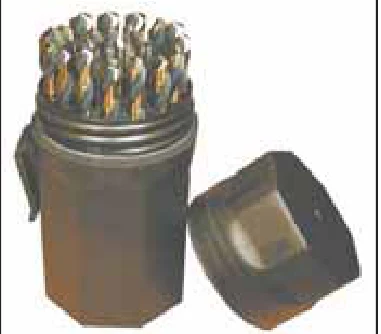
“I’ve tested them in stainless steel, spring steel, all different materials, and they passed the tests well. One customer said that they drill through stainless steel like it was cheese.” His most popular seller is the AQF-29P, a 29-piece drill bit set that comes in a heavy-duty plastic carrier with a clip for easy storage. A rubber washer keeps water out, and the top screws on for security. The bits themselves feature sizes from 1/16-in. to 1 1/2-in. by 1/64-in. Sizes 3/16-in. and larger feature 3 flats on the shank for reduced slippage, increased productivity and bit life. Another example is the Hole Hog set of core drills. The bits are designed specifically for situations where holes need to be reamed out. Hole Hog bits are accompanied by the appropriate pilot bit. Used correctly, they can enlarge a hole 60 percent. Hole Hog bits are also helpful in ‘large diameter’ holes, where the diameter of the hole is significantly greater than the thickness of the material. Standard bits can catch in the hole, resulting in broken, chipped or bent drills. Although drill bits were his first product, he has expanded into welding supplies and other lines, including Honeywell hearing and safety products. Today he carries thousands of products from a broad range of manufacturers and a few select distributors. Like his drill bits, Zimmerman emphasizes products made in the U.S. for quality and performance.
“We are very competitive and can save our customers quite a bit of money on most products,” says Zimmerman.
“We are the lowest price reseller; however, retail prices are up to our customers.” Contact: FARM SHOW Followup, Zimmerman Drill Bit Sales, 1468 Vaughns Grove-Fairview Rd., Pembroke, Ky. 42266 (ph 270 886-5100).
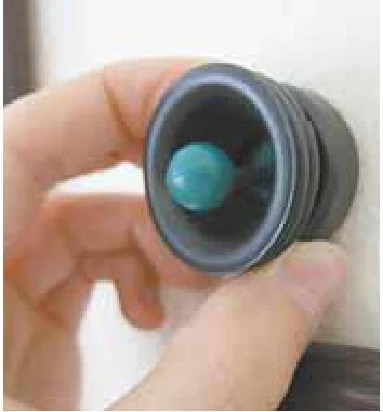
The StudPop® has a colorful “popper” that visibly and audibly tells you when the magnet senses a metal fastener up to 1/2 in. deep. The $9.95 device is the brainchild of John Blake, an engineer-turned-landlord/handyman, who was frustrated by stud finders on the market.
“I wanted something that would be super-easy to use on any kind of wall,” he explains. His StudPop works on sheetrock, tile, lath and plaster.
“Its shape resembles a speaker that radiates sound. On sheetrock it makes a loud thud as soon as it finds a nail or screw,” he says.
“When you see the popper stand up straight, that means that the magnet has detected a screw or nail that holds the wall board to the stud.” Functional, yet fun in an assortment of bright colors, the StudPop has attracted media attention and will be featured on the DIY television network this fall. Made with ABS polymers, they’re virtually unbreakable. They attach easily to your toolbox - or refrigerator. Or better yet, Blake suggests, just stick it on a wall and let your guests guess what it is. Currently sold on Amazon, in 2015 the StudPop will be available in hardware stores. Blake welcomes inquiries from distributors. Contact: FARM SHOW Followup, StudPop, John Blake, 24 Heath Rd., Kennebunk, Maine 04043 (ph 207 604-6657; www.StudPop.com).
Ed Brouwer, Osoyoos, B.C., used to have a lot of trouble starting his old David Brown 1200 Selectamatic tractor when temps got cold.
“I needed to use a lot of starter fluid to get it to run,” he says.
“The problem was that the place to spray starting fluid was 4 ft. from the tractor’s clutch pedal and ignition key. I had to spray starting fluid into the pre-filter, then run over to a step, climb up into the seat, depress the clutch, and turn the ignition key. By that time all the starting fluid had evaporated. So I’d try again and again. It would normally take a dozen or so attempts, and all the running back and forth caused my asthma to flare up.
“One day when I was hurriedly trying to climb the step I slipped on some ice and fell on my butt. I was pretty frustrated and almost said a bad word. But then I asked myself, ‘What would the readers of FARM SHOW do?’ “A light came on, and within 15 min. I had the problem solved. I removed the pre-filter housing from the tractor hood and inserted a piece of pvc pipe with an elbow into the line that comes up from the oil bath filter. The pipe extends back to the steering wheel, so I can use starter fluid without having to get off the tractor. It’s supported by a metal bracket that’s screwed onto the hood.
“It works slick. All I do is spray starter fluid into the end of the pipe and turn the ignition key. It usually takes only one try and the tractor starts right up.
“This idea saves wear and tear on my body and also saves on starting fluid. And, it impressed my wife – a win-win situation all the way around.” Contact: FARM SHOW Followup, Ed Brouwer, P.O. Box 914, Osoyoos, B.C., Canada V0H 1V0 (ph 250 495-4877; [email protected]).
“I recently built a new farm shop with a 10-ft. high ceiling. I wanted to install 4 by 8 by 1/2-in. sheets of OSB board on the ceiling but didn’t have anyone to help me. So I converted an old engine puller to do the job,” says Richard Sands, McConnelsville, Ohio. He bolted an 8-ft. long 2 by 4 along each side of the boom using existing holes in the boom, then sandwiched a 2-ft. long 2 by 4 between the ends of the boards. He then drilled a 3/8-in. dia. hole through all three 2 by 4’s and bolted them loosely together. He raised the boom to the ceiling to set the end board at the proper angle, then tightened the bolts. The last step was to screw a 12-in. sq. piece of 1/2-in. thick plywood to the angled 2 by 4.
“It was an easy way to install a ceiling. The engine puller rides on swivel wheels which makes it easy to maneuver the panels into place, even in hard-to-reach areas above the garage door’s overhead track,” says Sands.
“I run 2 small sheet metal screws up from the bottom of the 12-in. sq. piece of plywood to hold the 4 by 8 panel in place as I lift it. Then I use a stepladder and a cordless impact wrench to fasten the panel into place.” Contact: FARM SHOW Followup, Richard Sands, 9050 S. River Rd. N.W., McConnelsville, Ohio 43756 (ph 740 674-6989)1.
Air-Vac Systems, long-time manufacturer of shop air vac cleaners in Cedar Falls, Iowa, recently announced a first-of-its-kind 5-stage, dual intake air cleaner. Robert Hughes, president of Air-Vac Systems, says his company has been building and selling its 2-stage air cleaners to farm shops, welding, machine and diesel shops for almost 25 years. The 2-stage unit consists of a powerful fan that pulls dirty air through an industrial grade, 4-in. thick pleated pre-filter and then through a 95 percent efficient bag-type filter.
“The 2-stage unit works great for removing any liquid or solid particulates from ambient air,” he says. Hughes says their new 5-stage Air-Vac unit will also remove odors, toxic gases, chemical vapors, and VOC’s. It will also kill mold, bacteria and viruses, both airborne and on surfaces. The 5-stage air cleaner uses the same pleated and bag-type filter as the 2-stage model. It’s followed by a 75 percent charcoal bypass filter and finishes with a large ultraviolet (UV) light encased in a titanium oxide filter.
“The combination produces what’s called photo catalytic oxidation or PCO technology,” says Hughes.
“The process creates hydroxyl radicals and super-oxide ions, which are highly reactive electrons that convert harmful particulates and toxic gases into safer compounds, such as carbon dioxide and water.
“PCO technology is many times more effective than a HEPA filter, without diminishing the air cleaner’s cfm’s as HEPA filters tend to do. A HEPA filter will remove particles down to .03 of a micron, whereas PCO technology takes out particulates down to .001 of a micron.” Hughes says the wife of one of his customers came into his shop a couple of days after he had installed his PCO units and couldn’t believe the difference.
“She was used to the smells of gas, oil and stale cigarette smoke and said she was glad that now ‘the stink is gone’”. One M-30 UV AIR-VAC 5-stage air cleaner will clean up to 2,000 sq. ft. of air. For larger shops simply add more units. It sells for $3,580 and is shipped complete with filters and eyebolts for ease of installation. Air-Vac Systems is offering a $400 discount to FARM SHOW readers, which results in a final price of $3,180. The company’s standard 2-stage M-30 unit is also still available. Contact: FARM SHOW Followup, Robert Hughes, Air-Vac Systems, Inc., 1514 W. Lone Tree Rd., Cedar Falls, Iowa 50613 (ph 800 234-2473; cell ph 319 231-4711; fax 319 266-2524; [email protected]; www.air-vacsystems.com).
Ceramic coating of high-heat parts keeps them looking good and working better, according to Kevin Feller. He and his wife Amy run K & A Coatings. While they do powder coatings too, it is the ceramic coatings that set their business apart. They work with motorcycles, cars and trucks, as well as tractors for restoration and for pulling. Dave Nelson, Agri-Crafts (Vol. 38, No. 4) relies on Feller for his tractor restorations.
“Ceramic coatings can handle high heat without discoloring,” says Feller.
“On internal parts, they can keep pistons cooler and keep heat in the combustion chamber. A coating put on piston skirts self lubricates for less wear and longer life. Ceramic-coated manifolds, heads and exhaust pipes look great and also resist heat.” Parts are first sandblasted to clean them down to bare metal before the liquid ceramic is applied. Feller says he coats the inside of parts as well as the outside.
“We sandblast the inside of the pipes and spray with the liquid coating as best we can, though some of the curves in elaborate pipes can be hard to reach,” says Feller.
“We swab them to try to cover everything.”
Once the parts are well-coated, they’re baked in a kiln and cured. In the case of the polished aluminum coating, they’re also run through a tumbler with porcelain beads. Feller offers multiple colors and types of coatings in addition to the polished aluminum. The common ones are a Deere-approved flat black, as well as a cast iron-like tungsten and a champagne-colored titanium. The black is especially heat resistant, tolerating temperatures as high as 2,000°F. "We do pipes from all over the country," says Feller. "This spring we did a set of $8,000 headers for a Ferrari. I've done big twisty headers for race cars or muscle cars where they are trying to fit them under the hood." Feller prices ceramic coatings on pipes at about $15 per foot or more, depending on the diameter. Tractor mufflers range from $50 to $150. Headers range from $200 to $250. On classic tractors and cars, Feller is comfortable the cost is worth it. "If you go to a tractor or car show, you see these beautifully painted and restored vehicles with rusty exhausts," says Feller. "A ceramic coating can keep pipes and other parts looking good, too." Contact: FARM SHOW Followup, K & A Coatings, 44720 Prospect St., Rushford, Minn. 55971 (507 864-7007; [email protected]; kandacoatings.com).
“Anyone who’s ever owned a large round baler knows they’re going to break a belt sometime, and there’s never a good time or place for that happening,” says Mark Burrell.
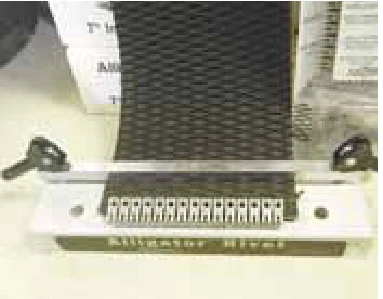
“Fortunately, there’s a tool available that makes in-field repairs fairly easy.” Burrell Implement Company sells the Flexco Alligator® Rivet Tool, a device that fixes a belt in just minutes without the need for a vice or tool bench.
“I sell hundreds of these every year to people all over the country,” says Burrell, who’s the fourth generation family member to operate the half-century old business that bears his name.
“People want this tool because they can fix a belt while it’s on the baler, on the ground, or on a pickup endgate. All they need is this tool, the rivets, the Alligator rivet lace, and a 1-lb. hammer.” Burrell says the rivet tool is available in a 7-in. version for belts up to 7 in. wide and a 14-in. tool, which does belts from 4 in. to 14 in. He sells the more popular 7-in. rivet tool bar for $160. The tool uses self-setting rivets that fit belts from 1/8 to 7/32 in. thick. The connecting pin is a .140-in. dia. hardened spring made of stainless steel to resist corrosion and withstand heavy use.
“We call the rivet lace a heavy plate fastener because it will last 10 to 20 times longer than the old clipper wire lace,” says Burrell.
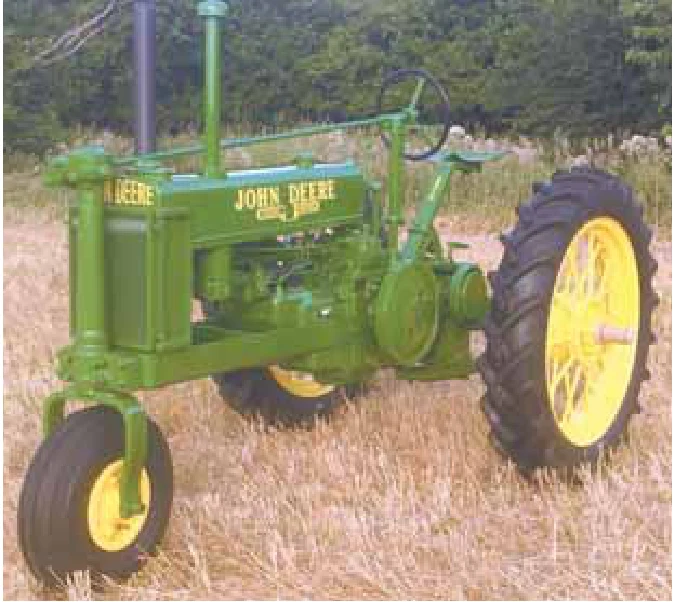
“It’s more resistant to lace pull-out because the metal is clamped to the rubber belt with big rivets.” Most baler manufacturers now use the rivet lace-type fastener on their belts, except Deere, which uses the mato lace. The Deere Mato lace repair tool costs $1,000, but the Flexco Alligator tool also works on Deere belts.
“My customers can get the 7-in. tool, the lace and rivets to repair two belt ends for just a little over $200,” Burrell says. He also sells a number of older style clipper tools and wire lace for older balers. His largest seller by far is the Alligator, which works on Deere belts and all others in the marketplace except older model Vermeers with 3-in. rollers. Burrell says with a laugh, “I have a Mato lace tool in the back room, but it’s covered with an inch of dust because people don’t want to spend that kind of money to repair belts.” Burrell Implement is also known for its large supply of repair parts for vintage grain drills, a business his father started in the 1960’s.
“We’ve got parts for many of the old time machines either in the yard or in the warehouse,” says Mark.
“I’m trying to phase out of that business, but people around the country keep calling and I just keep answering the phone. People who restore or still use those old machines are on a mission to find parts and often we’re the last ditch desperation call,” Mark says. Contact: FARM SHOW Followup, Burrell Implement Co., 24120 Hwy. 60, Fairview, Okla. 73737 (ph 580 227-4494; [email protected]; www.burrells.net).

With a C-clamp and a little welding, Pete Krusch of Cambridge, Vt., made a safe holder for welding and cutting torches.
“I made it so that I have a place to temporarily hold a lit torch while aligning or adjusting pieces to be welded,” Krusch explains. He cut off two small pieces of 1/2-in. ID pipe and welded them to a 6-in. piece of flat iron, which is welded to a C-clamp. Larger 3/4-in. pipe also works for larger torches, he adds.
The length of the flat iron keeps the lit torch at a safe distance from whatever the holder is clamped to. With pipes going in two directions the holder can be clamped on a vertical or horizontal surface. It has come in handy for many applications, Krusch says. Just use common sense where you clamp it. Contact: FARM SHOW Followup, Pete Krusch, 140 Forge Dr., Cambridge, Vt. 05444 (ph 802 644-5358; [email protected]).
After more than 35 years of working on Deere engines, Gary Hoefling practically knows his way around every green power plant with his eyes closed.
“I started working for Deere in 1980 and worked almost exclusively on 4-WD tractors doing major engine repairs,” says Hoefling. He used that expertise to start The Motor Works in 1993, specializing in complete drop-in engine replacement and repowering. Today he’s the country’s largest supplier of new-in-crate or completely rebuilt engines ranging from 4.5-liter, 4-cyl. models up to 13.5-liter, 6-cyl. models.
“My goal for more than 20 years has always been 100 percent customer satisfaction,” says Hoefling with pride.
“We have a one-year limited money back guarantee for everything we sell, but over the years we’ve rarely had an unhappy customer.” Hoefling has kept pace with technology, tools and techniques over the years.
“Nowadays we use computers to find problems, but the problems aren’t all that different from what we had to find by trouble shooting years ago,” Hoefling says.
“Computers tell us very specific information, but doing the repairs is the same as it was years ago.” Hoefling will overhaul or repair any Deere engine from a 404 gas or diesel in a 10, 20 or 30 series tractor to today’s diesels in high horsepower tractors and combines. His business also custom builds engines and does transmission and drive-line repair on tractors, combines, choppers and other self-propelled equipment. A recent addition to his services is Green Acre Salvage, which has many used parts for combines, tractors, forage harvesters and construction equipment.
“We’ll buy a complete piece of machinery or salvaged parts from engines, carburetors, transmissions, you name it,” says Hoefling. He also helps farmers by answering questions on component replacement and repowering that they want to do themselves. Part of his work is supplying upgrade kits such as engine oil pumps, new sleeves and pistons, fuel system updates, high-pressure low-smoke injection nozzles, new-style head bolts and inter-cooler kits. Contact: FARM SHOW Followup, Gary Hoefling, The Motor Works, 1601 35th Ave. W., Spencer, Iowa 51301 (ph 712 260-9834; www.themotorworks.net).