Practical ideas from FARM SHOW MagazineSubscribe · Free issue · Send us your shop tip
Subscribe to FARM SHOW
Issues / Vol. 31, No. 1 (2007)

Vol. 31, No. 1 (2007)

Money-Saving Repairs & Maintenance Shortcuts · Printed section pp. 36–39

44 selected entries · Complete text of selected entries

This issue’s section includes reader tips and feature-length shop stories. Held items and editorial notices are not reproduced.

Archive text: prices, coupons, availability and contact details reflect the original publication, not current offers. Reader methods are not universal instructions; follow manufacturer guidance and proper safety practices.

Reader shop tips

From the archive · Full text
Reader shop tip

Robert Mork

Robert Mork, Sevierville, Tenn.

“A fellow in your last issue wrote in complaining that his Dixon ZTR mower left bad streaks of unmowed grass. The problem might be a sprung deck shell. If that’s it, you have to clamp the deck to a work bench and clamp a 2 by 4 to the other end and tweak it back into shape. If the deck is not the problem, jack the mower up to see if the blades are all on the same plane. If one is higher than another, shim it down to the lowest blade height. Also, with the mower sitting on a level surface, measure all four corners to see if the rollers/boggie wheels are set at the right depth. One of the deck hangars might also be binding.”

From the archive · Full text
Reader shop tip 1 of 2

Frank Dyck

Individual tip 1 of 2 from this reader’s published contribution.
Frank Dyck, La Crete, Alberta

“I bought an old IH 241 round baler that gave me a lot of trouble. It had trouble starting a bale because the smooth steel rollers wouldn’t grip the hay or belts properly. I solved the problem by wrapping old belting around the feed and drive rollers, pop riveting it into place. It works fine now.

From the archive · Full text
Reader shop tip 2 of 2

Frank Dyck

Individual tip 2 of 2 from this reader’s published contribution.
Frank Dyck, La Crete, Alberta

“I hung an 18-in. long piece of plastic pipe with a length of rope through it to make a sling above my vise to support baler belting while I relacing a torn belt. Very handy.”

From the archive · Full text
Reader shop tip

Ron Stadler

Ron Stadler, Monroe, Mich.

“I have a lot of feed bags to tie and I didn’t want to have to cut string off a ball of twine all the time. So I came up with an idea that lets me quickly make up a batch of strings about 1 ft. long.

“I just took a 1 gal. paint can and cut a slot in the side. Then I wrap binder twine around the pail 150 times and run a knife through the slot, cutting all the twine. Gives me 150 pieces of twine all the same length.”

From the archive · Full text
Reader shop tip

John W. Apple

John W. Apple, Middletown, Ohio

“If you need to solder a copper pipe but can’t get water to stop dripping where you want to solder, here’s an idea. Push bread into the pipe until the water stops dripping. The bread will eventually dissolve and flush out.”

From the archive · Full text
Reader shop tip

Rob Sharp

Rob Sharp, Watford, Ontario

“I came up with a handy overhead hoist and wheels in my shop using a section of barn door track that I bolted to the ceiling. The track is welded to 18-in. lengths of angle iron that are spaced 2 ft. apart and bolted to the ceiling joists. Two sets of wheels are mounted on a 14-in. spreader bar to distribute the weight over a larger area of track. I paid $25 for the track, which I bought new, plus about $20 for the wheels. A big benefit is that it doesn’t take up a lot of headroom in my shop, which has a low 9-ft. ceiling. The track hangs no lower than the ceiling’s fluorescent lights. The hoist can lift loads up to 500 lbs. or more.

“The track is set in line with my overhead shop door, so if I want I can drive my pickup into the shop and use the hoist to lift a load directly onto it. Works great for lifting engines and other loads. The same idea could be modified to work just about anywhere. For example, it would work great for picking up objects off the floor and placing them on a work bench.”

From the archive · Full text
Reader shop tip

Doug Clark

Doug Clark, Goderich, Ontario

“I mix automatic transmission fluid, either new or used, with kerosene 50 - 50 for use as a penetrating oil, air tool oil (new transmission fluid only), and cutting oil for our drill press and lathe. It also works great for breaking the bead on stubborn tires.”

From the archive · Full text
Reader shop tip

Neon A. Stewart

Neon A. Stewart, Gordon, Texas

“The General Motors Frigidaire A6 compressor that operates the air conditioner on my Deere 4040 tractor kept failing. The problem was that the clutch continually locked up. I had to replace the compressor three times in one year. Even a rebuilt compressor costs about $225 so it got expensive.

“To solve the problem, I removed the compressor and replaced it with a modified Denso compressor that came out of my 1987 Ford pickup. The Denso compressor is the same one that’s used on Deere’s 50 Series tractors and is much more reliable than the Frigidaire model. Deere offers a conversion kit that makes the Frigidaire compressor work like a Denso, but it sells for about $900.

“I made several modifications to the Frigidaire compressor. I installed a new dryer and also pulled a vacuum to remove any moisture inside the compressor. I bought a new fan belt, and I also had to buy a new hose that goes from the compressor to the condenser and spliced it into the low pressure hose that leads to the evaporator. I also made new mounting brackets for the compressor.

“I made this conversion three years ago and it has worked out great. The Denso clutch is built much heavier than the Frigidaire model - I’ve never had a clutch fail. Now it’s the coldest air conditioner on my place.”

From the archive · Full text
Reader shop tip

Carter M. Ramsey

Carter M. Ramsey, Saint Simons Island, Ga.

“My Yanmar 22 hp 4-WD tractor tended to run hot whenever I worked it hard; for example, when plowing or disking to build wildlife food plots for our hunting club. To solve the problem, I went to our local NAPA store and bought a 12-in. automotive electric fan designed for a Buick LeSabre. I bolted the fan to a metal bracket that bolts onto the tractor’s radiator frame.

“I removed the original thermostat switch and wired the fan to a replacement thermostat switch that I installed on the engine block. The fan automatically comes on whenever the engine temperature goes above 180 degrees. It lowers the engine temperature by up to 20 degrees. The fan turns off as soon as the engine cools back down.

“For extra protection, I also installed a screen in front of the tractor’s radiator in order to keep debris off the fan. I paid about $60 for the fan. I’ve used this idea for three years now. No more overheating problems.”

From the archive · Full text
Reader shop tip

Steven A. Foster

Steven A. Foster, Menomonie, Wis.

“I sloped my shop floor to a drain, making it easier to clean equipment and to wash down the floor. I also installed radiant in-floor heat so the floor dries quicker after being wet during the heating season. In-floor heat is also really nice for working under vehicles.”

From the archive · Full text
Reader shop tip

David A. Miller

David A. Miller, Smicksburg, Penn.

“I was in the middle of a spray job with my Wagener Spray Tech sprayer when it quit working. I discovered it had a dry rotted seal, and I didn’t have any replacement seals. So I put a “Little Green Cheerio” castrating band in place on the inlet valve. It worked great.”

From the archive · Full text
Reader shop tip

Jason Jay

Jason Jay, Fort Ripley, Minn.

“I use canning wax to loosen rusted bolts, pipes, and nuts. I just heat up the part and then push wax onto the threads. It lubes the threads and makes everything easier to take apart. It’s an old trick, but a lot of people have never heard of it.”

From the archive · Full text
Reader shop tip

Victor Daniels

Victor Daniels, Sterline, Mich.

“I find that Turtle Wax bug and tar remover ‘wipes’ work great for cleaning fluorescent light bulbs. The wipes will take off the glue from the price stickers and labels on new bulbs.”

From the archive · Full text
Reader shop tip 1 of 2

Buddy Hoopes

Individual tip 1 of 2 from this reader’s published contribution.
Buddy Hoopes, Beloit, Ohio

“Many companies sell battery-powered drills, but I have yet to see one that’s equipped with a hang-up hook. So I use nylon ties to make my own hang-up hooks, and they work great. It lets me hang the drill on an S-hook on my belt. Also, I keep hooks on my work table and table saw where they’re always handy.

From the archive · Full text
Reader shop tip 2 of 2

Buddy Hoopes

Individual tip 2 of 2 from this reader’s published contribution.
Buddy Hoopes, Beloit, Ohio

“I converted an ordinary grain bin lid into a handy, rolling ‘tote pan’. It works great for everything from changing oil to holding tools and bolts. I got the lid from the company I work for as they didn’t need it any more. I installed four 2-in. caster wheels to the top side of the lid and then turned it upside down. I had bed liner sprayed on the inside of the lid. An all-thread bolt covered with plastic hose makes a dandy handle on one side of the lid. I also painted the lid Deere green and added the Deere logo.”

From the archive · Full text
Reader shop tip

Robert Ferreira

Robert Ferreira, Crystal River, Florida

“I came up with a simple, portable 12-volt battery charger that works much like a car charging system. It works great for charging any vehicle with a dead battery. All the information on the wiring schematics that’s required to build this charging system can be found in any auto repair manual.

“The idea is to use a small engine to belt-drive a car alternator, which is used to charge the dead battery. I use a 4 1/2 hp Briggs & Stratton salvaged from an old lawn edger, and an alternator off a GM car. The engine belt-drives the alternator the same way a car engine does, and it allows the alternator to produce enough voltage to ‘excite’ the field. Both the engine and alternator mount on a wooden platform that I bolted onto the frame of the old 2-wheeled lawn edger. I mounted a homemade control panel on the cart that’s equipped with an amp meter, volt meter, and switches that came off a car.

“To charge a dead battery, all I do is start the engine and hook a pair of clip leads to the tractor’s battery. A small 12-volt lawn mower battery is used for the field.”

From the archive · Full text
Reader shop tip

No-Spill Research

No-Spill Research, Inc., P.O. Box 11040, Kansas City, Mo. 64119 (ph 816 454-3389; fax 816 454-4158; www.no-spill.com/CARBcans.htm

This company offers fuel cans with spill-proof spouts. Flow rate is up to 3 gpm. The self-venting nozzle stops the flow of fuel when the target tank reaches full. The can has a single opening for filling and pouring. Available in 1 1/4, 2 1/2, and 5-gal. size cans. A variety of spout extensions are available.

From the archive · Full text
Reader shop tip

Mr. Funnel

Mr. Funnel, 3119 SW 42 nd Ave., Palm City, Fla. 34990 ph 772 287-6157; www.mrfunnel.com

This company offers a fuel filter that removes water and other contaminants from fuel, improving engine durability and performance. Mr. Funnel fuel filter is a heavy duty, fast-flow, poly funnel with a built-in stainless steel filter. It’s designed to filter out water, dirt, and debris from most fuels including gas, diesel, heating oil, and kerosene. Contaminants are trapped inside the filter, allowing only clean fuel to pass through the downspout. The coated, non-stick filter requires no cleaning.

Available in four models, the funnel filters gas, diesel, kerosene and heating oil. The smaller F1 and F3 funnels are said to be ideal for yard equipment. For transferring over five gallons of fuel, the F8 model works well. With a flow rate up to 15 gpm, the F15 has dual filters and can be used at a fuel pump.

Sells for $19.95 plus S&H.

From the archive · Full text
Reader shop tip

Don Ickes

Don Ickes, Osterburg, Penn.

“I used a pair of steel I-beams and other salvaged materials to come up with low-cost ‘grease mon-key’ ramps. They work great for changing oil on vehicles, removing the blades from my riding mower, and many other jobs. The ramps are set up on a slight hillside, with one end of each I-beam lying on a pile of dirt. The other ends are supported by a steel post out of an old boiler furnace.

“The I-beam simply sets on top of an 8-in. wide steel flange on top of the post. The bottom end of each post sets in a length of channel iron. I can vary the width of the ramps by simply moving the posts in or out of the channel iron, and then picking up the other end of the I-beams by hand and sliding them over. The ramps can handle a lot of weight - I’ve even driven a 2-ton dump truck up onto them.”

From the archive · Full text
Reader shop tip 2 of 2

Bob Bugger

Individual tip 2 of 2 from this reader’s published contribution.
Bob Bugger, Effingham, Ill.

“I use discarded card file cabinets to store all kinds of parts and tools.”

From the archive · Full text
Reader shop tip

Gary B. Miller

Gary B. Miller, Peru, Ind.

“Cleaning rust or dirt from bolt holes with your taps will dull the taps. Instead, use a cut-off wheel to cut notches in hard bolts to do the cleaning. This works just as well and it saves your taps for new threads. Also, cut the inside of nuts with a file or hacksaw to clean male threads.”

From the archive · Full text
Reader shop tip

Dennis Rood

Dennis Rood, Clarksville, Ark.

“When disassembling an antique 3 hp gas engine for restoration, I found that a very large 3-jaw puller would only remove one flywheel. Standing the crankshaft on end in a 30-ton press made short work of it.”

From the archive · Full text
Reader shop tip 1 of 2

Don W. Thomas

Individual tip 1 of 2 from this reader’s published contribution.
Don W. Thomas, Eureka, River, Alberta

“I bought a used moldboard plow several years ago that needed new shares. Rather than buy new ones, I welded used shares over the old shares, low enough to equal new ones. It worked as well as installing new ones at almost no cost. I used 7014 welding rod to do the work.

From the archive · Full text
Reader shop tip 2 of 2

Don W. Thomas

Individual tip 2 of 2 from this reader’s published contribution.
Don W. Thomas, Eureka, River, Alberta

“I’ve read several times in FARM SHOW about using melted wax to loosen stubborn bolts. Last summer I had two occasions to try the idea and I was amazed how well it worked.”

From the archive · Full text
Reader shop tip 1 of 2

Joe Eilert

Individual tip 1 of 2 from this reader’s published contribution.
Joe Eilert, Jewell, Kan.

“We installed an air-operated tire repair machine 15 years ago, wondering at the time if we could justify the cost. It has really paid off. In most cases, we can have tire repairs done in the time it would take to drive to the tire shop. It also lets us buy new tires at seasonal sales without having to have them installed at the time of purchase.

From the archive · Full text
Reader shop tip 2 of 2

Joe Eilert

Individual tip 2 of 2 from this reader’s published contribution.
Joe Eilert, Jewell, Kan.

“Installing bulk oil tanks with hose reels and electronic meters has been very convenient and time-saving for us. We have tanks for both engine and hydraulic oil.”

From the archive · Full text
Reader shop tip

Robert Lassila

Robert Lassila, Great Falls, Mont.

When pouring the floor for a new shop, I recommend installing a grounding device in the floor between your welder and the welding bench. This avoids some of the hassles of the grounding clamp and cable. Rebar works fine for the rod.”

From the archive · Full text
Reader shop tip

David A. Medley

David A. Medley, Gordon, Ga.

“For engines that have been sitting for a long time and that are hard to crank, I use a propane torch (not lit) at the intake area. The propane gives the engine enough boost to start.”

From the archive · Full text
Reader shop tip

John Hahn

John Hahn, 509 E. Main, P.O. Box 370, Craigmont, Idaho 83523 (ph 208 924-5538; [email protected]; www.hahn-tractor-seats.com)

“We manufacture all makes and models of antique tractor seats including Holt, Best, Caterpillar, IH, Cletrac, John Deere, and Allis Chalmers. We specialize in antique Caterpillar seats and have hundreds of patterns available. The photo shows one of our seats on a 1935 Cat RD8 bulldozer. The seats are made with vinyl over high-den-sity foam. We also produce leather products including crank straps, throttle-governor boots, break spring boots, equalizer spring boots, and shift tower boots.”

Shop feature stories

From the archive · Full text
Feature story

Antique Cast Iron Wheels, Axles For Sale

Featured source: Ben Barwick

“Anyone who has an antique one-lunger gas engine and would like to show it off will be interested in my antique cast iron wheels and axles. They can be used to make an antique engine-hauling cart that really looks great,” says Ben Barwick, Sumter, S.C.

Barwick gets his wheels from a manufacturing plant that went out of business. They range in size from 10 to 16 in. in diameter and have a 2-in. wide tread. They’re available in several different hub designs. Some have roller bearings, and some don’t.

The wheels came off old 5-ft. long, 30-in. wide steel carts that were used to haul lumber around furniture manufacturing plants.

“I bought the wheels from a local man who helped tear down the furniture making plant,” says Barwick.

“As far as I know you can’t buy wheels like these anywhere else. You can find cast iron wheels for sale in gas engine magazines, but those wheels just have straight spokes with no circles or designs.”

Collectors of antique gas engines often build carts with two wheels in the middle and a swivel wheel at each end.

Barwick has more than 200 pairs of wheels on hand.

“So far I’ve sold about 100 pair of wheels, but I’d like to sell them all. Customers will have to come to my place to pick them up,” he notes.

An axle and two wheels with bearings sells for $50; $45 without bearings. Swivel wheels sell for $10 apiece.

Contact: FARM SHOW Followup, B.T. Barwick, 40 Sandle Wood Lane, Sumter, S.C. 29154 (ph 803 481-2194).

From the archive · Full text
Feature story

Tractor Restoration Expert Specializes In Deere’s “H”

Featured source: Browning Restoration

Anyone with a Deere “H” that needs repair, maintenance or restoration should get a copy of a book by Patrick Browning called “John Deere ‘H’ Restoration Guide”.

What’s more, Browning also offers various aftermarket parts for restoration or repair, such as bolt kits, carburetors, control rods, fuel tank assemblies, cylinder head valve guides and other miscellaneous parts. In addition, he sells a collection of Deere Field Service bulletins from 1935 to 1953 which he says are a “must have” for any “H” owner. Brown also makes a Safety Step for the Deere “H” that bolts to the side of the frame. Works like the step widely used on new generation 3010, 3020, and 4010 tractors.

Browning’s Restoration Guide is an extremely detailed, 208-page manual that walks you through a total restoration. Hundreds of photos help illustrate the process and Browning doesn’t miss a trick when it comes to the nuts and bolts of putting an antique tractor back together again. One thing that shines through loud and clear in the book is that Browning has done this himself.

In addition to describing the process, Browning supplies an index of parts suppliers who carry needed materials for a complete restoration. He also includes detailed specs for parts and fittings on the tractors.

Sells for $24.95, S&H included. Contact: FARM SHOW Followup, Patrick F. Browning, 1397 Timberhill Drive, New Braunfels, Texas 78132 (ph 830-627-0430).

From the archive · Full text
Feature story

Engine Hoist Modified For Finger Touch Control

Featured source: Robert Sladky

Next time you’re trying to crank the lift on a hoist at the same time you guide the engine in or out of place, think how nice it would be to have remote control. Robert Sladky modified an engine hoist to respond with finger touch control.

“I restore old cars and trucks and need to do a lot of work by myself,” says Sladky.

“A typical engine hoist with a hydraulic jack can be dangerous to handle by yourself. I decided to develop an engine hoist with battery-powered hydraulics.”

Sladky started with a standard engine hoist, but stripped out the hydraulic ram with its jack action. He replaced it with a hydraulic cylinder with the same reach after welding new brackets to fit. To power the cylinder, he installed a 12-volt pump and motor designed for use with a pickup-mounted snowplow. The motor and pump were bracketed to uprights on the backside of hoist upright.

Power for the motor is provided by a deep cycle battery that sets on the hoist base where it also provides added counterweight to the lift.

“I use the remote control that would have run from the snowplow hoist to the pickup cab,” says Sladky.

“Hydraulics move the hoist up, and gravity lowers it. I put flow controls on the system back by the pump so speed is infinitely variable.”

Sladky says the flow controls are “gotta have” items. He explains the original system had an orifice that slowed upward movement and a control valve for downward movement.

“It was still too shaky,” he says.

“With flow controls, I can lift or lower at a snail’s pace without a bunch of jerking. I set it on slow, and it stays there for the most part.”

Sladky made a few other modifications to the hoist, replacing the original castors with larger, heavier duty castors. The larger ball bearings make it easier to roll the hoist into place and swivel easier under load than the smaller originals did. The larger castors re-quired welding bigger mounting plates.

Sladky estimates the original hoist cost him around $200. Modifying it cost another $450 plus his time. It has all been well worth it, he says.

“There’s no such thing as a powered hoist on the market like this, as far as I know,” he says.

“I use it for all kinds of things. It really saves my back.”

Contact: FARM SHOW Followup, Robert Sladky, 10940 North 142nd, P.O. Box 149, Waverly, Neb. 68462 (ph 402 786-2604; [email protected]).

From the archive · Full text
Feature story

“Good As New” Home-Built Bandsaw

Featured source: Bruce Chandler

Cutting metal with a hacksaw gets old fast. That’s why building a metal cutting bandsaw seemed like a good idea to Bruce Chandler, a former auto mechanics instructor who likes to build miniature engines. He already had a lathe and milling machine. He just needed a bandsaw with multiple speeds.

His first step was to take the dimensions of his wood bandsaw and draw up plans. He made wheels out of wood by glueing two plywood disks (larger than his desired final size) together and sandwiching them between Formica sheets, clamping the entire affair to an automotive flywheel.

Chandler used his lathe and mill to make a drive shaft for the lower wheel and bearings for both wheels.

“I drilled holes in the discs to fit the bearings and drive shaft, installed them on the discs, and used them to turn the wheels in my lathe,” he says.

“This ensured the wheels were perfectly round rather than having to turn them first and then try to find the center.”

Chandler built an E-shaped main frame out of 1/4-in. thick 4 by 4-in. box iron. The drive and idler wheels as well as the motor were mounted to this frame.

To create a channel in the wheels for the saw blade, he simply ground down a bit.

To ensure correct speeds for cutting metal and alternative speeds for different types of metal, he employed a speed reducer with a 9-in. pulley. The 1 1/2 hp electric motor had a 2-in. pulley and ran at 1,750 rpm. Connecting the motor and the reducer gave him a15.3:1 reduction. Four stepped drive pulleys on the speed reducer give Chandler four different speed options for different metals.

“I can even cut cast iron with this saw or up to 3/4-in. sheet iron,” he says.

“Its speed varies by pulley from 57.72 to 240.99 surface feet per minute.”

Chandler milled out blocks of aluminum and built bearings to use for guides. They are fully adjustable for thicker and thinner blades and guide from side to side as well as front to rear. The upper blade guide has a maximum height of 7-in. for large projects.

“I made boxes for the upper and lower wheels using 16 gauge iron and a 12 by 12 by 1/2-in. piece of steel for a cutting table,” says Chandler.

The base of the saw is fabricated from 1 1/ 2 by 1 1/2-in. angle iron. Like the rest of the saw, it is built to last. Chandler also added a couple of extras to make metal sawing even easier. A small wire wheel rides the blade. It has a light and flexible tube that supplies compressed air to blow chips away from the cutting blade.

“I started out the process with a set of plans and took lots of pictures,” says Chandler.

“If anyone is interested in doing something similar, I would be glad to sell them a set of plans and discuss it with them.”

Contact: FARM SHOW Followup, A.B. Chandler, P.O. Box 253, Big Arm, Montana 59910 (ph 406 849-5678; [email protected]).

From the archive · Full text
Feature story

Worn-Out 4020 Wheel Hub Repair

Featured source: Dale Denton

Anyone who owns a Deere 4020 tractor with duals knows that over time the wheel hubs work loose, damaging the key so badly that the hub can no longer be used.

Dale Denton, Cowden, Ill., came up with a way to restore worn wheel hubs to “like new” condition. He cuts a new keyway into the wornout hub and replaces it with a new full-size key.

“It costs only a fraction of what a new wheel hub sells for,” says Denton, who does the work for a neighbor who sells the refurbished hubs.

The wheel hubs on Deere 4020, 4430, and 4440 tractors are designed to U-clamp onto the axle and have a key that’s molded into the hub.

“When the hubs get damaged most people just throw them into the scrap pile. My neighbor gathers up those worn-out hubs and brings them to me. He then sells the re-furbished units,” says Denton.

First Denton removes what’s left of the old key and then cuts a new slot in the hub. He uses cold-rolled steel to machine a new key that fits the slot, shaping both sides of the key at a 20-degree angle to fit the tapered groove in the axle. Then he welds the key in.

If the bolt holes in the hub are damaged, he also drills new holes.

“My neighbor charges $50 for a refurbished wheel hub, whereas a new hub costs at least $180,” says Denton.

“The problem often happens when the farmer uses the tractor with single wheels on back for a while, then installs dual wheels and doesn’t get the wheel hub on tight enough. The same idea will work on any tractor that uses wheel hubs with keys in them. Some later Deere tractor models have wedge-type, double-tapered hubs which rarely come loose.”

Contact: FARM SHOW Followup, Dale Denton, Rt. 1, Box 168, Cowden, Ill. 62422 (ph 217 783-6530).

From the archive · Full text
Feature story

Magnetic Socket Inserts

Featured source: Bob Vasichek

“Our new magnetic socket inserts work great for holding bolts in hard-to-reach places,” says Bob Vasichek, Vasichek Enterprises, Michigan, N. Dak.

The removable poly inserts contains a strong neodymium magnet that’s designed to securely hold nuts, bolts and self-tapping screws. The inserts are slightly oversized for the socket, so when you push the insert into the socket the insert fits in tight.

“It’ll hold a bolt as straight as an arrow, no matter what angle you’re holding the socket at,” says Vasichek.

“It works great for getting bolts started and especially shines with burrs because it’ll keep the burr in the socket without it falling out.

“To remove the insert, you take a blunt object such as a bolt, stick it through the ratchet end of the socket and push the insert back out.

“A lot of guys put the inserts into a set of sockets and leave them in there permanently,” says Vasichek.

Standard magnetic socket inserts are available in sets of nine from 3/8 to 7/8 in. Metric sets contain 10 pieces from 10 through 19. These sets sell for $9.95 including S&H and fit 1/4, 3/8 and 1/2-in. drive sockets.

A combination set is available which has both standard and metric inserts. This 19-piece set sells for $17.95 including S&H.

The inserts are also available from Sears. Contact: FARM SHOW Followup, Vasichek Enterprises, LLC, P.O. Box 197, Michigan, N. Dak. 58259 (ph 701 259-2288; [email protected]; www.brocket.net).

From the archive · Full text
Feature story

Lawn Tractor Service Center

Featured source: Mel Primrose

Mel Primrose keeps his lawn tractor in tip top working condition, thanks to a mini service center he built next to his shop.

The Westlock, Alberta man likes to keep his yard looking good, so that means he also needs to keep his equipment well maintained. Primrose built a drive-on service deck using scrap metal he found at the dump. It includes a deck washing system consisting of a pivoting spray arm mounted underneath, to which a garden hose is attached.

The ramps are made from angle iron frames with metal mesh centers. The service deck holds the tractor 2 ft. off the ground.

“The deck makes it much easier to change the oil and service the air filter,” Primrose says.

In front of the deck ramps, he installed a winch lift for simplifying the job of sharpening mower blades and cleaning off grass build-up. A 1,500-lb. electric winch powers the lift. Primrose included a safety chain, just in case the winch ever fails.

The winch and stand is covered with a curved metal roof to protect it from snow and rain. To make it more portable, the stand’s posts slip into two 36-in. pipes that form re-ceptacles in the ground.

Primrose also set up an overhead pivoting air hose, which swings out 15 ft. from the outer wall of his shop, fitted with a 50-ft. flexible hose. It’s hooked to his air compressor indoors and is useful for blowing out dust or touching up tire pressure.

When not in use, the convenient and out-of-the-way air hose arm is held snugly in place above the garage door by a magnet.

“I really like this setup because all of the features are handy and quick to use. I built it in stages and it only cost me about $130 in all to make. The only things I bought were the air hose and winch,” he says.

Contact: FARM SHOW Followup, Mel Primrose, Site 10, Box 1, R.R. 1, Westlock, Alberta, Canada T7P 2N9 (ph 780 349-2477).

From the archive · Full text
Feature story

Hydraulic-Powered Bearing Puller

Featured source: Posi Lock Puller, Inc.

This new 12-ton hydraulic “puller” has a built-in hydraulic pump that takes the work out of pulling even the most stuck-on bearing, bushing, gear, wheel or pulley,” says Posi Lock Puller, Inc., Cooperstown, N. Dak.

The company has offered the Posi Lock Puller gear and bearing puller for years. It’s designed to pull a wide variety of press-fit parts. It comes with non-slip “safety cage” pulling jaws that are held in alignment by a sliding cage.

The new PHS-108 has the same pulling jaws with the addition of a built-in hydraulic pump and cylinder. It offers 12 tons of pull with a reach of 8 in., and a spread of 12 1/2 in. (or 22 1/2 in. with long jaws).

A threaded T-handle is used to open or close the pulling jaws. Sells for $920 plus S&H. Non-powered units and units that require outside hydraulics also available.

Contact: FARM SHOW Followup, Posi Lock Puller, Inc., 805 Sunflower Ave., Cooperstown, N. Dak. 58425 (ph 701 797-2600; fax 701 797-2706; [email protected]; www.posilock.com).

From the archive · Full text
Feature story

Kit Makes It Easy To Convert Ford To V-8 Power

Featured source: Don Knasel

“We had tremendous response to your original article from readers all over North America who want more power in their Ford N-Series tractors,” says Don Knasel, who developed a kit that makes it a snap to install V-8 flathead engines in place of the original 4-cylinder. Don came up with the do-it-your-self kit after converting 26 Ford 8N tractors himself.

“Most anybody capable of changing oil or spark plugs can switch engines with the kit in about 8 to 10 hours,” says Knasel. ”It can be used to convert any N-Series Ford tractor.”

Knasel calls his kit the Awesome Henry V-8 Ford Conversion Kit in honor of Henry Ford. He figures Ford would appreciate its simplicity and ease. Each kit is handcrafted and bears its own metal nameplate and reg-istration number. The kit itself costs $995 and contains all the hardware needed to connect the V-8 engine and clutch assembly to the 8N transmission and frame.

“Just disassemble and remove the stock 4-banger, bolt in the conversion kit and slide the flathead V-8 into place,” says Knasel.

“No special tools are needed. The conversion kit uses the clutch, pressure plate and flywheel found on the flathead V-8. We haven’t even had to adjust the clutch; they just slide in.”

What isn’t included in the kit is a smaller 4 3/4 gal. fuel tank available for $145. It’s needed to make room for the carburetor on the flathead. Also needed is a new header type manifold that drops out of both sides. With brackets and bolts, it adds another $225 to the cost. A tank conversion needed to change the 8N radiator to a V-8 adds another $95.

“A lot of guys will use their own tanks or manifolds, so we don’t include them in the conversion kit,” notes Knasel.

Before retiring from the collision and used car business, Knasel and his son Dave had collected around 100 mostly N-Series tractors. He is now down to 25 that he is keeping for his collection and another 10-12 he may convert to flatheads.

“It’s a question of do you want to overhaul a 4-cylinder that may be a little tired or replace it with a V-8,” says Knasel, “Nothing sounds better than those little flatheads.”

Contact: FARM SHOW Followup, Don Knasel, 11777 Tawawa-Maplewood Rd, Maplewood, Ohio 45340 (ph 937 497-9447; [email protected]; www.awe somehenry.com).

From the archive · Full text
Feature story

Jeep Hobby Leads To Willys Parts Business

Featured source: Harry Sheets

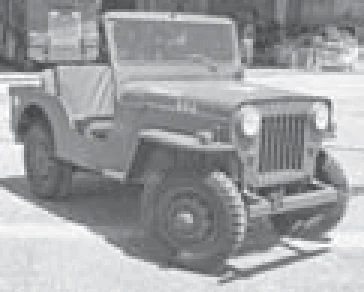
Finding a way to get rid of extra parts only made sense for Harry Sheets. With four vintage Willys Jeeps restored and 12 to 15 more sitting around, he had plenty of extra parts. When he ran across a website where he could post parts for sale, he jumped at it.

“I was always bringing home dead Jeeps that had no chance of being restored that I would pick up for $50 to $75 each,” explains Sheets.

“I started posting parts on the website, and the business just exploded. I had no idea there were so many people rebuilding and repairing their own Jeeps.”

Business was so good that Sheets ended up quitting his job and opening Midwest Willys. In his new career, he buys and sells original Willys parts at home, at trade shows and via the internet. He recommends the Willys Tech Board website www.willystech.com/parts/board.shtml - for repair information.

While new and reproduction parts are often available for old cars and trucks like the Willys Jeep, preference is often given to original parts. Lonny Deweesey is a customer and a friend of Sheets. He has restored two farm Jeeps and an Empire farm tractor made with Willys parts in the late 1940’s.

“If I can find a good quality old part, I would prefer it,” says Deweesey.

“Most of the time, it is of better quality than the new stuff. Harry is a good source. I give him a list of the parts I am hunting for, and he just hollers when he runs across it.”

Finding one or two parts needed are an advantage to working with Midwest Willys and other parts businesses. Like Sheets with his multiple Jeeps for parts, Deweesey often buys old vehicles just for a part or two. Then they sit until another collector comes along -who needs a part or two and buys what’s left.

“The hunt is 90 percent of the fun,” says Deweesey.

“I recently ran across a plow I had been looking for at an auction. It was a Newgren plow but, like other farm implements made for Jeep, it had a special tag that identified it.”

Deweesey bought the single bottom plow for his farm Jeeps. Both are outfitted with 3-pt. hitches. One has a side-mounted sicklebar and a rear mounted cut-off or buzz saw. The other has the plow mounted on it.

Sheets carries thousands of parts and is always on the lookout for rare parts such as the 3-pt. hitches favored for farm Jeeps like Deweesey has.

Currently, he says he has 25 “dead” Jeeps sitting outside his parts warehouse. As they are broken down to the frame, their components will join those that pack the shelves in his 34 by 30-ft. parts building.

Contact: FARM SHOW Followup, Midwest Willys, 3708 S. 100 E., Crawfordsville, Ind. 47933 (ph 765 362-2247; [email protected]).