Practical ideas from FARM SHOW MagazineSubscribe · Free issue · Send us your shop tip
Subscribe to FARM SHOW
Issues / Vol. 28, No. 4 (2004)

Vol. 28, No. 4 (2004)

Money-Saving Repairs & Maintenance Shortcuts · Printed section pp. 36–39

33 selected entries · Complete text of selected entries

This issue’s section includes reader tips and feature-length shop stories. Held items and editorial notices are not reproduced.

Archive text: prices, coupons, availability and contact details reflect the original publication, not current offers. Reader methods are not universal instructions; follow manufacturer guidance and proper safety practices.

Reader shop tips

From the archive · Full text
Reader shop tip

Kirk Dahl

Kirk Dahl, Ruby Valley, Nev.

“Probably a lot of folks already do this but I wanted to pass it along because it works so well for me. I use an old tooth brush to scrub grease and grime from my fingernails and cuticles. They’re softer than most fingernail brushes and easier to handle so you can do a better job when your hands are really dirty.”

From the archive · Full text
Reader shop tip

Richard Ackerman

Richard Ackerman, Columbia, S.Dak.

“I purchased an older 440 Bobcat with a bad engine. I overhauled it but it didn’t last long. I bought a new engine and before long I had to overhaul that one, too. Soon after, it blew up and I decided to go a different direction. I installed a 40-hp. Air-cooled VW engine in it.

“The engine was surprisingly easy to install. I machined the flywheel to accept the variable speed pulley and I had to weld supports on the front pulley to drive the hydraulic pump.

“This engine is a much better fit than the original one, with enough power to outperform other similar size skid steers. I have been using it now for 12 years with no problems. What’s more, I’ve installed VW engines in some of the neighbors’ Bobcats.”

From the archive · Full text
Reader shop tip

Dan J. Krenzel

Dan J. Krenzel, Cullman, Ala.

“In re-sponse to Guy Ramsey’s comments in Vol. 28, No. 1 regarding GMC’s in-tank fuel pumps, I have a 1998 Buick Regal 308 Turbo. The car has a steel fuel tank and if you get condensation in it, the tank will rust. The in-tank fuel pump has a screen that gets clogged with rust particles and loses output pressure. The output line has a filter to keep the finer rust particles out of the high pressure fuel system and injectors.

“I found out my problem on the second pump when I asked for it back and did some of what I call ‘Krenzel destructive analysis.’

“I’ll have to get a new tank and use a ‘gas dry’ additive on a regular basis or use etha-

nol fuel which will absorb the moisture to keep my tank from rusting.

“It’s not the pump’s fault. GM engineers created an improper tank. They put the pump in the tank because it’s a small pump prone to overheating because it’s made out of cheap parts, so they buried it in gasoline to keep it cool. They will deny the heck out of that but my ‘destructive intuition’ told me the truth.”

From the archive · Full text
Reader shop tip 1 of 2

Everett W. Gustafson

Individual tip 1 of 2 from this reader’s published contribution.
Everett W. Gustafson, RD 2, Box 349, Brockway, Penn. 15824

“When I had to replace the starter on my John Deere 318, I had to remove the engine since the starter is between the engine and frame.

“There’s not much room to get the drive shaft connected. It keeps falling off the spline at the transmission so it’s difficult to recon-nect the two when putting the tractor back together.

“I solved the problem by cutting a rectangular hole over the drive shaft so I can use a wire or rope to hold the shaft up while I put the engine back in place.

“You have to be careful not to cut off any pipes under the floor when cutting the hole.

“To replace the cover I cut out, I bolted a 1-in. by 1/16-in. piece of aluminum to the cutout piece which holds it in place.

From the archive · Full text
Reader shop tip 2 of 2

Everett W. Gustafson

Individual tip 2 of 2 from this reader’s published contribution.
Everett W. Gustafson, RD 2, Box 349, Brockway, Penn. 15824

“In addition to this, I also added three wheel spinners which makes it easy to control the steering wheel with my left hand while I use my right to control the hydrostatic lever.

“

From the archive · Full text
Reader shop tip

Kenneth Crumpton

Kenneth Crumpton, 161 Tidwell Rd, Winfield, Ala. 35594

“My father, two brothers and myself are always building something in our farm shop.

“The biggest problem we faced was that we never had enough room. So, when the welder wasn’t used, we would carry it to the corner of the shop and clear up its space for something else.

“The welder is heavy and took two of us to move it. If I was alone, I would strain and grunt until I had moved the welder.

“We also had to move the welder around the project as well.

“I came up with the idea of building a frame with casters on each corner. After searching in the shop, I found a lawn mower frame. The engine was bad so I removed it and set the welder on top of the mower’s base. I attached two 1 by 4-in. boards to the welder, then bolted it to the mower frame.

“Now, we can carry our welder anywhere in the shop or around the shop with ease.”

From the archive · Full text
Reader shop tip

Douglas McAlexander

Douglas McAlexander, 610 Hwy 220, Cedar Grove, Tenn. 38321 (ph 731 487- 2306)

“In 1985 I purchased a new 530 John Deere hay baler. It has a hydraulic system that puts the twine on the bale automatically when it reaches a preset diameter.

“The hydraulic system has a filter. When this filter is changed, the air has to be purged from the system before the twine arm will cycle.

“It is almost impossible to do this using the method recommended in the owner’s manual. I have talked with other owners who are having the same problem.

“To solve the problem, I went to an auto parts store and got 4 in. of 1 1/2-in. dia. radiator hose, two clamps, a 1 1/2-in. dia. freeze plug, and a tubeless tire valve stem.

“I drilled a 7/16-in. hole in the freeze plug to install the valve stem and then clamped the freezer plug in one end of the 1 1/2-in. hose.

“I removed the cap from the hydraulic pump and clamped the other end of the hose to the top of the pump.

“I put a hand tire pump on the tire valve stem, put the baler in gear, pulled the rope that puts the twine arm in motion from a small bale, and then started pumping with the hand tire pump.

“The arm starts to cycle with one very short stroke.

“There are several other Deere balers this will work on.”

From the archive · Full text
Reader shop tip

Paul Tannehill

Paul Tannehill, Somerset, Penn.

“I have a 1982 Ford 1200 compact 4 by 4 tractor that is my handiest best buy ever. My only complaint was the lack of power steering. With a front-mounted hydraulic blade, steering could be quite a workout.

“I finally found a simple way to add power steering without adding pumps or hydraulic cylinders. I think the idea would work on other tractors as well.

“The idea involves modifying the steering arm that connects to the steering sector. After examining it closely, I realized there was a lot of travel not utilized from the steering box.

“I jacked up the front end of the tractor just to take the weight off the wheel kingpin. I removed the four bolts that hold the steering arm on the kingpin and shaped and welded a 1/2-in. by 1 1/2-in. by 2 1/2-in. plate to lengthen the steering arm.

“I drilled a new hole and tapered it with a die grinder to fit the tie rod. It’s about 2 1/2 in. center-to-center from the original factory hole in the steering arm.

“I plugged the factory hole with a 1/2-in by 1-in. shoulder bolt. Then I welded on a 1/ 4-in. by 1 3/4-in. by 6 1/2-in. long plate for diagonal bracing from the new extension to the other steering arm.

“I readjusted the tie rod from the steering sector to the new arm extension to have the wheels hit the stop bolts on the axle.

“I went from 2 1/2 turns lock-to-lock on the steering wheel to 3 3/4 turns.

“The down side is more steering wheel revolutions while mowing or brush hogging, but I added a steering wheel spinner to make the wheel easier to turn. It spins so easily now it’s definitely worth the inconvenience.”

From the archive · Full text
Reader shop tip

Robert Siefert

Robert Siefert, Bennet, Neb.

“I find that placing an asphalt shingle with the tar side up underneath a battery will greatly reduce corrosion and discharge of batteries on tractors and combines that sit idle for long periods of time. I’ve also found it’s best to clean and repaint corroded areas where batteries mount. You’ll be amazed at how clean your batteries will stay.”

From the archive · Full text
Reader shop tip

Marvin G. Ling

Marvin G. Ling, Peebles, Ohio

“The Briggs & Stratton gas engine on my riding mower came with a short, clear length of plastic hose to use when changing oil. I took the plug out of the engine and replaced it with a short pipe, then installed a valve on the end of the pipe to connect up to the clear piece of hose. Makes it easy to change oil.”

From the archive · Full text
Reader shop tip

Robert Chase

Robert Chase, Platteville, Wis.

“To put hydraulic oil in difficult-to-reach places I use a jug with a plastic pipe in it. A hose is hooked up to the top of the pipe. Then I use an air nozzle placed inside the jug hole to force oil up the pipe, out the hose, and into the tractor.”

From the archive · Full text
Reader shop tip

John F. Wohlwend

John F. Wohlwend, Foxboro, Wis.

“If you have a tubeless tire that goes flat and is still on the vehicle, and the tire won’t take air because the bead is off, take the valve out of the stem and then jack the trailer up so the tire is off the ground. Squirt ether into the tire, being careful not to use too much. Spin the tire to distribute the ether, then light it through the valve or the tire’s loose bead.”

From the archive · Full text
Reader shop tip 1 of 2

Joe G. Eilert

Individual tip 1 of 2 from this reader’s published contribution.
Joe G. Eilert, Jewell, Kansas

“Deere tractors with 6-volt batteries will start much better if you convert them to two 12-volt batteries. The tractor will crank much faster.

From the archive · Full text
Reader shop tip 2 of 2

Joe G. Eilert

Individual tip 2 of 2 from this reader’s published contribution.
Joe G. Eilert, Jewell, Kansas

“The press wheels on International Harvester 7100 drills are known for having the center break. You can repair them by welding a small plate to either side.”

From the archive · Full text
Reader shop tip

E. “Woody” Johnson

E. “Woody” Johnson, Osakis, Minn.

“To fix leaking radiators on tractors and vehicles, I’ve had great luck using Silver Seal heavy duty stop leak (www.AutoBarn.com; ph 888 484-9560). It stops leaks quickly, in-hibits rust, and lubricates the entire cooling system. It builds a quick, permanent seal that won’t clog or damage radiators. Mixes with any kind of anti-freeze.”

From the archive · Full text
Reader shop tip

David Novotny

David Novotny, Fargo, N. Dak

“I built a nice little bench grinder using a two-speed Westinghouse washing machine motor, some 2 by 12s, an old Chevy fan belt, a couple of pulleys, and a chuck from an old drill. The motor belt-drives the chuck, which is mounted right in front of me as I sit on a bench. I use my wire brushes and grind stones for my hand drill and clamp them in the chuck. The chuck is at just the right height when I’m sitting on the bench. I have a lot of hand drill accessories that work well. I put a long cord on the grinder so I can move the grinder around my shop and still reach an electrical outlet. I also put an outlet on the bench so I can plug in other things like lights or saws. I plan to mount a guard on the grinder so I don’t get my fingers caught in the belt.”

From the archive · Full text
Reader shop tip

Dennis D. Hartman

Dennis D. Hartman, 8198 Cram Rd., Williamsburg, Mich. 49690 ph 231 267- 5107

“I have a 1975 Bolens 20 hp garden tractor that’s equipped with a front mount snowblower, and I came up with an easy way to hold the tire chains tight on the rear wheels. I just use a tarp strap with a hook added to the middle part of the strap. The three hooks form a triangle that keeps the chains tight.”

From the archive · Full text
Reader shop tip 1 of 3

Dan Jacobson

Individual tip 1 of 3 from this reader’s published contribution.
Dan Jacobson, 8913 Weaver Lake Dr., Pequot Lakes, Minn. 56472

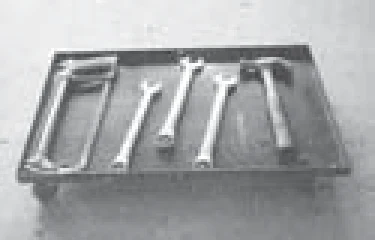
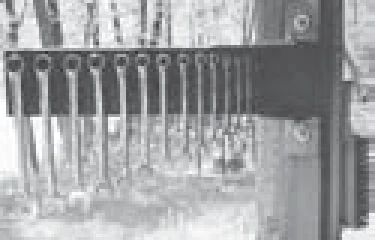
“My two-sided wrench rack puts both metric and standard wrenches at my fingertips. The rack swings from right to left with ease. It’s highly visible and saves time and energy. It lets me grab the right wrench the first time and every time. I sell them for $30 plus S&H.

From the archive · Full text
Reader shop tip 2 of 3

Dan Jacobson

Individual tip 2 of 3 from this reader’s published contribution.
Dan Jacobson, 8913 Weaver Lake Dr., Pequot Lakes, Minn. 56472

“A rolling tool tray works wonders when I’m working close to the floor. I just roll it along as my project progresses. It measures 17 by 24 in. I custom build them for $40 plus S&H.

From the archive · Full text
Reader shop tip 3 of 3

Dan Jacobson

Individual tip 3 of 3 from this reader’s published contribution.
Dan Jacobson, 8913 Weaver Lake Dr., Pequot Lakes, Minn. 56472

“This hydraulic welding table raises from 35 in. to 7 1/2 ft. high and will lift up to 1,100 lbs. To raise the table all I do is pump a foot pedal. To lower the table, I depress a smaller pedal and the table comes down. The table measures 21 by 36 in. and has a 1/2-in. thick working surface. If ever there was a backsaver, this is it - I’d never part with it.

To build a hydraulic welding table like this from scratch I’d charge about $1,200.”

From the archive · Full text
Reader shop tip 1 of 2

Pat Prom

Individual tip 1 of 2 from this reader’s published contribution.
Pat Prom, Eden Prairie, Minn.

“I came up with my own space-saving work island by butting several big shop tools together back to back. The tools include a milling machine, iron worker, shear, and drill press. By placing the tools back to back I can get all of them into a smaller area without taking up as much wall space. I keep a portable anvil nearby that I made out of an old wheel rim and a length of railroad track.

From the archive · Full text
Reader shop tip 2 of 2

Pat Prom

Individual tip 2 of 2 from this reader’s published contribution.
Pat Prom, Eden Prairie, Minn.

“I have a shop cart that’s equipped with four separate toolboxes. I made the big tool cabinet shown at one end of the cart. The tool cabinet at the other end is a Sears model. The entire cart was originally mounted on four small caster wheels. To help absorb all the weight, I removed two of the end wheels and replaced them with bigger wheels that I mounted about one third of the way in. Two thirds of the weight is now on the big wheels, so the smaller caster wheels don’t get over-loaded.”

From the archive · Full text
Reader shop tip 1 of 2

John Porter

Individual tip 1 of 2 from this reader’s published contribution.
John Porter, Albion, Mich.

“Probably one of the handiest inventions of all time is the aerosol paint can. Aggravation sets in, though, when you try to pry the cap off. When I first get a cap off, I take my sidecutters and clip the inner cap in three or four places. The cap will still stay on good, but will come off much easier the next time.

From the archive · Full text
Reader shop tip 2 of 2

John Porter

Individual tip 2 of 2 from this reader’s published contribution.
John Porter, Albion, Mich.

Also, once the can is empty I slot the bottom of the can with a hack saw and dribble all the leftover product into a paint can. By mixing a bunch of different colors together, some surprisingly neat colors will appear. I dab this paint onto freshly welded things or things that I don’t want to rust. Also, I save the marbles inside the cans and give them to my grandkids.”

From the archive · Full text
Reader shop tip

Herman Vander Vos

Herman Vander Vos, Bozeman, Mont.

“I own a 1968 Ford pickup with the fuel tank behind the seat. The design makes it very easy to insert a hose to siphon out gas, which I suspected someone was doing.

“To prevent this, I took a compression spring from an old grease gun and heated one end up and curled it into a couple of small loops.

Then, I inserted the spring into the fuel tank’s filler spout. It was a tight fit and took some manipulating to get in but now it’s impossible to get a siphoning hose into the tank, yet it doesn’t affect the flow of fuel into the tank.”

From the archive · Full text
Reader shop tip

John Buesinger

John Buesinger, Taylorville, Ill. (ph 217 824-5794)

“I built a tripod base for an old bench vise grip. Unlike a 4-legged stand, the 3-legged base always finds solid footing.

“The portable vise can be moved easily to the job.”

Shop feature stories

From the archive · Full text
Feature story

“Service Rack” For Garden Tractors

Featured source:

“It puts everything up high enough that I can service it easily,” says Harold Davis, Trenton, Tenn., about the service rack he built for his Deere garden tractor equipped with a 60-in., belly-mount mower.

The service rack is made from 1 1/2-in. steel tubing and 1 1/2-in. angle iron. It consists of a 4-ft. wide, 8-ft. long rectangular frame mounted on four 25-in. high legs. A pair of 8-ft. long ramps attaches to one end and a 12-in. high metal bar acts as a “stop”. A pair of 12-in. wide sliding ramps can be placed anywhere inside the frame to accommodate smaller tractors or ATVs. A ladder can be attached to either side of the rack.

“I recently bought a new Deere X495 garden tractor, and it’s a lot easier to remove the deck when it’s up in the air,” says Davis.

“By placing a piece of plywood on top of the frame, I can convert it into a work table,” notes Davis, adding that the ramps can also be used to load tractors or ATVs into a pickup.

He’s looking for a manufacturer. Contact: FARM SHOW Followup, Harold Davis, 5 Sally T. Cooper Road, Trenton, Tenn. 38382 (ph 731 855-9946; email: [email protected]).

From the archive · Full text
Feature story

Generator Runs Off Garden Tractor

Featured source:

I’ve never had a standby generator at my place so I always felt a bit vulnerable about power outages. I decided to mount a generator on our garden tractor, and we couldn’t be more pleased with it. It lets us produce portable electric power any time and any place we need it.

Lloyd Meffert is a lawn mower and small engine expert at Hettick, Ill. I asked him if he could mount a generator on our old Ford garden tractor, which is powered by an 8 hp engine.

We bought a NorthStar 2,900-watt, belt-driven generator from Northern Tool (ph 800 221-0516; website: www.northerntool.com). It requires at least a 5 hp gas engine and sells for $299.99 on the company’s website.

Meffert extended the front part of the tractor frame, then welded a vertical steel plate onto it which allows the generator to be mounted in a vertical position. He positioned the generator to line up perfectly with the tractor engine pulley, allowing enough space to install a belt tightener.

Our son Joe is a journeyman electrician. He set up our home so we can still have heat and water in the event of a power outage. First, he set up the furnace and the water pump so they can be plugged directly into the generator. Then he rigged our home so we can pull out the main fuse coming in and plug in the generator.

We’ve been cautioned never to operate the standby unit without first disconnecting from the power company’s incoming line. That’s because standby power can be fed back out into the power line and could endanger anyone working on the line.

We use the generator to power electric tools such as chain saws and hedge trimmers. We also use it to provide power for emergency flood lights, and to do repair work anywhere in our yard or out in the field.

Something Joe insists is necessary is the use of a ground fault eliminator - a small yellow accessory that plugs into the generator. It eliminates any danger of electrocution when using electric-powered hand tools.

The generator that we use is designed to deliver 2,600 continuous watts and produces 21.7 amps at 120 volts, and 10.8 amps at 240 volts. It has two 15-amp, 120-volt outlets and two 15-amp, 240-volt outlets.

Contact: FARM SHOW Followup, C.F. Marley, P.O. Box 93, Nokomis, Ill. 62075 (ph 217 563-2588).

From the archive · Full text
Feature story

Wood Splitter Doubles As Tire Repair Tool

Featured source:

Jack Vines, Allen, Okla., built a unique wood splitter that doubles as a tire repair machine, thanks to a set of removable attachments.

“It takes advantage of the powerful hydraulics already on the splitter. I can repair a flat tire anywhere instead of having to make a trip into town and wait for someone else to do the job. When I’m done I can remove the attachments and go back to splitting wood,” says Vines.

The two-wheeled machine is powered by an 8 hp Briggs & Stratton engine. It shaft-drives a hydraulic pump that powers a 4-in. dia., 24-in. long hydraulic splitting cylinder.

To work on a tire, Vines places it over a steel rod that threads onto a heavy screw at one end of the splitter table. Then he rotates a “spider” at the bottom of the screw to clamp the wheel rim down. A 3-in. wide, 1-in. thick steel “breaker bar” is used to break the bead on the tire. The bar is supported by a pair of 12-in. long metal arms that bolt onto both sides of the splitting wedge.

The same controls that operate the splitter are used to operate the breaker bar.

“The splitter has enough power to split almost any size or type of wood. With all that power, I have to be careful not to damage the wheel rim when extending the breaker bar,” says Vines.

“Where it really shines is on rusty trailer wheel rims that are hard to break down with a manually operated bead breaker. I can use this machine to break the bead on a 16-in. truck tire with no problem.”

A big advantage of the machine, says Vines, is that it can break the tire completely down which allows him to repair the tire from the inside.

“For example, if a tire has a nail in it I can remove the tire from the rim and then repair it using a plug and patch combination such as the Bowes seal (Bowes Seal Fast, LLC, P.O. Box 18802, Indianapolis, Ind. 46218 ph 866 428-4301 or 317 549-1723; website: www.bowessealfast.com). Repairing the tire from the inside works much better than patching the outside because I never have to worry about a patch blowing out.”

Vines sees no reason why tire changing attachments could not be adapted to any commercial wood splitter.

Contact: FARM SHOW Followup, Jack W. Vines, Rt. 1, Box 196A, Allen, Okla. 74825 (ph 580 421-9775; email: [email protected]).

From the archive · Full text
Feature story

6-Volt Alternators Fire Up Older Engines

Featured source:

Randy Rundle’s frustration starting old pickups led to a better idea and his own business. Fifteen years later, his Fifth Avenue Auto Parts, located in Clay Center, Kansas, supplies parts and solutions to everything from antique cars, boats, trucks and tractors to old irrigation engines. Anything with a 6-volt system is customer potential for Rundle, who started restoring old trucks while in high school.

“They were always tough to start, and I decided that fixing that was going to be my quest,” he recalls.

Part of the problem is that even when 6-volt systems have enough power to crank the starter, there might not be enough left for a strong spark. That’s made worse by constant recharging of batteries, which shortens battery life. If the engine isn’t run long enough or fast enough, the generator can’t recharge the battery between starts and supply energy for lights and other accessories.

“If the engine is warm, it’s even harder to start,” adds Rundle.

A better answer, says Rundle, is to replace the 6-volt generator with a 6-volt alternator. It produces plenty of power to run vehicle accessories at low rpm’s and recharges the battery.

After two years of research and locating a source for custom-built rotors and stators, he produced his 6-volt alternator. It had an output of 60 amps, 7.5 volts, 60 percent more power than produced by original 6-volt generator systems. Today it also includes a solid state regulator built into the inside of the alternator.

For the past fifteen years, he has been installing his alternators and upgrading systems. Projects have included all the cars seen in movies such as LA Confidential to a lim-ousine for the Queen of England. In between Hollywood stars and British royalty, he supplies alternators and other parts to antique cars, boats, trucks and tractors as well as old irrigation motors.

“Most conversions are in the $300 area,” says Rundle.

“That includes the alternator, pulley, mounting brackets and wiring harness.”

Most of Rundle’s business centers on 6-volt systems. He notes that lots of World War II stuff has yet to wear out; it just needs to be upgraded. Upgrading the 6-volt systems from generators to alternators has led to other things. Antique tractor pullers and hot rodders need more power for higher compression engines. Once power is built up, engines tend to run warmer, so cooling has to be upgraded, too.

“One thing that has gotten really big in re-cent years is conversion of these antiques to 12-volt systems,” says Rundle.

“The newer generation of collector has grown up with air conditioning and stereos and wants them in their antiques as well.”

Contact: FARM SHOW Followup, Randy Rundle, Fifth Avenue Antique Auto Parts, 415 Court Street, Clay Center, Kan. 67432 (ph 785 632-3450; fax 785 632-6154; email: [email protected]).

From the archive · Full text
Feature story

Rebuilt Ford Pickup

Featured source:

“Our 1966 Ford pickup with 98,000 miles burned oil and the ring gear on the flywheel was going out. I bought a 1984 Chevy conversion van with a 6.2 diesel and dropped the sub frame out of it, including the engine, transmission, power steering, air conditioning, and so on.

“I removed the 6-cyl. engine, transmission, cross member, steering, and so on, from the Ford. All that was left on the Ford was the frame rails.

“I slid the diesel subframe, containing the complete suspension, in between the Ford frame rails and it was a perfect fit. I welded it in place so it looks like a factory-built job. At that point I also installed the rear end out of the van in the Ford. I had to weld in some spring hangers to do it but it all went together without a hitch.

“Usually, on a project like this, you have to shorten or lengthen a driveshaft. But I didn’t. Everything fit perfect.

“I replaced the Ford dash with the one out of the van and also the steering column with the adjustable wheel and wiper and cruise controls.

“We also added propane injection. I think when we get it all done it should give us around 30 mpg.

“This was a ‘don’t try this at home’ project. A lot of work, but I believe it will be worth it.”

Contact: FARM SHOW Followup, Richard Ackerman, 12730 Tacoma Loop, Columbia, S.Dak. 57433 (ph 605 225-3231; email: [email protected]).

From the archive · Full text
Feature story

“Ultimate” Shop Has Its Own Living Quarters

Featured source:

Some wives joke that their husbands live in their shops. Ed Yager, Glen Rose, Texas, re-ally did live in his for awhile, along with his wife, Gail.

When the Yagers sold their home in Ft. Worth to move to an unimproved acreage near tiny Glen Rose, the first building up was Ed’s new shop.

Yager says he always enjoyed working in the shop, but living in the city, he never had enough room for the kind of shop he wanted. He says they realized that it would take some time to build the house, and since local housing that fit their needs was not available, he designed the shop with a guest house in it. So while the house was going up, the Yagers lived there.

Yager’s 30 by 80-ft. shop is a gabled steel building, like a barn, but they covered over the exterior steel siding with adobe-style brick. Inside, it has 8 in. of insulation all around covered by 3/4-in. plywood.

“The combination of insulation and brick helps control the heat during the hot Texas sum-mers - except when it is 110 degrees in the shade,” Yager says.

To create his “guest-house” living quarters, Yager put up a wall 12 ft. from one end of the building and across the full 30-ft. width of it. He then partitioned the 12 by 30-ft. area into two rooms, along with bathroom and closets. One room is the living/kitchen area, while the other is a bedroom. He stubbed in a 10-ft. ceiling and dropped 10 in. of insulation on top of that.

“I put in sheet rock, and then got a good buy on some nice pecan paneling, so we pan-eled the entire living quarters,” he says.

He used thermopane windows in the living quarters and the shop.

The all-steel shop building has 10-ft. sidewalls. The roof peaks at 15 ft. An over-head door at one end is tall enough that Yager can bring his Massey tractor inside, along with any implement that he may have on it, for service and repairs.

A 10-in. I-beam mounted overhead inside the 10 by 12-ft. door makes a track across half the length of the shop for a 2-ton manual chain hoist. He says this got a lot of use when he was unloading building materials for finishing the insides of the shop and later for the house. He continues to use it for unloading large containers of herbicide, building materials for fencing, and more.

One corner of Yager’s shop is devoted to a water pressure tank and water treatment equipment that supplies the shop, guesthouse and the house with water. This corner also has a washer and dryer.

The rest is laid out in work stations, where he has work tables, shelves, and his shop equipment, including an oxy-fuel welder, a MIG welder, a stick welder, commercial drill press, band saws for both wood and steel, a table saw, a radial arm saw, and various other tools. He plans to eventually add a metal lathe. Yager built all the tables and shelves himself to fit the space he had available.

“I wanted to put in an oil change pit and sump area, but that was going to require cutting down into solid rock,” he says.

“We sloped part of the shop floor into a floor drain to make it easier to wash down, but even the drain was difficult to install because of the rock.”

Yager also added a heat pump heating and cooling system for the living quarters. To make the shop more comfortable during the hot months, he installed two evaporative coolers in it. For warmth in the winter, there are a couple of forced air heaters in the shop.

Yager says the building and concrete slab it sits on cost a total of $56,000 (about $24 per sq. ft).

“That doesn’t include the exterior brick, interior siding, wiring or the improvements made to the shop and guest house area,” he says.

Contact: FARM SHOW Followup, Ed Yager, 1564 County Road 2021, Glen Rose, Texas 76043 (ph 254 897-3770).

From the archive · Full text
Feature story

Home-Built Sheet Metal “Chop Saw”

Featured source:

Peter Visser of Dublin, Ontario, was tired of struggling to cut sheet metal with a torch.

“When I cut thin sheets with a torch, they would warp and I’d get a rough edge. So I came up with a chop saw that cuts sheet metal cleanly and straight,” he says.

Visser removed the base from a Makita portable metal saw that he already had and replaced it with a piece of flat 3/8-in. thick steel plate, the same width as the saw. It’s held in place with two bolts. On the bottom of the plate, he welded two pieces of angle iron to form a slide that holds onto a 10-ft. rail he made using two sections of 3-in. channel iron laying side by side.

Visser put a roller and a hand crank at each end of the rail and hooked the cable to each side of the saw’s slide plate. The winch system moves the saw smoothly from one end of the rail to the other. The operator doesn’t have to lean across the plate and pull the saw by hand.

“I use this system to cut sheets of steel up to 12-ga. I lay it on a couple of saw horses so it’s up off the ground, and when I start to cut, I lock the saw down and pull it across,” he explains.

“It makes straight and smooth cuts. One blade will cut the length of an 8-ft., 14-ga. sheet three times.”

Contact: FARM SHOW Followup, Peter Visser, R.R.1, Dublin, Ontario, Canada N0K 1E0 (ph 519 345-2182; email: [email protected]).