Practical ideas from FARM SHOW MagazineSubscribe · Free issue · Send us your shop tip
Subscribe to FARM SHOW
Issues / Vol. 26, No. 4 (2002)

Vol. 26, No. 4 (2002)

Money-Saving Repairs & Maintenance Shortcuts · Printed section pp. 38–41

32 selected entries · Complete text of selected entries

This issue’s section includes reader tips and feature-length shop stories. Held items and editorial notices are not reproduced.

Archive text: prices, coupons, availability and contact details reflect the original publication, not current offers. Reader methods are not universal instructions; follow manufacturer guidance and proper safety practices.

Reader shop tips

From the archive · Full text
Reader shop tip

Andrew Abrams

Andrew Abrams, P.O. Box 182, Marcellus, Mich. 49067 (ph 616 646-0202; Website

www.marcellus-metalcasters.com): “It’s becoming nearly impossible for an individual to get castings made economically at most metal working shops. Our market niche is reproduction castings and prototypes. We produce gray, nodular, and abrasion resistant iron castings and low alloy steel castings. We can mold new castings from broken castings and make affordable patterns for replacement castings. We also help inventors get prototype castings together for presentations and testing. Castings can be a very economical alternative to welded parts, saving weight and producing stronger parts.

“With most domestic foundries increasing the automation of their processes, we thought your readers would like to know that there’s still a company that gives individual attention to people and projects.”

From the archive · Full text
Reader shop tip

Fred Hansen

Fred Hansen, Santa Rosa, Calif.

“In the “Best & Worst Buy” section of Vol. 26, No. 3, a reader wrote about his Deere 5210 tractor. The air conditioning didn’t work well on it. We solved that same problem on our 5500 by plumbing a ball valve into one of the heater lines outside the cab. We keep the valve off, with the handle removed, unless we need to use the heater. Apparently the heater control valves on these tractors can be faulty.”

From the archive · Full text
Reader shop tip

James Spencer

James Spencer, Memphis, Ind.

“After using my Vermeer 605C round baler for several years, the rubber wore off the coated roller. Instead of spending a lot of money for a new roller, I put some beads of weld on the roller like farmers used to do on snapping rollers on corn pickers. The baler now works as well or better than it did before. One hint: I put the beads on at an angle.”

From the archive · Full text
Reader shop tip

Jack & Dave Wock

Jack & Dave Wock, Jerseyville, Ill.

Jack and Dave built this 18-ft. long hoist out of a piece of 8-in. I-beam. What makes it unique is that it pivots 180° on an anchor post at the middle of the wall on one side of the shop. That lets them move it out of the way when it’s not being used. Also, loads can be carried off to the side of the shop when needed.

“The hoist is 14 ft. high and rides on a couple of heavy steel wheels.”

From the archive · Full text
Reader shop tip

Rick Kuhn

Rick Kuhn, Oconee, Ill.

Rick made an insulated shop at one end of his 60 by 140-ft. equipment shed by designing a folding door system that closes off the shop when needed.

It consists of 4-ft. wide door panels, 10 ft. high. They slide along an old hay carrier track that Rick salvaged from a hay barn. Each door has a rolling hanger attached to its top center. Once stretched out flat, they form an insulated wall.

To seal off the open rafter area above the track and below the roof, Rick made two large curtains using blue plastic tarp. There’s a rod through the lower edge of the tarps. The tarp curtains are swung up out of the way when the doors are opened, using light nylon rope controlled by pulleys.

He can open the moveable wall during the summer or when he needs to work on a big piece of equipment.

From the archive · Full text
Reader shop tip 1 of 2

Dave White

Individual tip 1 of 2 from this reader’s published contribution.
Dave White, Farmersville, Ill.

Attending a nearby industrial auction paid off recently for Dave, who found two good buys for his farm shop. The first purchase was a 15-ft. tall rolling ladder that mounts on casters. Makes it easy for him to get into the upper storage areas in the shop.

From the archive · Full text
Reader shop tip 2 of 2

Dave White

Individual tip 2 of 2 from this reader’s published contribution.
Dave White, Farmersville, Ill.

He also picked up a set of 12-ft. tall heavy-built industrial shelving. He says it’s strong enough to hold just about anything. He reaches the top shelves from his rollling ladder.

From the archive · Full text
Reader shop tip 1 of 2

W. Jacobson

Individual tip 1 of 2 from this reader’s published contribution.
W. Jacobson, Midale, Sask.

“I’ve come up with a simple way to patch tires. Clean around the hole with gas or other cleaner. Then push clear silicone into the hole and around it. Only the clear kind of silicone works. After an hour or so, put the tire back on and inflate. I’ve never had one fail yet.

From the archive · Full text
Reader shop tip 2 of 2

W. Jacobson

Individual tip 2 of 2 from this reader’s published contribution.
W. Jacobson, Midale, Sask.

“Here’s another one: A hack saw will cut twice as easy and last twice as long when speared with lard. It cuts just as well but with a lot less effort.”

From the archive · Full text
Reader shop tip

Clarence Hilmer

Clarence Hilmer, Columbus, Neb.

“I’ve repowered machines and worked on engines for more than 50 years. Recently, I had a terrible time removing a distributor from a 1979 302 Ford engine. Having tried every penetrating oil I could find, I finally tried household vinegar. I applied it several times and let it soak in. After a bit, the distributor came off easily. It worked better than anything I’ve ever tried and here it was sitting in our kitchen cabinet all these years.”

From the archive · Full text
Reader shop tip

Betty L. Jones

Betty L. Jones, Claremore, Okla.

“Here’s an idea that saves me a lot of time when painting. I punch holes inside the rim around the top of the can so that when I take the brush out, paint drips back inside the can. It’s out of the way when you put the lid back on.”

From the archive · Full text
Reader shop tip

Jeff Lang

Jeff Lang, Newport News, Va.

“I wanted a soap dispenser for my shop but couldn’t find one I liked that was easy to fill. My wife was throwing away a pump soap bottle so I mounted it between a couple pieces of wood with a hole in the top piece for the bottle neck. It holds the bottle permanently in place and I just unscrew the cap to refill. Works good.”

From the archive · Full text
Reader shop tip

Lewis Leon Dick

Lewis Leon Dick, Mt. Hope, Kan.

“I’ve always had a problem with straw going around the end of cylinder bars on our combine cylinder. The result is a hole worn in the metal on the side of the combine.

“I solved the problem by welding 1 by 1 1/2-in. strips of 1/4-in. thick metal on top of the concave with the same curve as the concave, forcing straw through the cylinder bars but preventing it from going around the ends of the bars. This solves the problem.

From the archive · Full text
Reader shop tip

Byrl Cogburn

Byrl Cogburn, De Leon, Texas

“My Deere 435 round baler has dual twine tie arms which allow it to wrap two lines of twine at the same time. It uses a pair of twine ‘brakes’ which hold tension on the baler twine as it’s being wrapped on the bale. There are two of these brakes, one on each side of the baler. These brakes get grooves worn in them over time and don’t hold the proper tension on the twine. I figured out that I could switch the brakes around to their opposite sides and they would pull the twine in a different place on the brake, avoiding the grooved areas. I was right. They work like new now and it didn’t cost me a thing.”

From the archive · Full text
Reader shop tip

Michael Mortell

Michael Mortell, Franklin Grove, Ill.

“A lot of equipment today has small wheels on narrow hubs with bearings and thin metal or plastic caps over the hub.

“Even the ones with sealed bearings could benefit from having a little grease inside the hub, but most don’t have grease zerks in them.

“You can add a grease zerk to a hub cap by drilling a hole through the cap the same size as the zerk. You can’t cut threads in the thin hub cap material, but you can secure the zerk in place with a nut. The nut from an electric switch fits just right. Don’t pump in too much grease, as you can force off the cap.”

From the archive · Full text
Reader shop tip

Jake Braun

Jake Braun, Hague, Sask.

“My shop is about 100 ft. long, with most of the tools stationed at one end. That results in a lot of running back and forth. To solve the problem, I made a two-wheeled wooden caddy that lets me easily transport small tools anywhere I want in the shop. The caddy is about 4 ft. high by 18 in. wide and has a base that’s large enough to hold saws and drills. It rides on a pair of old lawn mower wheels. About half way up is a hinged wooden panel where I store chisel tools on one side and screwdrivers on the other side. Above the panel are a number of sloped shelves for storing screws of different sizes. At the top are all my kits and punches as well as brackets to hang a pair of hammers.”

From the archive · Full text
Reader shop tip

Les Turner

Les Turner, St. Ansgar, Iowa

“My 1978 Toro Ground Master 52-in. riding lawn mower had a worn steering gear. Replacing it with a new steering gearbox would have cost hundreds of dollars, so to save money I used the manual steering sector off a 1969 Chevy Nova car. The steering sector fit in the same holes but was a little larger than the original steering gear, so I used an angle grinder to grind out some of the mounting area. I also welded a 2-in. length of 1-in. sq. tubing on the shaft that attaches to the steering wheel. On the steering sector, I welded a square burr that had been ground to fit inside the 1-in. tubing. Then two metal screws were inserted in the tubing below the burr to prevent the steering wheel from being pulled up.

“The only other modification was to have the cast iron steering arm on the replacement unit cut and welded to the Toro arm. My total cost was less than $50.”

From the archive · Full text
Reader shop tip

Stephen Carpenter

Stephen Carpenter, Somerset, Ohio

“When the electric motor on my grain bin unloader wore out, I replaced it with an old hydraulic motor off a junked-out combine grain head. It actually improved things because it slowed the auger down which allows me to run the auger fuller.”

From the archive · Full text
Reader shop tip

Larry Moore

Larry Moore, Loudon, N.H.

“I put a basketball hoop up in one end of our shop. It was the best thing I could have done to keep the floor clean, because my kids are always sweeping the floor in order to play. The shop is L-shaped, with work benches and tools at one end and a big garage door at the other end where the basketball hoop is located and where I also keep my tractor. To play basketball all the kids have to do is back the tractor out.”

From the archive · Full text
Reader shop tip

R. Kevon Stockwell

R. Kevon Stockwell, Jeffersonville, Ohio

“We had a 1989 Deere 750 no-till drill that had a pin with double roll pins holding a pressure spring in place. We found the easiest way to remove the roll pins was to heat the shaft red hot with a torch.”

From the archive · Full text
Reader shop tip

Ray Albertson

Ray Albertson, South Mills, N.C.

After building his farm shop, Ray discovered that the 20-ft. wide sliding door was too heavy for one person to push open alone.

Rather than leaving the door open all the time or always having to look for a helping hand, he put together a power door opener.

To make the opener, he started with a 1/2 hp electric motor. A chain and sprocket attach the motor to a 90-degree gear reduction box and speed is reduced further using a chain and sprocket to a jackshaft.

To hook the drive to the door, Ray used a #35 roller chain, stretched the full width of the door.

“The chain sits on an angle iron track mounted on the door and is fed through the opener mechanism and around the main drive gear,” he explains.

“On the end of the chain, a small threaded rod keeps proper tension on the chain.

“To open the door, all you have to do is press the open button and walk away,” he continues. An automatic shut-off stops the motor when the door is fully closed. When you push the close button, the motor reverses and pulls the door shut until it hits the shutoff.

To protect the opener and the door, Ray put lockouts on the switches.

“When the door is fully open, the open switch is locked out, and when it’s fully closed, the close button doesn’t function,” he says.

Shop feature stories

From the archive · Full text
Feature story

Variable Speed Controller For Shop Tools

Featured source:

“Often when drilling big holes on a drill press, even at the slowest speeds, it was too fast and I was always burning out bits. I decided there had to be a way to slow the drill down even more,” says Stan McDonald, Foxboro, Ontario, a shop wizard who’s known for his innovative electrical tools and ideas.

He devised – and now offers for sale – a variable speed controller for shop tools that lets you add variable speed control to any brush-type electric motor or DC motor.

To run his drill press, he picked up a 90-volt DC motor at a junk yard and fitted it to the press. It then plugs into the control box, which mounts on the wall in his shop. A knob on the box lets him run the press from almost a dead stop up to high speed. In addition, he can run the press in reverse so he can use the drill for tapping holes.

You can also plug hand drills, routers, skill saws and any other 110-volt AC tool into the same box and manually vary the speed.

“Speed controls on the market are generally not built heavy enough for continuous use or lots of power. Mine is overbuilt for non-stop use,” says McDonald.

Larger shop motors, like a drill press, are usually induction-type motors so you have to replace them with DC motors to vary the speed. Most DC motors that you can find at a junk yard are 90 or 180 volts, says McDonald.

“There are a lot of them because no one knows what to do with them.”

The controller box is small enough to mount on the end of a work bench. It has plug-ins for both AC and DC motors. Sells for right at $150 U.S. He can also supply new or used DC motors to power larger shop tools. He’ll supply whatever is needed for a particular machine.

Contact: Stan McDonald, 402 Mudcat Rd., Foxboro, Ont. Canada K0K 2B0 (ph 613 968-9516; E-mail: [email protected]).

From the archive · Full text
Feature story

Fork Lift Mast Makes Great Shop Elevator

Featured source:

“When a wind storm blew a pair of big sliding doors off the track on my barn, I decided to do something about it. I made a metal bracket and bolted it to a wood plank, which I bolted to the door frame, about 8 ft. off the ground.

The upper floor storage and work area in Stanley White’s sawmill and woodworking shop is much more useable now that he can get there by elevator.

White says he got the idea when someone gave him a couple of old forklifts.

“I rebuilt one of them to use in my shop,” he says. The other one wasn’t repairable. But since he was looking for something easier than steps or a ladder to get to the upstairs sawmill, White salvaged the mast and hydraulic lift cylinder and turned them into an elevator.

“The second floor is kind of a loft area around the outside of the lower floor. To make the elevator, I mounted the mast solidly against the wall,” he says.

“I made a platform out of aluminum that fit over the forks and mounted it solid to ride up and down on. It’s about 4 1/2 ft. by 5 ft., so it’s big enough I can load tools and lumber on it, too.”

White made a powerpack for the elevator from a 110-volt electric motor and a 2-speed hydraulic pump by mounting them both on a frame and connecting them with pulleys and a belt. He says he had to experiment a little to find the right size pulleys. He pieced together a hydraulic oil reservoir from scraps of stainless steel he had around the shop.

“I bought the motor from a salvage yard for $25. The hydraulic pump was one I’d bought new and used for something else for several years,” he says.

“It automatically adjusts to slow or fast speed, depending on the amount of the load on it. So if the load is light, it runs on the faster speed. But if it’s a heavy load, it shifts to the lower speed, where it has more torque.”

White rigged a rope control for the hydraulic valve.

“I made a T to fit on the valve lever. Then I fastened a rope to each end of the cross on the T and ran it up through the elevator platform and over a pulley. When I pull on one side, it goes up. When I pull on the other side, it goes down. If I’m not pulling on the rope, the switch centers and the elevator stops. The electric motor has a switch that I can shut off from the second floor, so I can shut off the motor if I’m going to be up there for awhile.”

He says the only thing he bought for the elevator was the salvaged motor.

“I worked on the elevator off and on for a couple of The two doors meet inside the bracket, which keeps the doors rigid so they can’t blow either in or out.

“The plank is mounted high enough that I can drive a tractor or other vehicle under it. I’m willing to build these brackets for others.”

months before I got it the way I wanted it,” he says.

Contact: FARM SHOW Followup, Stanley E. White, 2177 Island Road, Mobile, Alabama 36605 (ph 251 443-7423).


From the archive · Full text
Feature story

Foot Throttle Kit For N-Series Fords

Featured source:

“Ford N-Series tractors were one of the most reliable tractors ever built,” says Phil Smith, Red Rock Manufacturing.

“The 2N, 9N, and 8N were built from 1939 to 1952. The most popular of these was the 8N, with over 500,000 of them built from 1947 to 1952. They’ve always been reliable tractors, with thousands of them still in service. Most parts - whether used or reproduction - can be found at farm stores today .

“However, there were many accessories for these tractors that were built by smaller companies which are often not available, such as the foot accelerator for 8N’s. It was called the Dowden Foot Feed and it was made by Dowden Mfg. Co. They are very rare, if you can even find one, and expensive.

“We now manufacture a replica of the Dowden Foot Feed and sell it as a kit with everything included. The parts are cast from patterns off a set of original parts.

“People are surprised how useful it is because it enables you to use your right hand for shifting and runninng the hydraulic control. It is especially handy when using a loader, rear blade, or dirt bucket.

“The hand throttle was standard on the N-Series tractors. Once this kit is installed, you can use either the foot pedal or hand throttle.

“We sell the entire kit for $135 and that includes shipping. At this time, it is only available for 8N tractors. We would like to find one for other N-Series tractors so we could duplicate that, also.”

Contact: FARM SHOW Followup, Phil Smith, Red Rock Manufacturing, 1117 Park Lane, Pella, Iowa 50219 (ph 641-628-9692; E-mail: [email protected]).

From the archive · Full text
Feature story

“I Saved The Price Of A New Harrow”

Featured source:

It took a lot of time but Bob Sampson says his harrow tine repair project was well worth it.

What he did was to mig weld extensions onto worn tines to bring all of them back to their original 16-in. length. He bought 20-ft. lengths of 7/16-in. cold rolled steel. Then he cut and added enough tine to bring each tine back to its original length.

“I made two welds on each tine, leaving space in between so they could flex a little,” Sampson says.

“I had a bit of a problem holding the pieces in alignment until I came up with a jig made of a split piece of 3/8-in. pipe. I used clamps to hold the pieces in place while welding.

“After a full season of use, none of the extensions have been lost. I saved the price of a new harrow.”

Contact: FARM SHOW Followup, Bob Sampson, RR3, Box 115, Petersburg, Ill. 62675 (ph 217 632-2016).

From the archive · Full text
Feature story

Jack Fitted With Big Base

Featured source:

Commercial “handyman” jacks have a small base that can push down into the ground, making the jack unsafe to use. Clifford Brandenburger, Beecher City, Ill. solved the problem by bolting the 4 by 6-in. base on his jack to a much larger base that measures 20 in. sq.

Also, by removing a steel pin from the base of the jack he can reverse the jack 180 degrees on its original base so he can use the jack up close to a wall.

“I use the jack often to lift my garden tractor so I can work under it. The big base makes the jack a lot safer to use,” says Brandenburger. He used 2-in., 1/2-in. thick sq. tubing to build the base.

“I always put a 1/2-in. dia. bolt under the jacking mechanism, so the jack can’t come down even if the mechanism fails,” notes Brandenburger.

Contact: FARM SHOW Followup, Clifford Brandenburger, Rt. 2, Beecher City, Ill. 62414 (ph 618 487-5247).

From the archive · Full text
Feature story

Restoration Duo Saves IH Cubs From Extinction

Featured source:

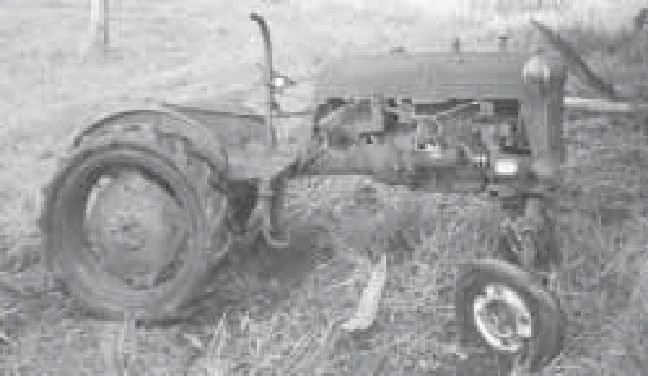
If you have a Farmall Cub in need of restoration, you might want to get in touch with Alan Wells and Jack Borden.

The Oakville, Wash., farmers run a tractor repair and restoration business out of the shop on Well’s farm. In recent years they started buying and restoring Cubs. They work on standards, highboys, or lowboys with IH, McCormick-Deering, or Farmall paint and decals. If they can be repaired to near original condition, Wells and Borden are up to the task.

They’ve bought and then resold most of the Cubs they’ve worked on, but Wells says, “We’ve also restored some for collectors and people who still want to use a Cub for work.”

Borden has a special place in his heart for Cubs. As a 13-year-old, he sold an FFA calf for enough to make the down payment on a Cub and then did custom tractor work with it in order to make the $43 monthly payments.

While Cubs are a special favorite, Wells and Borden will work on anything. They prefer it be red, though. They’ve restored a lot of Farmall A’s, Super A’s, H’s and M’s along with a few later models.

To date, nearly all the tractors they’ve restored have been from the Pacific Northwest. They’re looking to buy junked and restorable Cubs within a reasonable drive from Oakville, just south and west of the Seattle area. And they’ll sell a restored one to anyone who wants it. Wells says a Cub that sold new for $550 in 1947 is worth $3,000 or more now if it’s properly restored.

“It doesn’t matter if the tractor is part of a collection or is going back out to do field work, we restore them all the same,” Wells says.

Contact: FARM SHOW Followup, Alan Wells, 7571 St. Route 12, Oakville, Wash. 98568 (ph 360 273-2454; E-mail: [email protected]).

From the archive · Full text
Feature story

Hard-To-Find Parts For Tinkerers

Featured source:

Ever started a project and found yourself looking for a small motor, sprocket, gear or other part? If so, you’ll want to check out West Coast Inventory Supply.

It’s a great online source of all kinds of parts from gears and shafts to motors, circuit boards and actuators. The company has both new and surplus parts. They cater to model builders, electro-mechanical designers, and just plain tinkerers. It’s a great place to find stuff for motorized robotics or school projects.

Staff are happy to advise you if you don’t know quite what it is you need. Best way to order from them is online, but you can also order by mail order, fax or phone. Write or call for a free catalog if you can’t access the catalog at their Website. The Website also includes links to other product and information sources.

Contact: FARM SHOW Followup, West Coast Inventor Supply, Box 80515, Rancho Santa Margarita, Calif. 92688 (ph 949 858-7251; fax 949 858-7819; E-mail: [email protected]; Website: www.wcisupply.com).

From the archive · Full text
Feature story

Chrome Liners For Forage Choppers

Featured source:

“These chrome liners will last three to four times longer than any other liner on the market,” says Craig Talbot, R & H Machine, Inc., Caldwell, Idaho. The company specializes in chrome alloy wear parts for tillage tools and planters.

The chrome alloy liner bolts onto the blower chute and consists of 6 1/2-in. wide overlapping sections that vary in length and shape, depending on the chopper brand and model. The individual sections bolt together. To install them, the operator drills holes in the blower housing.

“It’s a popular liner with custom forage choppers. In fact, some New Holland dealers in the San Joaquin Valley of California won’t sell a new chopper without our liner in it,” says Talbot.

“If a crack develops in one of the liner sections, you can replace just that section.

“You can put the old liner back in with no problem when selling the machine. When installing the liner, it’s a good idea to apply silicone between the liner and the housing, which greatly reduces vibration.”

The chrome liner sells for 10 to 15 percent more than conventional high-wear liners.

The company also sells long-wearing chrome alloy skids for forage chopper heads as well as swathers.

Contact: FARM SHOW Followup, R & H Machine, Inc., 115 Roedel Ave., Caldwell, Idaho 83605 (ph 800 321-6568; Website: www.rhmachine.com).

From the archive · Full text
Feature story

Press Powered By Upside-Down Jack

Featured source:

“It gives me a much better view of what I’m doing because there’s no base plate in the way,” says Clifford Brandenburger, Beecher City, Ill., who built a small hydraulic press equipped with a 1 1/2-ton hydraulic jack placed upside-down.

The jack’s 1 1/2-in. dia. ram can be extended up to 4 in. downward to press out bearings and bushings, etc.

“Normally, you can’t use a hydraulic jack upside down. But I feed this some extra oil from an outside reservoir to keep the jack mechanism constantly bathed in oil,” says Brandenburger.

He simply bolted a small oil tank to the top of the press frame and then ran a length of 1/4-in. dia. copper tubing from the tank to the jack. Oil in the tank flows by gravity down to the jack. He made another bracket for the jack and bolted it on upside down next to the tank. By pulling a pin from the bracket, he can slide the jack back and forth and center the jack over the object to be pressed. A horizontal metal platform below the jack can be raised or lowered up to 1 ft. by changing the position of two steel pins.

“The oil tank measures 1 ft. long and 1 1/2 in. in diameter, but any size tank would work as long as it’s mounted above the jack,” says Brandenburger, noting that he used steel pipe and 2-in. sq. tubing to build the press itself.

Contact: FARM SHOW Followup, Clifford Brandenburger, Rt. 2, Beecher City, Ill. 62414 (ph 618 487-5247).

From the archive · Full text
Feature story

Fold-Down Bumper Makes Engine Work Easier

Featured source:

Routine engine maintenance, like checking fluids or replacing spark plugs, can be difficult on pickups, trucks, vans or recreational vehicles. Otis Huff, Little River, Texas, found a way to make those jobs easier.

He designed a replacement front bumper and grill protector that folds down into a work platform.

“It’s an idea I’ve had since I was 19 or 20 years old,” says the 69-year-old retired farm equipment mechanic.

When he retired a few years ago, Huff began working out the details in his shop. Since then, he’s made several prototypes of his bumper, using mostly scrap steel.

When folded down, Huff’s work platform is bumper height and runs the full width of the vehicle, about 20 in. wide. It’s built strong and there’s plenty of room to set tools and parts on it. For larger vehicles, the bumper can be fitted with wings that fold out along the sides of the truck.

Huff has applied for a patent on the idea and the design of some parts of the fold-down bumper.

“I’d like to talk with someone who owns a small manufacturing company or machine shop that would be interested in manufacturing it,” he says.

Contact: FARM SHOW Followup, Otis Huff, Box 455, 1306 W. Mesquite St., Little River, Texas 76554 (ph 254 982-3402).

From the archive · Full text
Feature story

Screw-In Handle For Vise Grip Pliers

Featured source:

If you own a set of Vise Grip-type “locking pliers”, you’ll be interested in this new screw-in handle that makes it easier to tighten down the jaws.

The Grip-Buddy gives you more control and more clamping power, says the Mastertool Co. It works like the handle on a bench vise.

Once the handle is installed, the Vise Grips work totally different. You tighten and release the jaws with the screw-in handle, not with the spring-loaded lever. So you can work in much tighter spots and get a tight fit on a nut or bolt much more quickly.

“If you want to use the release lever, you still can. But it’s a lot easier and faster to turn the handle,” says inventor Dan Mintz.

“It gives you 20 percent more gripping power.

“One of the biggest advantages occurs when you want to reposition two pieces of metal that you’ve clamped together. With a conventional vise grips you have to open the jaws all the way, readjust the pieces and then re-clamp the jaws. With the Grip Buddy, you just loosen the jaws grip a little, then use a hammer to tap the pieces into a new position and turn the handle clockwise to re-tighten the jaws.

“Another advantage is that there’s no need to guess how big the jaw opening should be. You just put the jaws around the object and use the handle to tighten it down. There’s no chance that you’ll make a mistake and have to adjust the jaws again.”

Sells for $9.95 including S&H. Contact: FARM SHOW Followup, Mastertool Co., Box 2021, New York, N.Y. 10013 (ph 212 504-3293; fax 212 504-3293; E-mail: [email protected]; Website: www.GripBuddy.com).