Practical ideas from FARM SHOW MagazineSubscribe · Free issue · Send us your shop tip
Subscribe to FARM SHOW
Issues / Vol. 24, No. 3 (2000)

Vol. 24, No. 3 (2000)

Money-Saving Repairs & Maintenance Shortcuts · Printed section pp. 38–40

34 selected entries · Complete text of selected entries

This issue’s section includes reader tips and feature-length shop stories. Held items and editorial notices are not reproduced.

Archive text: prices, coupons, availability and contact details reflect the original publication, not current offers. Reader methods are not universal instructions; follow manufacturer guidance and proper safety practices.

Reader shop tips

From the archive · Full text
Reader shop tip

Harvey K. Malon

Harvey K. Malon, Rapid City, S. Dak.

“I made a cheap rack for scrap iron by stacking standard wood pallets on top of each other. You can get pallets free just about anywhere.

“This rack gets your scrap iron up off the ground and makes it easy to sort through. I put all kinds of miscellaneous steel in there. If you have long pieces of tubing or scrap, you could stack two pallets end to end. It’s a good idea to lay the pallets on railroad ties or treated lumber because the pallets will rot if placed directly on the ground.”

From the archive · Full text
Reader shop tip

John Whipple

John Whipple, Shenandoah, Iowa

“The best thing I’ve done in my shop to make it more efficient is to put tools and tool chests on wheels. That lets me take the tools to the job and not have to walk back and forth to the bench all the time for the right tool.”

From the archive · Full text
Reader shop tip 1 of 2

John M. Kiminski

Individual tip 1 of 2 from this reader’s published contribution.
John M. Kiminski, North Brookfield, Mass.

“The distributor on our Deere B tractor was all worn out. To avoid a very expensive repair, we turned the shaft down in a lathe, bought some new bushings and pressed them on, and then bored them to size on the lathe. It worked well and the tractor runs great now.

From the archive · Full text
Reader shop tip 2 of 2

John M. Kiminski

Individual tip 2 of 2 from this reader’s published contribution.
John M. Kiminski, North Brookfield, Mass.

“The best feature we built into our shop is a repair pit. It’s a great time and back saver when changing oil, tires, and working on clutches, transmissions, etc.”

From the archive · Full text
Reader shop tip

August E. Andersen

August E. Andersen, Long Eddy, N.Y.

“One trick I’ve learned that makes diesel-powered tractors start easier in cold weather is to equip them with high- speed starters. My Deere 4020 started hard so I mounted a high-speed starter on it, which solved the problem. I bought the starter at my local Deere dealer. Costs a little more than a regular starter but it works.”

From the archive · Full text
Reader shop tip

Dave Whaley

Dave Whaley, Wheatley, Ontario

“I use our old 200-gal. sprayer to wash out our larger Hardi sprayer. I bought a car wash wand with soap dispenser and 50 ft. of garden hose. Now I don’t have to bring the Hardi sprayer anywhere near the well or get yelled at by my wife for killing the grass.”

From the archive · Full text
Reader shop tip

Jack R. Kiser

Jack R. Kiser, Fremont, Ohio

“I had to replace the outside door handle on my 1989 Chevrolet pickup but it was difficult to get to. I solved the problem by cutting a 1 1/4-in. dia. hole in the edge of the door with a hole saw. That allowed me to connect the latch rod to the door handle. I filled the hole with a metal snap-in plug.”

From the archive · Full text
Reader shop tip 1 of 2

Joseph W. Claus

Individual tip 1 of 2 from this reader’s published contribution.
Joseph W. Claus, Pittsburgh, Penn.

“One shop tip that saves me aggravation is to paint all outside hand tools bright yellow. Hammers, wrecking bars, splitting wedges, pry bars, etc. Makes them easy to find and identify, especially if you work with a group of people.

From the archive · Full text
Reader shop tip 2 of 2

Joseph W. Claus

Individual tip 2 of 2 from this reader’s published contribution.
Joseph W. Claus, Pittsburgh, Penn.

“My best tip for making engines last is to change the motor oil often. I’ve been changing oil and filters every 2,000 miles for 40 years. It never sludges up in the valve area and oil sump. My engines are always clean inside. I also recommend using the same brand of oil all the time. Paraffin and asphalt-based oils should not be mixed.”

From the archive · Full text
Reader shop tip

Norman Foellmi

Norman Foellmi, Sparta, Wis.

“While switching engines in a piece of equipment, I had to take a pilot bearing out of a crank shaft. I just filled the opening with grease and then put a dowel in that fit the hole and hit it with a hammer. The bearing popped right out.”

From the archive · Full text
Reader shop tip

Roland Jackson

Roland Jackson, Amarillo, Texas

“I manufacture a power steering kit to fit NAA and 8N Ford tractors. I’ve had many comments on how clean the installation is. One of my goals, before I started working on this project, was to make an add-on unit that worked and looked exactly like the original equipment. We accomplished that goal in that the steering unit is quick and turns the front wheels from extreme right to extreme left with two revolutions of the steering wheel – just like the original steering. We also wanted to make the unit strong so once it was mounted on the tractor, it would last for years.

“There’s a 1 1/2-in. dia. cylinder on each side of the tractor. Both cylinders work together to give you a smooth and trouble-free turn every time regardless of the load on the tractor’s front wheels. The cylinders are attached to your tractor by heavy drag link brackets which require no drilling or welding.

“Anyone interested can get more details at our web site: www.jacksonpower steering.com. I sell the system for around $1,600 using a power steering pump and $1,400 if the existing lower pump is used to power the steering control unit.”

Contact: FARM SHOW Followup, Roland Jackson, 2800 Estates, Amarillo, Texas 79124 (ph 806 463-2141; E-mail: [email protected])

From the archive · Full text
Reader shop tip

David White

David White, Farmersville, Ill.

He bought three material racks at a state salvage sale and then mounted them on large wood pallets, which he built. The pallets let him carry the racks around with his forklift, even when loaded. Lets him carry them into the shop as needed when working on a project.”

From the archive · Full text
Reader shop tip

Roger & Bruce Elliott

Roger & Bruce Elliott, Montrose, Ill.

They had a close call when a local man was killed by a car slipping off a jack. It prompted them to go looking for a safer lift for their shop. When a nearby car dealership when out of business, they bought one of their hydraulic lifts and installed it in their farm shop. The lift is self-contained, with an electric-powered hydraulic pump, and doesn’t require a pit. It bolts directly to the flat concrete floor. So far, no problems and they can use it on all types of vehicles and equipment.

From the archive · Full text
Reader shop tip

J. Harris

J. Harris, Prentice, Ill.

Old planter firming wheels can be used to make cheap salt boxes. The spoked wheel used by Harris keeps the salt block off the ground yet lets rain water go through.

From the archive · Full text
Reader shop tip

Claire Wilson

Claire Wilson, Winchestor, Ill.

With more and more factories upgrading to high- tech milling and drilling equipment, a lot of surplus “low-tech” equipment is on the market that works fine but might be a bit less sophisticated.

Wilson recently picked up this Cleveland-Hammond toggle drill from a manufacturer. The heavy production line drill has a swinging feature which allows exact drilling over a wide sweep. He says he uses it every day. What he likes about it is that several holes can be drilled in a heavy piece of metal without having to move the metal. It can drill holes over a 2-ft. sweep.

“We can drill holes up to 4 in. in dia. the drill has six speeds and will go all day if you need to. He says he picked it up for “a reasonable price” and notes that if he hadn’t bought it, it would most likely have been scrapped.

From the archive · Full text
Reader shop tip 1 of 2

Isaac Yoder

Individual tip 1 of 2 from this reader’s published contribution.
Isaac Yoder, Blanch, N.C.

“After two years of use, I’m willing to share an unusual money-saving repair I came up with. On our farm well’s submersible pump, there is a coupler between the motor and pump. On the pump side, the coupler has a hex shaft while the shaft on the motor side has finer splines. The splines on the motor wore off so we had to get a new motor. A year later, it happened again so we decided we had to do something. I just ground the end of the motor shaft back slightly and put high grade Loctite (the green color) on the shaft and collar and tapped it back on again and reassembled the pump. After giving it plenty of time to set up, we put the pump back in use again. The repair has held up for two years. That’s twice as long as when it was new. So I would advise anyone to at least try what we did rather than buy a whole new motor.

From the archive · Full text
Reader shop tip 2 of 2

Isaac Yoder

Individual tip 2 of 2 from this reader’s published contribution.
Isaac Yoder, Blanch, N.C.

“I have also used Loctite on bearings, both large and small, high speed or low speed. If an old bearing or race wears down a shaft or collar, just put some Loctite on and position the bearing and it will seize to the shaft. It’s a miracle product as far as I’m concerned.”

From the archive · Full text
Reader shop tip

Dan Grewe

Dan Grewe, Arlington, Wa.

“I read with interest Curtis Wold’s idea for drilling a 1/ 16-in. dia. hole in engine and transmission dipsticks to check oil levels. Here’s my way which is simpler and maintains strength in narrow dipsticks. Just grind a little notch at the full and add levels. Quick and easy to do with a file.”

From the archive · Full text
Reader shop tip

Bob White

Bob White, South Euclid, Ohio

“I’ve got the slickest little trick for mounting tubeless tires. After trying every thing I could think of to get beads to seal, I came up with this idea. It works every time and costs nothing.

“After slipping the tire onto the rim, I ‘snug’ the bead on the side that’s opposite the valve stem. You don’t have to seal that side. I just fit it snuggly to the rim with a couple pulls.

“Then I flip the tire over onto some supports. I use a couple pieces of 4 by 4’s or a couple tires. The supports hold the sides of the tire as you push down on the rim. It only takes a couple of pounds of force to push the rim down enough to close the bead gap. While I hold the rim down with my left hand, I apply shop air with my right to seat the bead. To make it seat faster, I take the valve stem out to reduce restriction in the air flow. This technique has never failed me and no special tools are required. Takes only about 30 seconds.”

From the archive · Full text
Reader shop tip

Jerry Brown

Jerry Brown, Bixby Radiator, Inc., 15200 S. 76 th E. Ave., Box 307, Bixby, Okla. 74008 (ph 800 331-2748)

“I custom build radiators for tractors with engines that are running too hot. I specialize in Deere tractors but I can work on other models, too. The farmers who come to my shop need a bigger radiator but they can’t get one from the company that will fit. Some of them have gone to radiator repair shops for help with no results. Others have tried installing a turbocharger but it didn’t solve the problem. Often the problem is that they’re using a tractor that’s too small for the jobs they’re using it for.”

From the archive · Full text
Reader shop tip

Paul Horne

Paul Horne, 8950 Upper 240 th St. W., Lakeville, Minn. 55044 (ph 612 469-4229)

“I recently began marketing a hydraulic thrower control for Deere small square ejec-tion balers. These balers come with a steel rod that you have to manually rotate in order to adjust the bale’s throwing distance. To change the setting you have to reach behind from the tractor cab and rotate the rod, which is awkward to do. My thrower control uses the tractor’s hydraulics to rotate the rod and is activated by a valve in the cab.

“My thrower controls consist of a cylinder and chain contained inside a steel frame that bolts onto the baler. The cylinder chain-drives a sprocket that attaches to the rod. As the cylinder is extended or retracted, the chain rotates the rod in either direction.

“My neighbor used it last year on 10,000 bales with no problems. It’ll fit any Deere ejection baler model. As far as I know, Deere is the only company that makes ejection balers equipped with hand-operated controls for setting the bale throwing distance.”

From the archive · Full text
Reader shop tip

Leon Dick

Leon Dick, Mt. Hope, Kan.

“I keep my diesel fuel tank on a trailer. I didn’t want to have to connect cables from the fuel pump on the trailer up to my tractor battery all the time so I installed electrical boxes on each side of the tractor, and wired them up to the tractor’s 12-volt system. I also attached a 110-volt, 3-prong male plug to the cord on the 12-volt fuel pump on the trailer. It lets me use the tractor’s 12-volt system to operate the pump and eliminates the need to use jumper cables off the battery.

“You can buy these box receptacles at almost any hardware or electrical supply store. I used existing holes in the tractor frame and ran a bolt through the back of the box. I also grounded the receptacle by running another bolt through the tractor frame and attaching a ground wire to it. I installed a box on each side of the tractor so that I can drive the tractor up to either side of the trailer. I made this conversion on my Deere 4430 and 4420 tractors and also installed a box on my Deere 7700 combine for the same purpose.

“I paid about $1.25 for the box, 50 cents for the receptacle, and $2.50 for the cover.”

From the archive · Full text
Reader shop tip

Rodman & Co., Inc.

Rodman & Co., Inc., 2823 N. San Fernando Blvd., Burbank, Calif. 91504 (ph 800 228-1806 or 818 846-9494; fax 9681)

“Our new ‘Nibbler’ sheet metal cutting head fits any electric, pneumatic or cordless drill with a speed range of 1,500 to 3,000 rpm’s. It cuts steel, brass, copper, aluminum, plastic, and fiberglass with no distortion, jagged edges, or sparks. The unit’s main body attaches to the drill chuck and comes with a grip handle on one side and the cutting mechanism – which uses a punch and die - on the other side. As the drill turns it operates a mechanism inside the body, which uses the rotary action of the drill to move the punch up and down. The punch rides up and down inside a die that has a gap in it. You grab the handle to guide the gap into the material you want to cut. The design allows the unit to cut corrugated, round or flat stock.

“The punch can’t be sharpened due to the unique design of the cutting head. However, you can lengthen the life of the punch by rotating the die to a new position to provide a new cutting edge. Simply loosen a set screw under the die and turn it, then tighten the set screw back up. Four different positions are available.

“There are other sheet metal cutters on the market, but they’re self-contained units that are large and cumbersome and hard to maneuver. Our unit keeps the price down by using an existing power source – your drill. Self-contained models are designed so that only one edge of the punch can be used. And they’re much more expensive, selling for $400 to $800. Our unit sells for $179.95 plus S&H. Extra punches and dies are available, as is a bench holder bracket that lets you mount the unit on a bench.”

From the archive · Full text
Reader shop tip

Harold Stoudt

Harold Stoudt, Hamburg, Pa.

“Several years ago I completely restored my 1952 Allis Chalmers G tractor and rebuilt the engine. Recently the engine crankshaft broke. The original Continental engine is no longer made and parts for it are no longer available. I use this tractor a lot to clean my barn and for other jobs, having built a front-end loader for it years ago. I didn’t want to give it up so I re-moved the engine and replaced it with a new Kohler 2-cyl., 25 hp, air-cooled gas engine. It works great.

“To mount the new engine I mounted a 1/ 2-in. steel plate against the original clutch housing and attached the new engine mounts to it. I had a machine shop make a 1 1/4-in. dia. shaft which has a hub on the end of it that matches up with the tractor’s original flywheel and clutch. The engine uses three V-belts to drive this shaft. The original engine ran at 2,300 rpm’s, but the new engine runs at 3,600 rpms so I had to carefully cal-culate the belt ratio to maintain the original drivetrain speed.

“The Kubota engine has a big muffler that’s right behind the tractor seat. To keep its heat away from the driver, I mounted a steel shield between it and the seat. The shield mounts right where the original radiator used to be (the air-cooled Kubota engine doesn’t need a radiator).

“I paid $1,576 for the engine which I bought new. The original 4-cycle engine was rated at 19 hp but the 4-cycle Kubota engine is rated at 23 hp. However, the horsepower on the two engines is about the same because newer engines don’t have as much torque.

“The original engine weighed 225 lbs. but the Kubota weighed somewhat less than that. I wanted to keep an equal weight with the new engine so when I used two pieces of 8-in. channel iron. The engine mounts on a steel plate that’s bolted to an 8-in. channel iron frame. The bolts are welded to the top of the frame and can be adjusted so that the engine can be raised or lowered in order to tighten the V belts. I also mounted a drawbar on the back of the frame.

“I also mounted a belt-driven hydraulic pump behind the shield. The pump is used to operate the loader.

“No plans are available.”

From the archive · Full text
Reader shop tip

BurkTek Inc.

BurkTek Inc., Box 10736, Kansas City, Mo. 64188 (ph 800 700-6784 or 816 468-4650; fax 5744; Website: www.cordpro.com)

“Our new 100-ft. extension cord reel is designed with a unique reel divider that lets you wind up each half separately. That means you don’t have to keep the cord reel next to an electrical outlet which is much handier. To install the cord you simply insert the cord end through a hole in the divider and then pull the cord through to half way.

“The unit prevents the cord from becoming loose and tangled and also keeps it clean, neat and ready to use. A reinforced eyelet allows it to be hung from a wall. It can store 100 ft. of 16 ga. cord, 80 ft. of 14 ga. cord, or 50 ft. of 12 ga. cord. Sells for $10 plus S&H.”

Shop feature stories

From the archive · Full text
Feature story

Drill Bit Rack

Featured source:

Keeping drill bits organized and easy to find is a cinch with this drill bit rack we recently spotted in the British farm magazine Practical Farm Ideas.

The idea is to weld short lengths of different-size steel pipe to pieces of light angle iron and then fasten the assemblies to the wall. Each piece of pipe is marked clearly for a size of bit. Bits are inserted with the cutting tip out to keep them from dulling. The pieces of pipe are big enough to handle several bits.

The bit holders are welded on at a slight angle so the bit won’t fall out. (Checkout Practical Farm Ideas at www.farmideas.co.uk)

From the archive · Full text
Feature story

Bowling Ball Vice Holds Small Work Steady

Featured source:

When Charlie Foster retired after a career in the military followed by a second one working for a telephone company, he retreated to his shop.

“I make knives, miniature cannons, and do a lot of wood carving and other miscellaneous projects,” he says.

Frustrated at not being able to hold small parts steady and at the right angle for carving or filing, he devised a swivel vice out of an old bowling ball that makes it easy to put work at exactly the right angle.

“I drilled and tapped the thumb hole in the ball to fit a big bolt. Then I welded a small 4-in. vice to the head of the bolt. With the bolt and vice screwed into the ball, I’ve got a vice I can turn to just about any angle,” he says.

To hold the ball vice steady, Foster used the steel frame out of an old bowling ball bag.

“It’s sturdy and has four rubber cushions to hold the ball. The ball wedges into the frame so snugly it takes more than a little effort to get it to move once it’s put in place,” he explains.

The ball vice worked so well, Foster made other devices to screw into the ball. For example, he welded a flat steel plate onto a bolt that screws onto the ball.

“I drilled holes in the plate, so I can screw pieces of wood onto it to hold them in place to work on,” he says.

Foster made a couple other screw-in devices to help hold odd-shaped pieces, especially for wood carving.

“I’m thinking about attaching a halogen flood light to another old bowling ball. That way, I could adjust the light just where I need it without the need for a clamp to hold it in place,” Foster says.

Contact: FARM SHOW Followup, Charlie Foster, 7962 Center Parkway, Sacramento, Calif. 95823 (ph 916 392-2789; E-mail: [email protected]).

From the archive · Full text
Feature story

Big Two-Pronged Hoof Pick Has Many Uses

Featured source:

A hoof pick is a hoof pick, right? Not so, says Paul Muller, Arvada, Colo., who has come up with a two-headed hoof pick that’s made from used horseshoes.

“It’s heavier than anything on the market and has two different types of heads which lets you use it for a variety of jobs,” says Muller.

The pick comes with a large, twisted, dipped-rubber handle that provides a sure grip regardless of your hand size and has a leather thong on one end to hang it up. There are two curved heads. One head is flat and semi sharpened. It can be used to scrape out mud or fungus and can even be used as a crude hammer to pound nails. The other head is pointed and works great for prying com-pacted dirt, clay , ice, snow, etc., out of horse or cow hooves. It can also be used to make buckle holes in leather and even to pull fence staples.

“It makes cleaning out hooves less of an effort because the weight works for you,” says Muller.

“I invented it five years ago but just started marketing it last year. It’s a handy and unique tool to have hanging in the shop.”

Sells for $14.95 plus S&H. Contact: FARM SHOW Followup, Paul L. Muller, 6937 W. 53 Pl., Arvada, Colo. 80002 (ph 303 467-1278; fax 3442).

From the archive · Full text
Feature story

Quick Way To Strip Paint Without Sandblasting

Featured source:

“We’ve found a way to strip paint off antique tractors that works better than sandblasting,” says Bruce Baker, Ohio City, Ohio.

“We use a cutting torch with a large tip and keep the oxygen lever pressed. You have to keep it moving and never stay in one spot. It’s very fast and efficient but you cannot use it on sheet metal – the hood, fenders, radiator, etc. This method works to remove old paint, grease, and grime. Everything burns right up and you brush off the debris.”

Contact: FARM SHOW Followup, Bruce Baker, 11877 Walnut Grove Rd., Ohio City, Ohio 45874 (ph 419 965-2646).

From the archive · Full text
Feature story

Where To Go To Get Tractor Seats Restored

Featured source:

If you’re tired of sitting on that cracked, ripped, uncomfortable old tractor seat, Bill Buchanan and Jonas Martin can help you.

These two craftsmen operate a couple of reupholstery shops that specialize in tractor seats. Buchanan’s shop, in Linwood, Ontario, specializes in cloth covered seats. Martin’s shop, near Wallenstein, Ontario, specializes in weather-resistant Naugahyde coverings.

The work is a sideline for both men and they sometimes work together on jobs.

Reupholstering tractor seats can be fairly simple but often requires several hours of work.

The men have all the forms and patterns to cut new foam padding and coverings for the most popular tractor seats.

“One of the easiest and quickest seats to re-cover is the style that Deere used on their 20 through 55 series tractors. We can do those in a short time,” says Martin.

He says one of the most difficult seats to re-cover is the one on Case IH Maxxum tractors.

“Those are just beginning to come in to us,” he notes.

“Some of the older Farmall seats are difficult, too, and they sometimes leave off some of the piping or otherwise simplify a cover to save customers some money. But if you want an exact restoration, they can handle that, too.”

Martin says some of the seats that come in from older equipment require metal work before new cushions and covers can be put into place.

“We can do some of that here, but more extensive metal work we send out to another shop,” he says.

While they specialize in tractor seats, Buchanan and Martin can work on just about any type of automotive seat, including those from cars, trucks, construction and earth-moving equipment, motorcycles and even bicycles.

“I suppose if someone wanted furniture, antiques, or a car interior reupholstered, we could probably do that, too,” Martin notes.

For tractor seats, prices range from $65 to $95 (Canadian), plus shipping both ways. Some, however, can run closer to $200. And once in a while, when metal work is extensive, the total bill can come out even higher.

“We have to pay by the hour for welding and metalwork,” Martin explains.

He says a small percentage of seats that come in for repairs just can’t be fixed.

“Sometimes after-market seats are available for less money, and we encourage people to take a look at those. But most of the time, the covers aren’t cold-crack resistant like ours are.”

Contact: FARM SHOW Followup, Jonas W. Martin, R.R. 1, No. 7595, Wallenstein, Ontario, Canada N0B 2S0 (ph 519 698-9970) or Bill Buchanan, 36 Isabel St., Linwood, Ontario, Canada N0B 2A0 (ph 519 698-9834 please don’t call on Sunday).

From the archive · Full text
Feature story

Oil Cooler Boosts Tractor’s Hydraulic Capacities

Featured source:

If you’ve got a job to do that overheats your hydraulic system, you’ll be interested in this “cooler” built by Alberta farmer Raymond Hart.

He uses a Case 2470 4-WD tractor to pull a chain-type earth mover fitted with an “endless” chain loader. It’ll handle up to 8 yards of dirt at a time and is operated by tractor hydraulics.

“This tractor’s hydraulics were originally designed to handle just the power steering and front-end loader. It did not have enough capacity to run the earth mover,” says Hart.

“So I bought a large hydraulic pump and mounted it on front of the tractor’s diesel engine and installed a 30-gal. reservoir behind the cab. Then a new problem developed.

“The hydraulic oil was running too hot. The hydraulic motor on the earthmover would get extremely hot and smoke.

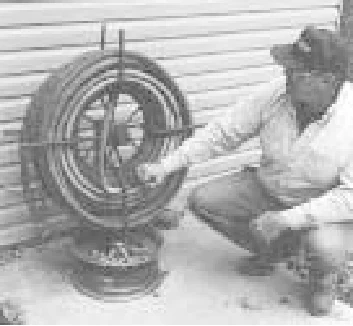
“A friend of mine suggested I mount a 45-gal. drum of water on the tractor drawbar and coil up about 60 ft. of 1/2-in. dia. copper tubing inside the barrel. I attached the line coming from the hydraulic pump to the copper tubing and then hooked the line to the 30-gal. reservoir to the output from the barrel.

“Before I installed the cooler, I could only run for 3/4 of an hour and had to shut down for four hours before it was safe to go again. Since installing the cooler, I can run continuously 12 to 15 hrs. a day. I’ve loaded about 40,000 yards of dirt in the past two years since making the change.

“To install the hydraulic pump on the front of the tractor, I had to alter the radiator. I needed to make room for a driveshaft and universal joint which run to the pump, which is mounted ahead of the radiator.

“The water barrel holds 40 gal. of water and had to be mounted very firmly so it would stay in place on rough ground. The barrel sits on top of a large steel pulley with four hold-down bolts. It never moves.

“The final modification I made was installing a 3-speed transmission off a 1-ton Chevy truck behind the hydraulic motor on the earth mover. The output shaft connects to the drive shaft on the chain. It was originally pto-powered.”

Contact: FARM SHOW Followup, Raymond H. Hart, Box 578, Claresholm, Alberta T0L 0T0 Canada.