From the archive · Full text
Reader shop tip
John Lubinski
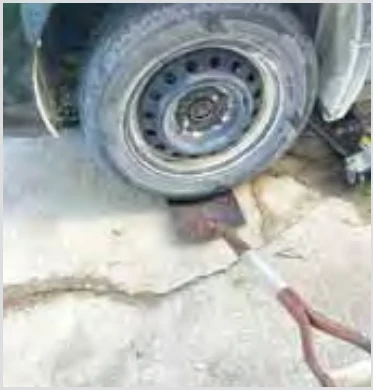
“Using a small shovel to lift a tire into position when changing makes it much easier to move and get the tire back on, especially for us old guys.”
Money-Saving Repairs & Maintenance Shortcuts · Printed section pp. 32–34
32 selected entries · Complete text of selected entries
This issue’s section includes reader tips and feature-length shop stories. Held items and editorial notices are not reproduced.
“Using a small shovel to lift a tire into position when changing makes it much easier to move and get the tire back on, especially for us old guys.”
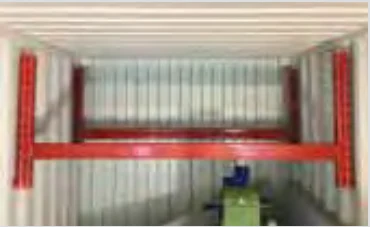
“I made a shelf using some old skid racking. I cut the racking to length and ensured that the vertical uprights were lined up and straight before cutting. I welded hooks to the top and now have a shelf I can park motorcycles under.”
“When bearing mounting areas become worn and can’t be quickly repaired, we don’t center punch the race (that doesn’t replace lost material). Instead, we use a 6 to 12-volt battery with jumper cables and a clean hacksaw blade to add material to resize the race before installing a new bearing.”
“I’ve had many back and hip surgeries and now have trouble putting on my socks. I took a 5-in. piece of schedule 40 PVC and made my own sock aid device. The ones you can buy didn’t work well for me.”
“I also took a 4 by 4 and dug a 12-in. hole in the floor that was 3 ft. deep. I filled in the hole around the post with cement to use for a vise.”
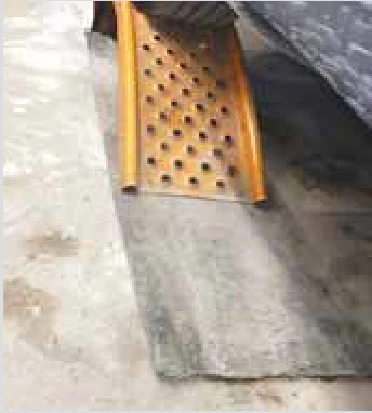
“When using car ramps, I cut a piece of material about a foot longer than the car ramp and set the ramp on top of it to keep it from moving around.”
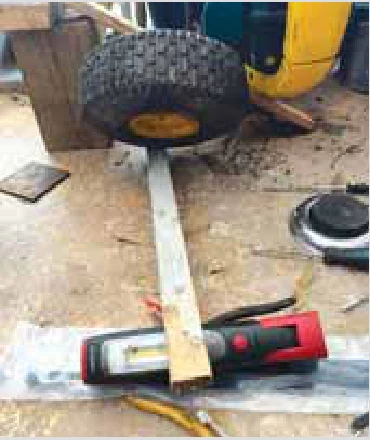
“To make it easier to install a tire, I use a board with something under the far end to get it to the right height so I can install the washer and cotter pin without having to try to hold up the wheel at the same time.”
“I have a test light for the electric fence, but it was so weak that I couldn’t see it during the day. So, I found a small LED with a plug for 110-volt AC and a female AC plug. I attached two wires with contacts on the end. When I touch the contact to the wire and the other stuck in the ground, I get a bright flashing light.”
“I zip-tied a 3-ft. and 1-ft. painter’s folding platform on the back rack of my 4-wheeler for hauling firewood. I installed it upside down and put the legs up when hauling.”
“I replaced the 1/2-in. drain plug on my Cub with a 1/2-in. regular water line shut-off valve. It makes oil changes really easy.”
“Duct tape, zip ties and JB Weld will fix anything.”
“When replacing bearings on a shaft, I put the bearing in the freezer for an hour or two first. It then slides on easily.”
“When I have to mount a gate or door on a wooden post or frame, I first get bigger and/or longer screws. Next, I apply Liquid Nails to the back of the hinges on both the door or gate and the post or frame. I also run the screws or bolts in and then pull them out, put Liquid Nails on them, and then run them back in. It’s similar to using Threadlocker on bolts.”
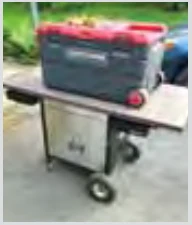
“I’ve made a couple of mobile workbenches from old gas grills. First, I removed the grill. The cart had a frame and a nice cabinet. I used an old solid-core door on top to make a mobile workbench. I put on tires from Harbor Freight, so it’s easy to roll in the yard. The first one I made was open (no cabinet), so I added grid shelving.”
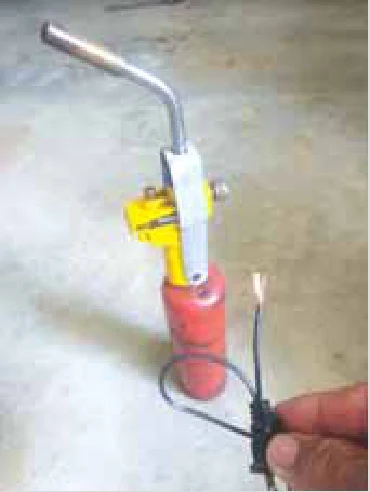
“When my TurboTorch fell over, the housing broke. I repaired it with a piece of aluminum strap 1/16 in. thick by 1 in. wide by 13 in. long.
“Also, I clean the orifice with a strand of copper wire from a lamp cord.”
“When one of my older shop-type vacs (with 2-in. suction and exhaust/blower ports) failed, I cut the cord off and turned it into a ‘pre-filter’ for my better vac.
“Using a 2-in. suction hose (available as an accessory), I connected the exhaust port of the old vac to the suction port of the good vac, then connected the conventional pick-up hose to the suction port of the old vac.
“I keep good filters in both units and most of the crud remains in the old unit as the good unit provides only suction (slightly reduced), not direct pickup.”
“When removing fittings from air compressor systems, let out the air pressure before loosening.
“I use spring hand clamps to hold the hose when filling a sprayer.”
“To repair the wobble box on a New Holland 489 haybine, remove the header first. It’s not that hard, and it makes the job a lot easier.”
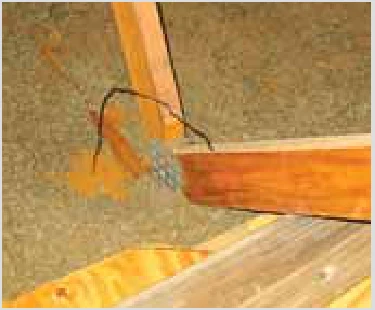
“I’m submitting this as a licensed electrician. When doing a minor remodel and installing lighting outlet boxes in a finished ceiling, be certain that not only is the box where you want it, but also make sure that no structure is in the way. Since the attic is accessible, I measure and mark the box location in the room, then take an awl or small Phillips screwdriver and stick a piece of wire in the ceiling hole. I go to the attic above the room and find the wire so I can be certain the hole is clear of any studs. If a stud is in the way, I know how far to move over before cutting the hole in the ceiling. If I end up not using the pilot hole location, it’s easy to patch since it’s small.”
“I keep a set of cheap wrenches so when I need one with a special angle or bend, I don’t destroy one from my good set. You might only need that special angle or bend once.”
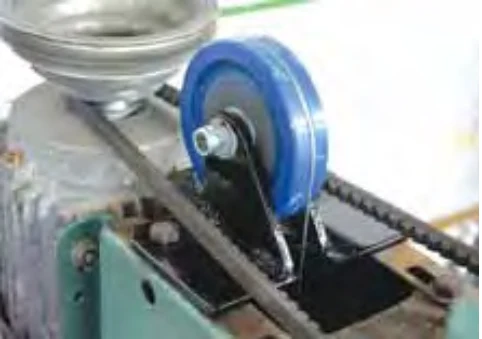
“Bolting a gauge wheel from a cultivator onto a farm gate makes it a lot easier to open and shut the gate.”
“I had an 8.5-hp engine on a walk-behind mower that wouldn’t run right unless the choke was half on. So, I drilled out the gas jet. It was too much gas. I bought a new jet, same deal. Then I drilled out less in size, but it was still too much. I finally added wire in the hole and lucked out. It runs perfectly.”
Tony Foale says the Startrite drill press he’s owned for years has always performed well, except for one frustrating feature: raising and lowering the table is always difficult because the press lacks a rack-and-pinion table lift.
“After all those years, I finally got fed up with using two hands to raise the table and let it down, so I built a counterweight system to fix it.”
Foale says his counterweight is simple, but integrating it onto the press had two issues. The table would quickly jam going up or down if there was too much weight on it, and if the counterweight was too heavy, lowering the table would be quite difficult.
Foale solved the problem by inserting a long, round counterweight inside the drill column. He attached a metal cable to the top of the weight and ran it over a pulley that he mounted on top of the column. He connected the other end of the cable to a metal bracket, about 6 in. long, that he attached to the back of the table.
Now, when he loosens the lock, the table lifts easily with one hand. The counterweight helps with the upward movement. To lower the table, he loosens the lock and gently presses on the top of the metal bracket while slightly raising the front of the table. The table then slides down slowly without dropping. If he’s working with heavier parts on the table, he’ll add a one or two-pound counterweight to the bracket on the back of the table for better balance.
Foale is an accomplished engineer who’s invented more than 100 shop-made parts and tools. He says the counterweight system is a great improvement for moving the table, and he wishes he had thought of it years ago.
Contact: FARM SHOW Followup, Tony Foale (www.motochassis.com).
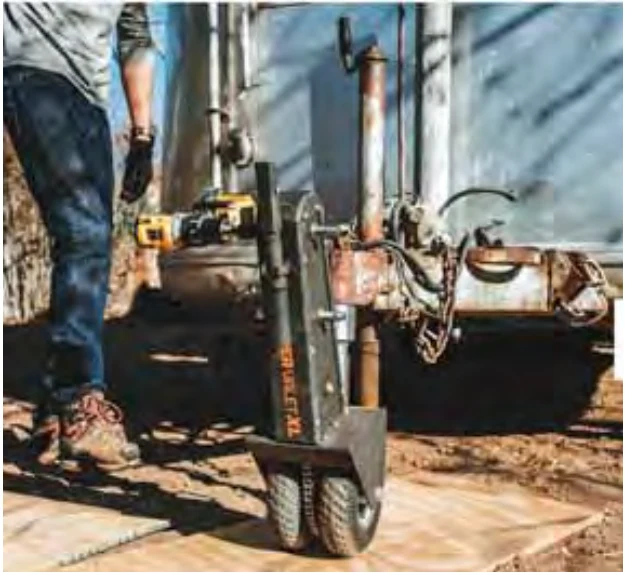
Trailer Valet makes moving and parking trailers up to 10,000 lbs. easy, even in tight spaces. With high and low gear options, you can switch between speed and control. It’s available in both ball and bracket options and comes in several makes and models, capable of supporting various loads.
The XL connects to a standard trailer frame using the coupler or optional bracket. It can be operated manually with the hand crank or with the included attachment and a 20 to 24-volt drill for powered movement. Designed to maneuver large trailers without a vehicle, the XL is made from steel with zinc-nickel plating. It weighs 56 lbs. and measures 29 in. high, 11 in. wide and 11 in. deep. It has a 9-in. solid rubber wheel.
With a 10,000-lb. hauling capacity, the ideal tongue weight range is 500 to 1,000 lbs. The XL has a low gear ratio of 27:1 and a high gear ratio of 11:1. It features an integrated brake that automatically engages when the handle is released.
The XL is built to operate on tightly packed grass with hard soil or tightly packed gravel. It’s not designed to move on sandy, muddy, rocky or severely bumpy ground.
The company notes that repeated or prolonged contact with water will damage the gears and chains that operate the Trailer Valet and erode lubricants.
Users report that it performs well on flat ground but has some difficulty with inclines, tight turns and gravel. Many noted that having the correct trailer weight on the tongue is necessary to maintain wheel traction.
“I purchased a Trailer Valet XL about two years ago and use it regularly to move a 27-ft. camper about 100 ft. on a level concrete driveway. It takes this 73-year-old about 10 min. The trailer weighs about 8,000 lbs. If the wheels get off the driveway, I move the handle to the lower gear. I don’t use any battery power to assist. At my age, I don’t think I could do it on an incline or on gravel. I’ll leave that task to those who are younger. It’s well constructed and easy to use,” says Dan Ryland in a customer review.
It includes a one-year manufacturer’s limited warranty. Trailer Valet XL costs $850 on the company’s website, with free shipping on orders over $200 within the U.S.
Contact: FARM SHOW Followup, Trailer Valet, 16021 Euclid Ave, Chino, Calif. 91708 (ph 844-846-9344; [email protected]; www.trailervalet.com).
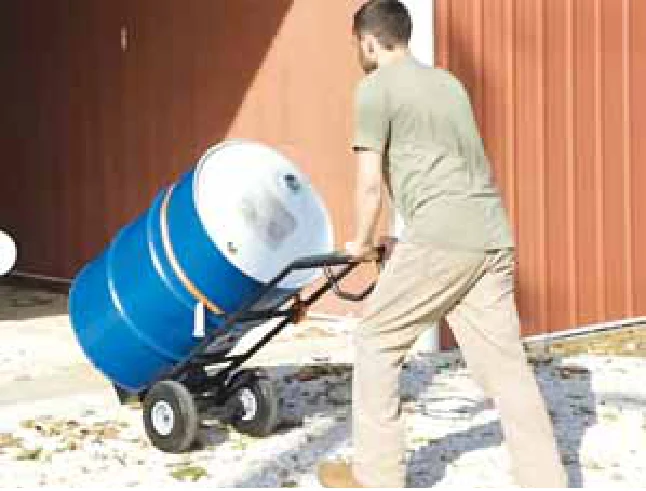
The COSCO Load Assist Hand Truck boasts a 55% reduction in pull force, significantly easing strain on the user. With an impressive 800-lb. load capacity, it’s designed to handle heavy items with ease. Its assisted load tilt feature ensures that tilting the load requires minimal effort, enhancing both convenience and safety. Additionally, the hand truck offers safer load control, providing enhanced stability and maneuverability to protect both the user and the cargo. The angled P-handle is ergonomically designed for easy steering and a comfortable grip, making navigation precise and effortless. It’s equipped with guarded flat-free tires that eliminate the need for maintenance. The patent-pending load assist mechanism sets this hand truck apart, offering unmatched assistance and efficiency.
“I’ve never used a hand truck with the assisted hand tilt, and it’s a game changer. I’ve always used the generic, old-school style hand trucks. I decided to try this new style out, and wish I’d tried it sooner. Super smooth operation, easy to lift and put back down, heavyweight. Highly recommend,” says a user from Toms River, N.J., online. Available at Lowes, Northern Tool, Walmart and other retailers for around $100 to $125, it includes a limited 5-year warranty. Contact: FARM SHOW Followup, COSCO Products, 2525 State St., Columbus, Ind. 47201 (ph 800-628-8321; [email protected]; www.coscoproducts.com).
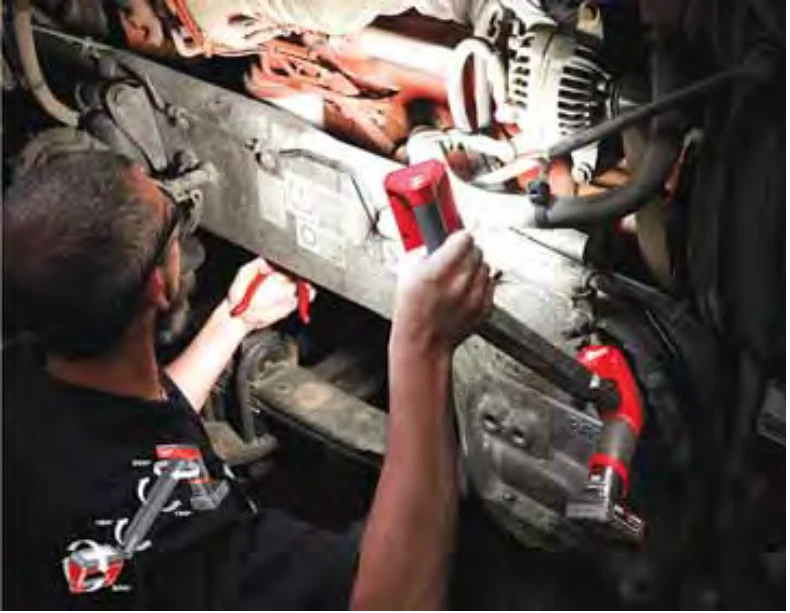
Just when you thought you had all the flashlights you needed, Milwaukee introduced the M12 Underbody Light. The light features two swivel points that offer 300 degrees of horizontal rotation and up to 180 degrees of vertical rotation. Its 1,200-lumen output provides full coverage for all tasks under the vehicle. It has a strong magnetic base, allowing for easy mounting and better positioning, and includes a 12-in. magnetic storage tray to hold nuts and bolts. The M12 Underbody Light can run up to 15 hrs. on low or 5 hrs. on high, delivering all-day runtime with one XC 4.0 battery pack.
Guaranteed by a 5-year tool warranty, the LEDs never need to be replaced and are backed by a limited lifetime warranty. Available at many retailers, like Ace, Home Depot and Northern Tool, we found prices starting around $200 for the light without batteries or a charger. If you already have Milwaukee tools in your shop, this may be a good fit. Contact: FARM SHOW Followup, Milwaukee Tool, 13135 West Libson Rd., Brookfield, Wis. 53005 (ph 800-729-3878; www.milwaukeetool.com).
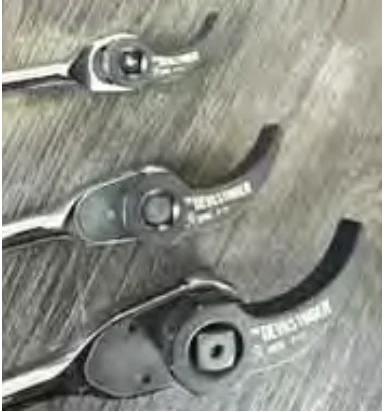
The Devil’s Finger from Jersey Discount Tool Co. (JDTCo.) puts a mini-pry bar in every toolbox. Handy for prying loose oil pans or other small jobs, it’s a sturdy alternative to indexing pry bars.
“Indexing pry bars often tend to break,” notes Nick Morello, Jersey Discount Tools Co.
“You have lots of options with the Devil’s Finger. You can use a breaker bar on it, a straight wrench, or even pliers. Lots of guys use a ratchet with it all day long with no complaints.”
JDTCo. initially introduced the Devil’s Finger with an 8-pt. 3/8-in. drive. However, they found that it didn’t always stay on a ratchet or breaker bar. They redesigned it with a 4-pt. drive and flattened the sides, making it easier to use with a wrench or pliers. Additionally, it can be hammered into place to wedge apart two surfaces.
They added 1/4-in. and 1/2-in. drives for more options.
“A technician who works a lot on trash compactors told us he really likes the 1/4-in. for getting into the compactors,” says Morello.
The 3/8-in. Devil’s Finger is available directly from JDTCo. for $24.95. A three-piece set with 1/4, 3/8 and 1/2-in. Devil’s Fingers is priced at $59.95. The 1/4 and 1/2-in. sizes are also available individually. Contact: FARM SHOW Followup, Jersey Discount Tool Co., 273 Union Blvd., Totowa, N.J. 07512 (ph 833-573-6348; [email protected]; www.jerseydiscounttool.com).
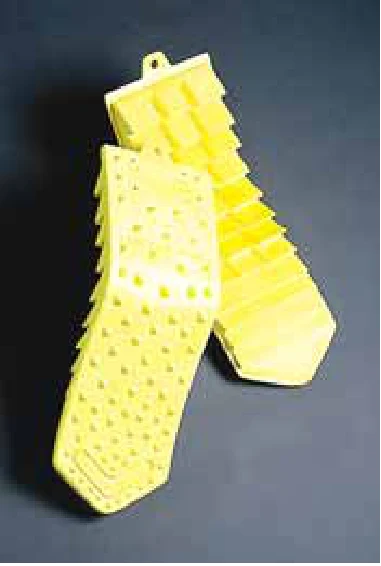
Most of us have been stuck in snow, mud or sand with our vehicle. Usually, we end up paying for a tow or using a lot of energy to shovel and push until we get free. U.S. Safety Solutions developed the skid-proof Save-A-Tow traction ramps, a unique product to handle this scenario.
“Stronger than steel and engineered for cars, vans, pickups and sport utility vehicles, these mini traction ramps are a must for fishermen, hunters, outdoorsmen, campers, farmers, travelers, emergency personnel and anyone who drives in the snow, mud and sand,” says Deryck Wade, company owner. The lightweight 3-lb. hump-shaped ramps measure about 6 in. in width and 17 1/2 in. in length. Made of tough, high-density, rigid polymer, mini studs grip the tire, while alligator teeth on the underside grip the road, supporting more than 2,000 lbs. in the process.
“Just slip the ramps under the wheels,” Wade says.
“The car sends power to the track on the ramp, and you just drive out. The humped shape keeps them from spinning out from under the tire.” The Save-A-Tow traction ramps are made in the U.S. and sold throughout North America for about $99 a pair. An optional handy storage bag is available. They come in a standard yellow color, but can be specially ordered in a different color.
“They save shoveling, pushing, overexertion, injury, time and dollars in towing costs or transmission damage.” Contact: FARM SHOW Followup, U.S. Safety Solutions LLC, 875-A Island Drive, Suite 111, Alameda, Calif. 94502 (ph 510 356-6543; [email protected]; www.ussafetysolutions.com).
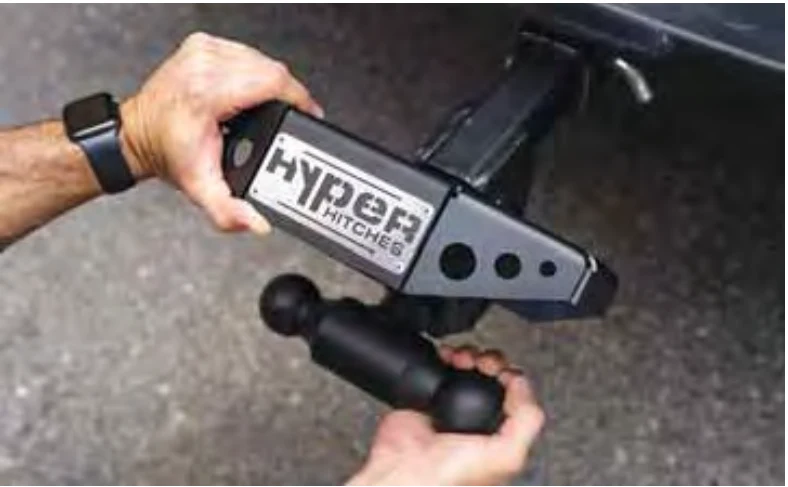
The Hitch Step by Proven Industries Lock Technology offers a solid stepping platform for accessing any vehicle.
“Our DualBall Hitch Step Combo stands out thanks to its precision-engineered construction and built-in multi-functionality,” says Tonya Fortin, company representative.
“It’s crafted using CNC sheet laser cutting and press forming from 3/16-in. steel for exceptional durability and structural strength.”
The Step has a flip-up/down design and features rotatable hitch balls that fit either 2 in. or 2 5/16 in. sizes (select when ordering).
“It includes an integrated anti-rattle bumper and tightener—a patent-pending combination designed to enhance reliability and versatility,” Fortin says.
“Everything comes with a robust black powder-coat finish.”
She states that the Hitch Step demonstrates the same quality that has established Proven Locks’ reputation.
“Our products show a commitment to American craftsmanship and real-world functionality. Using domestic alloy carbon steel, stainless steel and aluminum, we manufacture in-house with CNC machines and robotic welding cells.”
A 500 lb. weight capacity ensures the Hitch Step works in a variety of settings.
“It’s ideal for those who tow frequently,” Fortin says.
“The added feature of rear bumper protection from low-speed impacts makes it especially valuable for workhorses and commercial vehicles.”
Fortin shares that installation is straightforward.
“Just insert the Hitch Step into your standard 2-in. receiver and secure it with your hitch pin. The flip-down step is immediately usable, and the stainless steel pins and integrated tightener help minimize vibration for a secure ride.”
Four models are available on the company website: 12 in. ($150 or $200 with integrated receiver drop for 2-in. hitch) and 24 in. ($175 or $225 with integrated receiver drop).
Customer reviews highlight the design’s high quality and functionality, especially for the 24 in. version.
Each purchase includes a lifetime warranty against manufacturing defects.
Contact: FARM SHOW Followup, Proven Industries Lock Technology (ph 877-400-8423; [email protected]; www.provenlocks.com).
Like most farmers, Gerald Peters occasionally faced the prospect of replacing the bearings on the packers of his air drill.
“The bearings on my Flexi-Coil 5000 drill last quite some time, so when they go, it’s often impossible to pull them off the packers to change them out,” Peters says.
“They’re manufactured with surprisingly thin steel, so damaging or completely wrecking them is easily done as they get seized to the shaft.”
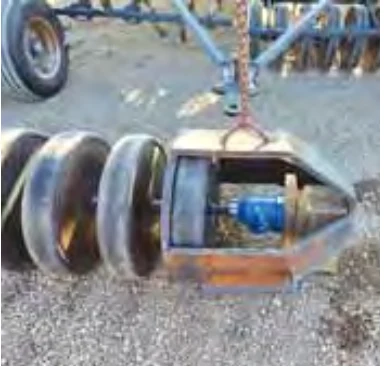
Peters imagined a puller that applied pressure to both the packer wheel and the weld on the center pipe might work, so he designed the pieces for an open-to-the-bottom puller and had them cut at a local welding shop. From there, he welded the three 1-in. thick side and top pieces together. To manage the weight, he uses a small yard tractor loader and a chain to support and position the heavy puller.
“I slide the puller over the top of the wheel, and it fits precisely through the slot, snug enough to pull on the weld,” he says.
“I use a 20-ton bottle jack to apply the pulling force.” Peters says that occasionally he might apply some heat and pound on the puller a little to get things moving, but he’s changed 14 bearings without damaging a single wheel.
He made the puller longer to reach the bearings between the second and third packer wheels. Once the wheels are removed, he has free access to cut off the bearing remnants.
He estimates he spent about $500 to $600 building the unique puller.
Contact: FARM SHOW Followup, Gerald Peters, La Crete, Alberta, Canada (ph 780-821-0986).