Practical ideas from FARM SHOW MagazineSubscribe · Free issue · Send us your shop tip
Subscribe to FARM SHOW
Issues / Vol. 41, No. 4 (2017)

Vol. 41, No. 4 (2017)

Money-Saving Repairs & Maintenance Shortcuts · Printed section pp. 32–35

44 selected entries · Complete text of selected entries

This issue’s section includes reader tips and feature-length shop stories. Held items and editorial notices are not reproduced.

Archive text: prices, coupons, availability and contact details reflect the original publication, not current offers. Reader methods are not universal instructions; follow manufacturer guidance and proper safety practices.

Reader shop tips

From the archive · Full text
Reader shop tip

James A. Smith

James A. Smith, Truxton, N.Y.

“To drill hard spring steel, I make a dam of putty around where I want to drill, and fill it with turpentine. By using turpentine on hard material, such as spring steel, can be drilled, when it would have been impossible with oil. A common drill bit will go right through. I used the idea when I needed ‘sod turners’ on a plow. The dealer wanted $40 each. Instead, I got some broken truck springs at a truck repair shop for free and drilled them with turpentine. They last twice as long as factory parts.”

From the archive · Full text
Reader shop tip

Jon Brandt

Jon Brandt, Pierce, Neb.

“For extra bolt and pipe fitting storage, I use old buckets from grain elevators. They throw them out when installing new buckets so they’re free for the asking. I’ve found they make great parts storage. I screw them to boards attached to the wall of my shop. The top row is about 5 1/2 ft. off the ground and I’ve got 36 buckets in all.”

From the archive · Full text
Reader shop tip

Joel Argersinger

Joel Argersinger, Toledo, Ohio

“I use cheap paint to prevent rust on plows, discs, planter blades, and anything that wears. I paint them before the off season. Keeping equipment in good shape means it performs better and sells for more later. Boxes on drills and planters should also be painted, inside and out.”

From the archive · Full text
Reader shop tip

Rod S.

Rod S., East Central, Kan.

“In Vol. 41, No. 2, Eric Sagan mentioned that he used WD-40 as a starting fluid. A friend of mine tried the idea on a small lawn mower but after many sprays of WD-40, he couldn’t get it going. So he tried real starting fluid and the engine roared to life. I did a little research and found out that apparently, WD-40 changed their propellant so that it no longer functions like starting fluid. So unless you have a can that’s several years old, it won’t work.”

From the archive · Full text
Reader shop tip

Robert Grandjambe

Robert Grandjambe, Fort Chipewyan, Alberta

Ball hitches have to be the dumbest idea ever for towing trailers and equipment. They’re not secure and are difficult to hook up. What I’ve done with all my trailers and my wood splitter is to cut a hole in the top of the hitch so I can use a pintle hook on my truck and ATV. It’s such a time-saving and safe way to tow a trailer. I realized modifying a hitch like this is not street legal but it works well for hauling equipment around my place. If you want you could take off the ball hitch and weld a ring onto the trailer hitches in place of the ball hitch.”

From the archive · Full text
Reader shop tip

Jerry Brandt

Jerry Brandt, La Grange, Mo.

“The headlights on my 2000 Dodge Ram 1500 have been a big headache. They come on and stay on until I unhook the battery. I replaced the switch and checked all the fuses but can’t find out why they come on and stay on. I Googled it and saw lots of other people are having the same problem but no one had a solution. Not sure what to do.”

From the archive · Full text
Reader shop tip

Dave Threlkeld

Dave Threlkeld, Belleville, Ill.

“I use old bicycle inner tubes as bungee cords because they’re much stronger. If they break, just tie them in a knot and keep going. I get most of mine free from a local bike shop.”

From the archive · Full text
Reader shop tip

Wm. E. Skaggs

Wm. E. Skaggs, Chesapeake, Va.

“On most new riding lawn mowers, the blade spindles have sealed bearings. To make them last longer, I pull them apart, removing the shield from each bearing and then drill a hole in the housing and tap it so I can install a grease fitting. Problem solved.”

From the archive · Full text
Reader shop tip

Douglas Edwards

Douglas Edwards, Englehart, Ontario

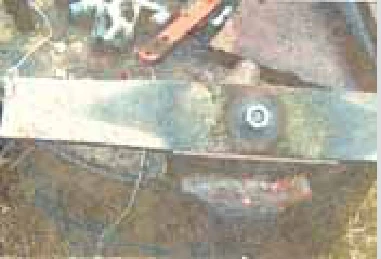
“I made a rig to hold lawn mower blades in a vice to make it easy to sharpen them at the right angle. I like using a good file to sharpen because it does the best job.

“I use a short piece of angle iron, facing downward, to fit into the vice. Then I welded another piece of angle iron to the top of it, facing up. I drill a hole through this bracket so I can bolt the blade down onto the bracket. I sharpen one side and then remove the nut and flip the blade to do the other side. Holds the blade solidly so I can sharpen at the original angle.”

From the archive · Full text
Reader shop tip

Robert O. Wallrath

Robert O. Wallrath, Houston, Texas

“The bolt that holds the blade in place on my Yardman mower broke off. I got it out by grinding a slot in the broken end of the bolt, heating the shaft, and turning the bolt out with a flat blade screwdriver. Worked very well.”

From the archive · Full text
Reader shop tip

William Watner

William Watner, St. Marys, Kan.

“I use masking tape to build up the pouring side of a full can of paint about 3 to 4 in. so I don’t spill. I can just bend the tape into a pouring spout. Works just as well as plastic snap-on pouring spouts that you can buy, and you don’t need to clean the tape. Just rip it off.”

From the archive · Full text
Reader shop tip 1 of 3

Gary Thomsen

Individual tip 1 of 3 from this reader’s published contribution.
Gary Thomsen, Arion, Iowa

“A pvc pipe broke at the surface of our concrete well pit. I was able to square off the jagged brake by cutting the pipe from the inside with a dremel tool cutting disc. Worked good to make the repair.

From the archive · Full text
Reader shop tip 2 of 3

Gary Thomsen

Individual tip 2 of 3 from this reader’s published contribution.
Gary Thomsen, Arion, Iowa

“Empty cardboard egg cartons make great parts trays when on repair jobs with a lot of small parts. The cartons soak up a small amount of grease and oil and once they are dirty, you can just toss them away.

From the archive · Full text
Reader shop tip 3 of 3

Gary Thomsen

Individual tip 3 of 3 from this reader’s published contribution.
Gary Thomsen, Arion, Iowa

“I installed an electric hoist in my shop to raise things to store in the loft. Because of back problems, I can’t tote things up and down the ladder any more.”

From the archive · Full text
Reader shop tip 1 of 2

Freeman Hochstetler

Individual tip 1 of 2 from this reader’s published contribution.
Freeman Hochstetler, Gilman, Wis.

“OEM bearings are outrageously high-priced when you buy from the manufacturer. If there are numbers on the old bearing, we cross-reference it at a local supplier and buy for a fraction of the cost. There are also websites where you can purchase bearings with the parts number (for example, www.locateballbearings.com).

From the archive · Full text
Reader shop tip 2 of 2

Freeman Hochstetler

Individual tip 2 of 2 from this reader’s published contribution.
Freeman Hochstetler, Gilman, Wis.

“I use a Cat forklift with the side shift disconnected and standard Pioneer couplers installed to raise and lower and move equipment around the farm. Eliminates the need for a tractor.”

From the archive · Full text
Reader shop tip

Lanny Vail

Lanny Vail, Bowman, N. Dak.

“Tubeless tire bead leaks are easy to stop with Door-Ease stick lubricant (NAPA Auto Parts or Amazon). It will not harm the rubber at all and I’ve never had it fail to stop a leak. Just rub it on the tire beads and also on the rim flange and mount the tire normally with a good bead lube.”

From the archive · Full text
Reader shop tip

Marvin Boehm

Marvin Boehm, Sherwood, Ohio

“I have a small farm shop where I keep my restored tractors and other farm stuff. I like some heat in winter but only on an intermittent basis. I bought a used ‘downflow’ gas furnace from a contractor who was replacing all the units in an apartment house. It mounts in an angle iron frame that I welded together and then suspended from a steel beam across the top of the shop.

“On a cold day, I just turn up the thermostat and get almost instant heat over my workbench. The furnace heats my 40 by 45-ft. insulated shop very quickly.”

From the archive · Full text
Reader shop tip

Charles Blackburn

Charles Blackburn, Evansville, Ind.

“To replace a leaking seal on the front main shaft off the transmission of my Farmall H tractor, the U-joint would not come off the shaft. I tried pullers and heat but nothing worked. I ended up cutting off the rear half of the U-joint with a side grinder and it was still very tough to drive the pieces off the shaft with a hammer and chisel. But replacing the seal and installing a new U-joint solved the problem.”

From the archive · Full text
Reader shop tip 1 of 2

Ken Burtard

Individual tip 1 of 2 from this reader’s published contribution.
Ken Burtard, Theresa, Wis.

“I use a stick welder to convert stripped or rusted-out ratchets, which can no longer be used as ratchets, into breaker bars.

“To make the conversion I put the ratchet in a locking pliers and attach a ground wire to it. Then I place the ratchet in a vise and weld the ratchet assembly solid so that it won’t turn. After that I grind off the welding burrs for a nicer look.

From the archive · Full text
Reader shop tip 2 of 2

Ken Burtard

Individual tip 2 of 2 from this reader’s published contribution.
Ken Burtard, Theresa, Wis.

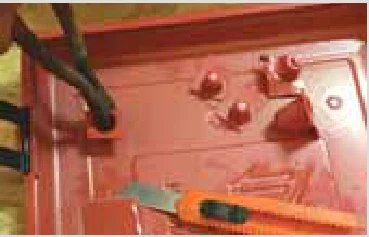
“New cordless drills and sawzalls are often sold in plastic tool cases mold-formed to contain a particular tool. Using a sharp utility knife, I convert such tool cases into handy, general purpose toolboxes that will never rust. The photo shows how I converted an 18-in. long, 14-in. wide, and 6-in. deep tool case to store a big hammer drill as well as drill bits and wall anchors.

“I cut out any spot welds inside the tool case and use a pliers to remove any plastic plugs. I also trim away part of the tool case’s outer edge, making sure not to cut out too much so the tool case won’t lose its strength. Then I use sandpaper anywhere I’ve made a cut to remove the sharp edges. If the tool case’s hinges are broken, I make new ones by screwing on pieces of old shoe leather.”

From the archive · Full text
Reader shop tip

Alan Linda

Alan Linda, New York Mills, Minn.

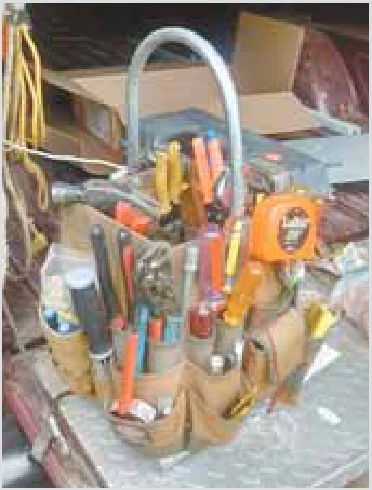
“Canvas-type tool holders designed to fit over a 5-gal. pail can hold a lot of tools, but because the bottom of the pail is round they can tip over easily.

“I solved the problem by making a square sheet metal box, adding a curved piece of electrical conduit to serve as a handle. The box could also be made from plywood.”

From the archive · Full text
Reader shop tip

Bob Moty

Bob Moty, Crystal Lake, Ill.

“I made a chart showing the purpose of each breaker on my fuse panel and keep it next to our house’s main fuse box. Then I used a felt tip marker to write the breaker number on the inside of the cover plate on each light and receptacle. That way if I ever have to replace a switch or receptacle, I can tell quickly which breaker needs to be turned off.”

From the archive · Full text
Reader shop tip

Dennis Divine

Dennis Divine, Joplin, Mo.

“In recent issues of FARM SHOW some readers said their Sears Craftsman rototillers were hard to start when used with Champion spark plugs. One reader recommended using NGK plugs instead, so I tried them and they’re working fine in my Briggs & Stratton engine.”

From the archive · Full text
Reader shop tip

Matt McNaughton

Matt McNaughton, Foothills, Alberta

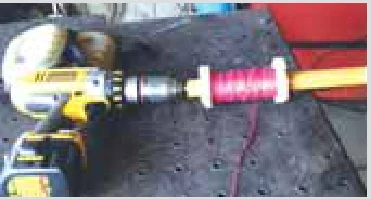
“I often use a string line to help align fences and walls, and I had been winding up the string around a 1 by 4 board with notches cut into one end. However, the string always seemed to get twisted and the wind-up process took too long.

“To make the job easier, I drilled a hole into one end of a 9-in. dowel and screwed a 1/4-in. threaded shaft into it. I also mounted 2 large wooden washers onto the dowel to keep the string in line. There’s enough room at the opposite end of the dowel for a loose hand hold.

“To wind up the string, I just insert the threaded shaft into a cordless drill and start it up. Works like a charm.”

From the archive · Full text
Reader shop tip

Ralph Reid

Ralph Reid, Bynum, Ala.

“I came up with a self-oiling drill bit by capping off the hole at the base of my drill press where the bit goes through, and then filling the hole with oil. I then welded a 1 1/2-in. dia. threaded metal pipe fitting into the hole and put a plug in it. As a result, the bit automatically gets oiled every time I’m drilling and stays cooler. Works great.

“If the hole fills with metal shavings I just unscrew the plug and clean out the shavings, then refill the hole with oil. I do a lot of drilling where I work and have drilled up to 2,000 holes on a single job, so this idea saves me a lot of time and hassle.”

From the archive · Full text
Reader shop tip

Heather Ramsay

Heather Ramsay, Victoria, B.C.

“I was working against a deadline to finish making some modifications to our greenhouse, which required drilling a series of holes in metal tubing. I didn’t have any cutting fluid on hand to provide cooling and lubrication, but I remembered that cutting fluid is oil-based and sometimes contains sulphur.

“So I mixed some pelleted sulphur fertilizer with 10W-30 motor oil. After that my drilling work went a lot quicker and smoother, even though I was using less-than-ideal bits. I used the drill at a low speed in order to help break up the sulphur pellets. I spread the same concoction on a hacksaw blade to cut metal tubing more quickly.”

From the archive · Full text
Reader shop tip

Hansen Global, Inc.

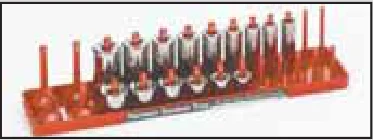
Hansen Global, Inc., Two Rivers, Wis. (ph 877 793-5213; www.hansenglobalinc.com/our-products/socket-trays)

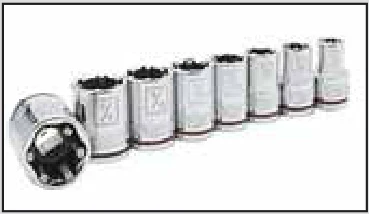
You won’t spend time searching for loose sockets when using this company’s new socket tray. Made of tough ABS plastic, it’s designed to organize sockets for quick, easy identification by size and style. The tray comes with post holders marked in large print for the socket size. It holds both regular and deep well sockets and is available in 3 different sizes to fit 1/4-in., 3/8-in. and 1/2-in. drive standard and metric sockets. Sells for $10.95 on the website.

Shop feature stories

From the archive · Full text
Feature story

They Specialize In Lawn Mower Tires

Featured source: Lawn Mower Tire Store

The Lawn Mower Tire Store is an online service that strives to be the best resource for mower wheels and tires. The company has been in business since 1994 and has a 99.9 percent positive feedback rating on eBay. They carry substantial inventory and ship orders to arrive in 1 to 2 days. The Lawn Mower Tire Service website provides guidelines, stories and tips for maintaining current tires and ordering new ones. One section describes tire sizes, specifications, type, ply rating, load rating, branding, series and model numbers. If people can’t figure out what to order from this information, the website has sales personnel who can walk a person through the process and get you exactly what you need. In addition to mower tires, the Tire Store also supplies accessory parts such as bearings, wheels, tire sealant and inner tubes. Their main focus is mower tires, but they also carry tires for golf carts, tillers, trenchers, ATVs, snowblowers, wheel barrows and other small rubber-tired equipment. Contact: FARM SHOW Followup, Lawn Mower Tire Store, P.O. Box 327, Newburgh, Ind. 47629 (ph 805 530-6596; www.lawnmowertirestore.com).

From the archive · Full text
Feature story

Cummins Repower Parts And Advice

Featured source: Eric Rego

Eric Rego and his father Bob have the parts and experience needed if you want to repower with a Cummins diesel. Both parts and advice are offered on their Maple Springs Farm website. Eric Rego used to work as an engineer at Cummins Engine Company.

“A lot of people are interested in doing a repower, but very few have all the information they need,” says Rego.

“We offer repower kits, as well as individual hard-to-find parts. I’ve also written up the repowering process with photos and posted it to my blog on our website.” They first repowered a White 2-135 with a 5.9L Cummins 6BTA and cut fuel use by more than 2 gal. per hr. Since then they’ve done a number of Olivers and are in the process of repowering a 1650 with a Cummins 4BT. Along the way they needed parts, some of which they made and others they found and now sell. One example is an engine mounting kit that the Regos source from Buckley Zoller of Manuta, Ohio.

In his blog posting, Rego points out that getting proper engine/transmission alignment is one of the biggest challenges.

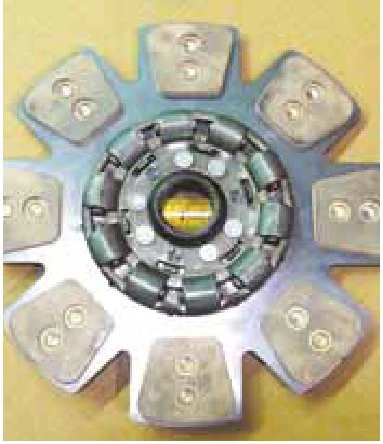
“Good alignment is critical to minimizing chain coupler wear and eliminating vibrations associated with incorrectly aligned chain coupler sprockets,” writes Rego. He then provides a step-by-step explanation of how to mount the Cummins using Zoller’s kit. Parts listed on the Maple Springs website include bell housings, clutches discs, an angle tach drive adapter kit, Cummins engine fans and more. They offer nearly 30 parts in all that the Regos found difficult to source.

“Some are genuine Cummins parts, while others are from various sources,” says Rego.

“Where possible, our parts are made in the U.S. More than 95 percent of everything we sell is made in the U.S.” Contact: FARM SHOW Followup, Maple Springs Farm, 1828 County Road PB, Verona, Wis. 53593 (ph 608 658-2072; [email protected]; www.msfparts.com).

From the archive · Full text
Feature story

3D Machining Beats Cast Parts

Featured source: Eric Rego

Eric Rego can replace a cast part with a stronger machined part using 3D machining. He can also make molds for casting custom polyurethane parts. While the 3D machined parts tend to be custom orders, the molds allow him to create parts that he and his father sell from their Maple Springs Farm parts business.

“For low volume parts or tools, 3D machining from a steel billet is often a more economical alternative to casting,” explains Rego, Rego Engineering and Machine.

“We can duplicate any part that comes through the door with a high degree of accuracy.” Rego uses careful measurements to create a CAD file. Special software transforms it into a 3D image with many thousands of lines of computer programming code. The computer code is then put to work on a milling machine with each line of code corresponding to a single cut.

“It takes thousands of cuts every inch to form the geometry of a part,” says Rego.

“Sometimes you have to extrapolate when looking at curvatures with some blending of measurements to get it just right.” He recently used the process to make a steering wheel complete with the nubs for fingers to catch on the backside. He has also produced a pair of Super 44 steering arms for an Oliver tractor. Originally the arms were made by casting, but Rego says the machined replacements are actually stronger. He uses molds to make a variety of soft and hard plastic replacements for hard to find Oliver parts, such as dash trims and decorative pieces.

“Polyurethane is available in so many densities with varying strengths and hardness,” says Rego.

“The 3D manufacturing lets us make the molds to make the parts we need.” Contact: FARM SHOW Followup, Maple Springs Farm, 1828 County Road PB, Verona, Wis. 53593 (ph 608 658-2072; [email protected]; www.msfparts.com).

From the archive · Full text
Feature story

Here’s Where To Get Parts For Older Planters

Featured source: Clem Koelzer

If you need parts for an older model planter and your dealer or a local salvage yard doesn’t have them, chances are Kansas farmer and repairman Clem Koelzer does. Koelzer “accidently” got into the business back in 1972 when he bought a salvaged planter from a local dealer for parts. One old planter led to another, and pretty soon he had a variety of Case IH, Deere, White and Kinze planters in his back lot. Nowadays, after nearly 45 years in the salvage business, he has people calling from all over the country for used parts.

“I’ve got about 5 acres of planters on hand,” says Koelzer, “and we have a good supply of the most common parts pulled and in parts inventory. Most of the planters I have were built from the ’60’s through early 2000. I have a good selection of parts for Case IH 800 through 955 Series, for the Deere 7000 series, for White 5100’s, and several models of Kinze built before 2000.”

Koelzer says he hasn’t gotten into newer planters because many of those are priced too high, even at auctions. Most of the older planters he acquires now are salvaged from dealers who can no longer sell them. When Koelzer isn’t answering the phone to sell parts, he and his 3 sons run their own farmland, raising stock cows.

“It has been a good business,” Koelzer says, “and we’ll continue as long as people keep calling and are satisfied with what we’re sending them.” Koelzer says he doesn’t operate a computer and prefers doing business the old fashioned way.

“Word of mouth and a few small ads in some farm publications have done just fine for us in terms of advertising, so that’s the way we’ll continue.” Contact: FARM SHOW Followup, Koelzer Repair, 581 KS-16, Onaga, Kansas 66521 (ph 785 857-3257).

From the archive · Full text
Feature story

Rack Holds 3 Fuel Tanks

Featured source: Tim Renger

Iowa farmer Tim Renger says he saved a lot of space inside his “fuel shed” by building a wood rack to hold 3 big tanks.

“It isn’t anything fancy, but it saves floor space and keeps the tanks in a small area just inside the door on a level cement floor and out of the weather.” Renger built the rack so his 100-gal. and 250-gal. gasoline tanks would rest on a sturdy platform directly above a 500-gal. diesel tank. The rack has 4 sturdy corner posts that he made by tripling 2 by 4’s. He attached 2 by 4’s to the posts to hold the tanks. Renger’s setup is clean and efficient, with the pump and meter for the diesel tank located at one end of the setup and the motor, pump and meter for the gasoline mounted just behind it. Both pumps have in-line filters and hoses are held neatly on 2 special brackets (taken off an old IH combine) that keep the hoses from kinking when they’re not in use. Renger says he likes to keep things neat and the rack is a good way to minimize the amount of space needed for 3 tanks and to keep the hoses off the floor. Contact: FARM SHOW Followup, Tim Renger, 1002 390th St., Bancroft, Iowa 50517 (ph 515 320-3287).

From the archive · Full text
Feature story

Solid Outdoor “Workbench” Great For Pounding

Featured source: Douglas Edwards

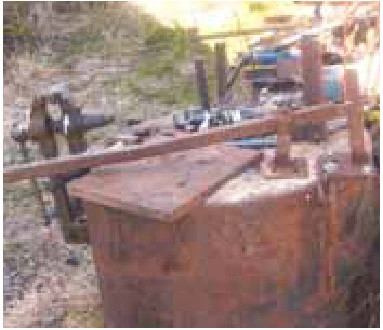
“I’ve used this outdoor workbench for many years. I made it from a 3-ft. long piece of 4-ft. dia. steel pipe,” says Douglas Edwards, Englehart, Ontario.

“I first put a couple inches of concrete in the bottom of it and then filled it up to about 10 in. from the top with gravel. Then I filled it up with concrete so it’s level with the top. A piece of 1-in. thick steel plate with bolts welded to the underside was pushed into the wet concrete to hold it firm. I also inserted a few bars to use for bending and attached a vise to the side of the pipe.

“This circular workbench is ideal for swinging a heavy hammer when you need to straighten something out. I enjoy working outside so I often use my torch and welder on this heavy table.” Contact: FARM SHOW Followup, Douglas Edwards, 287065 Spruce Grove Rd., Englehart, Ont. Canada P0J1H0.

From the archive · Full text
Feature story

Skid Loader Repowered With Cummins Diesel Engine

Featured source: Melvin Zook

When the original engine went out on his 2012 Volvo skid loader, Melvin Zook of Kinzers, Penn., decided to repower it with an inexpensive used Cummins 4B39 diesel engine rather than rebuild the loader’s original JCB diesel engine. Zook operates an equipment repair business and occasionally uses his skid loader as a rental machine.

“The Cummins diesel had less than 1,000 hrs. on it and has about the same power as the original JCB but has more torque, which comes in handy for excavation and logging work. Cummins diesel engines are known to run for a long time.” Zook made the conversion in August 2016.

“I had to fabricate motor mounts for the front part of the engine since the bolt holes wouldn’t line up. Everything else worked out better than I expected. The bell housing, gas line, wiring, throttle and choke cables and even the original belts matched up.

“I chose the Cummins engine because after taking measurements I knew it would fit well. It was an older 2012 model so it didn’t have any common rail fuel systems on it that would have made it harder to install.” Zook says the entire job took only about 30 hrs. to complete.

“I paid $2,900 for the engine. It was money well spent.”

Contact: FARM SHOW Followup, Melvin Zook, 5277 Mine Road, Kinzers, Penn. 17535 (ph 717 940-1303; [email protected]).

From the archive · Full text
Feature story

Simple System Sucks Exhaust Out Of Shop

Featured source: Michael LeFevre

“I installed an in-floor exhaust removal system in my farm shop that makes it easy to work on vehicles in the shop without choking to death from fumes,” says Michael LeFevre, White Cloud, Mich.

“I ran a network of connected 4-in. dia. pvc pipes under the floor, with 2 ports in the floor in each of my shop’s 3 work bays. They all run to an outlet in the utility room where a boiler draft fan, powered by a 1 1/2 hp. electric motor, pulls exhaust through the pipes and then pumps it outside through the wall. There’s a 4-in. tee joint below the floor under the fan so any moisture drains into the sand below. The whole system is pretty much laid out like a floor drain system, which I also installed. In fact, between the exhaust and floor drain systems, I’ve got more than 200 ft. of 4-in. dia. pvc under the shop floor.

“There’s a metal cap over each port in the floor when it’s not being used. For some vehicles, where the exhaust outlet is close to the floor, I can just park over a floor port and it will suck the exhaust down without a hose. For bigger machines, we have various lengths of hose available.” Contact: FARM SHOW Followup, Michael A. LeFevre, 6223 W 2 Mile Road, White Cloud, Mich. 49349 (ph 231 854-1446).

From the archive · Full text
Feature story

He “Cleaned Up” His Own Brake Rotors

Featured source: Kenneth Burtard

“I recently cleaned up the rotors on the disc brakes on my 1978 Ford F-150 4-WD pickup. I used a 4 1/2-in. angle grinder and a belt sander without removing the rotors from the wheels,” says Ken Burtard, Theresa, Wis. Burtard uses the pickup for plowing snow and other odd jobs around his farm, and says he usually drives slowly. However, after time the brake rotors get very rusty.

“Under slow driving conditions, drum brakes can go for several years without getting too rusty, but not disc brakes. The rust that forms is very abrasive and will eventually wear out the brake pads,” says Burtard. He jacks up the front end and then unlocks the hub on each wheel so the rotors are free to spin. He also removes the brake caliper and brake pads so he can get at both sides of each rotor.

“Spinning the rotor fast makes it easier to grind or sand uniformly all the way around the rotor, without grinding too much metal off one spot,” says Burtard.

“I’ve found that with some assistance, a belt sander or angle grinder usually has enough traction to get the rotors spinning. I use the angle grinder first to remove most of the rust and then finish up with the belt sander.”

“As I work I turn the vehicle’s steering wheel as needed so I can access both sides of the rotor. Once the rotor begins to spin, I adjust the angle of the sander or grinder so that it’s always working against the grain of the metal. I always use safety glasses, and I wear a damp wash towel around my head in order to keep dust out of my nose and eyes.” Burtard says that after he’s done grinding and/or sanding the rotors, he puts some oil on them to help keep them from rusting as quickly. Contact: FARM SHOW Followup, Kenneth Burtard, W660 Co. Rd. DD, Theresa, Wis. 53091 (ph 920 251-2726; [email protected]).

From the archive · Full text
Feature story

He Dunks Tires In Rain Water To Check For Leaks

Featured source: Kenneth Burtard

“I needed an easier way to check for leaks in my car and truck tires, so I modified a 250-gal. home heating oil tank. I fill it with rain water that drains off an eave trough on my shed’s roof. Works great,” says Kenneth Burtard, Theresa, Wis. The converted home heating oil tank is located next to the shed just below a downspout. It’s mounted on some wooden pallets, making it easy to move around with a skid loader and also eliminating the need to bend over. Burtard removed the tank’s legs and then laid it on its side and cut a big U-shape opening in the top. He folded the cut piece of metal back to form a backsplash and bolted it to the shed wall.

“I’ve used this idea for several years and it works surprisingly well. I’ve even modified some tanks for friends,” says Burtard.

“The tank fills automatically whenever it rains, all summer long. I built it because I don’t like to spend money at a tire shop if I don’t have to. A lot of tire shops nowadays don’t bother dunking tires in water any more to find leaks, and instead just squirt soapy water onto the tire. Then if they can’t see any bubbles they say you need a new tire.

“Placing a tire under water makes it easy to see where the air leak is because bubbles will start coming out right away. I can immediately tell whether it’s a leaky valve stem or core or a bent wheel rim or a staple in the tire tread. If the leak is in a small wheelbarrow tire, sometimes I just add a little drained motor oil to plug the leak. I also use drained motor oil on rusty or corroded aluminum rims. The oil keeps the aluminum from corroding. I clean the rim and then smother it with the oil, which softens up the rubber and makes a nice seal.” Burtard says he usually keeps the tank a little more than half full of water. He made an overflow adjustment device by installing a 90-degree elbow and a 12-in. length of straight pipe in the tank’s oil drain hole.

“This way when I dump a tire into the water it overflows behind the tank and not onto my feet,” he says. He plans to use a vehicle’s rack and pinion steering system to push the tire down into the water, eliminating the need to push the tire down by hand for bubble inspection.

“It’s hard to hold the tire steady while you’re looking at the water to look for bubbles, especially if it’s a big tire,” says Burtard.

“I’ll add a steering wheel to the pinion and also weld a big steel plate to the end of a pipe that I’ll attach to the pinion. Cranking on the steering wheel will push the tire down into the water.” Contact: FARM SHOW Followup, Kenneth J. Burtard, W660 County Road DD, Theresa, Wis. 53091 (ph 920 251-2726; [email protected]).

From the archive · Full text
Feature story

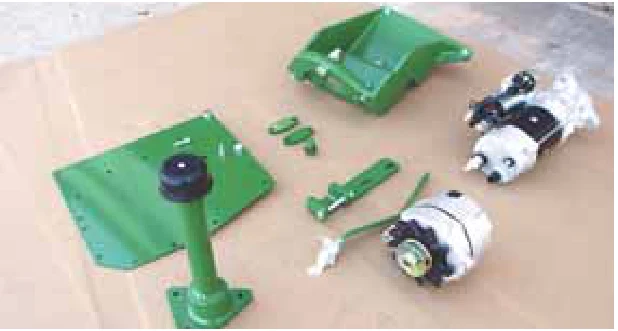
Electric Start Kit For Deere 2-Cyl. Tractors

Featured source: Lamar Horning

Lamar Horning recently contacted FARM SHOW about the new kits he sells that convert Deere 2-cyl. engines equipped with a pony motor to electric start. Three kits are available: one for Deere’s 70, 720, and 730 models; one for 80, 820, and 830 models; and one for the Model R.

“The trouble with those old pony motors is that they’re expensive to repair, providing you can even find someone willing to work on them,” says Horning.

“Some companies offer aftermarket kits for 2-cyl. tractors, but they include only the starter motor and mounting bracket and none of the other parts you need. You can’t always find those parts at salvage yards, and if they are available they’re very expensive.” Kits range in price from $1,165 to $1,595.

“Those prices may seem high, but my kits include everything needed and shipping is included,” says Horning.

“You save a lot of money compared to what you’ll have to pay at a salvage yard for all the components you need.

“I work at a steel fabrication shop so I’m able to build all the parts I need except for the starter and alternator, which helps keep my cost down.” Contact: FARM SHOW Followup, Lamar Horning, 1772 Spring Hollow Rd., East Earl, Penn. 17519 (ph 717 445-9465).

From the archive · Full text
Feature story

Pressurized Tank Helps Lubricate Overhauled Engines

Featured source: Philip Showalter

Kentucky mechanic Philip Showalter has overhauled engines since the mid 1980’s and he says a device he came up with helps pre-lube an engine for easier starting after an overhaul.

“For years after overhauls I’d put an engine back together, fill it with oil, and turn the crankshaft manually before starting it. That worked okay, but I was never quite sure that all the parts were coated before starting it with the engine starter. Any part that might not have been lubricated could be subject to friction, and that’s definitely not good for the engine,” notes Showalter. To remedy that issue, Showalter designed a simple pressurized lubricating system that he made from a 10 gallon air tank and a few fittings. The device uses 40 lbs. of air pressure to distribute a small amount of oil into an overhauled engine through the oil port. He says it’s quick and efficient and, after slowly hand turning the engine while the line is attached, the engine parts are all thoroughly lubricated. Showalter made two simple modifications to a new 10 gallon air tank to make his device. First he replaced the air nozzle head with a screw-on fitting that connects to the engine port, where the engine oil pressure gauge is attached. Then he cut a 1-in. hole in the top of the air tank and welded in a 4-in. piece of pipe. The pipe serves as a filler spout so he can add a quart or two of oil to the tank to pre-lube an engine. A cap screw seals the opening after the oil is poured in. To use the device, he pressurizes the tank through the normal air hose fitting, then inverts the tank gradually to force oil and air into the overhauled engine. The air tank valve is used to regulate air and oil flow into the engine. Showalter says if anyone is building a device like this, it’s important to put clean oil into a new tank 3 times and completely blow it out so the tank is free of any small metal or dirt particles.

“A person certainly doesn’t want any of those particles in a newly overhauled engine,” Showalter says. Showalter has used the pre-lube device on tractor and truck engines from 25 hp. on up to high horsepower V-8’s, and also diesel engines. Contact: FARM SHOW Followup, Philip Showalter, 1592 Highway 19 #2, Cynthiana, Ky. 41031 (ph 859 954-3030).